A Complete Overview of the Openhrms Calendar Module
The Technological era demands more digitalized and automated solutions and tools for managing every size and type of business. A well-described HR management system is necessary to develop a strong relationship between employees and organizations. By understanding the necessity of a human resource management software system, our team invented the Open HRMS platform to make the complex operational steps related to HR management simple. The OpenHRMS HR suite is developed to manage each operation associated with the HR of a company. The system works with numerous modules. OpenHRMS Calendar module is one of the most efficient modules that will help you schedule various appointments and meetings, set reminders to remember dates and many more aspects.
This blog will provide you with an insight into the OpenHRMS Calendar module.
The OpenHRMS Calendar module is available in the OpenHRMS App Store. You can go to the App Store and install the module into your database if it is not installed in your database. Once it is installed, the system will always depict the Calander menu icon on your database.
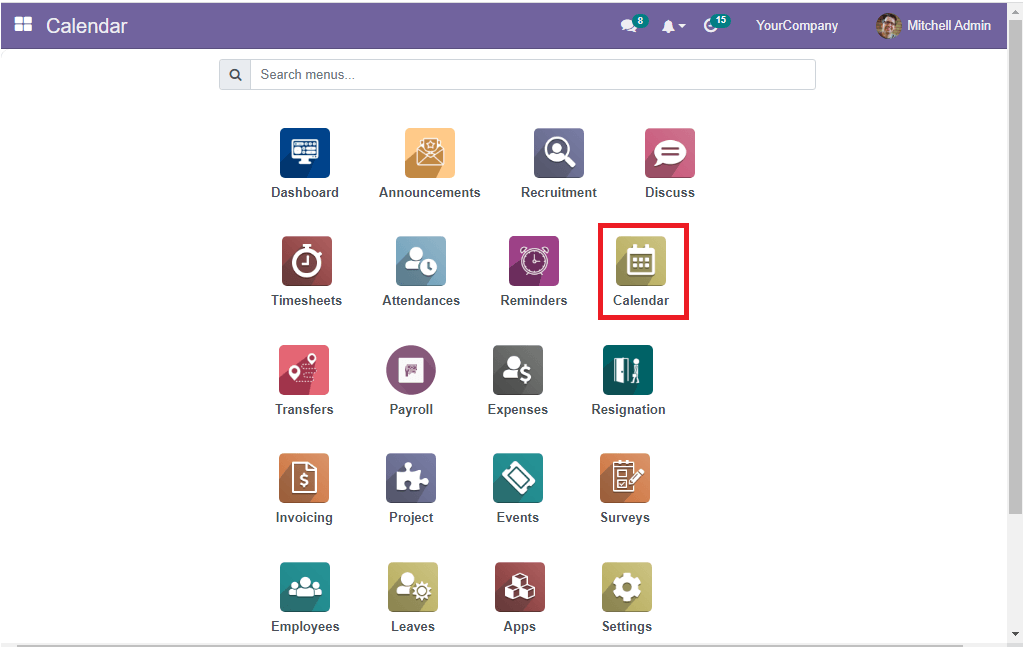
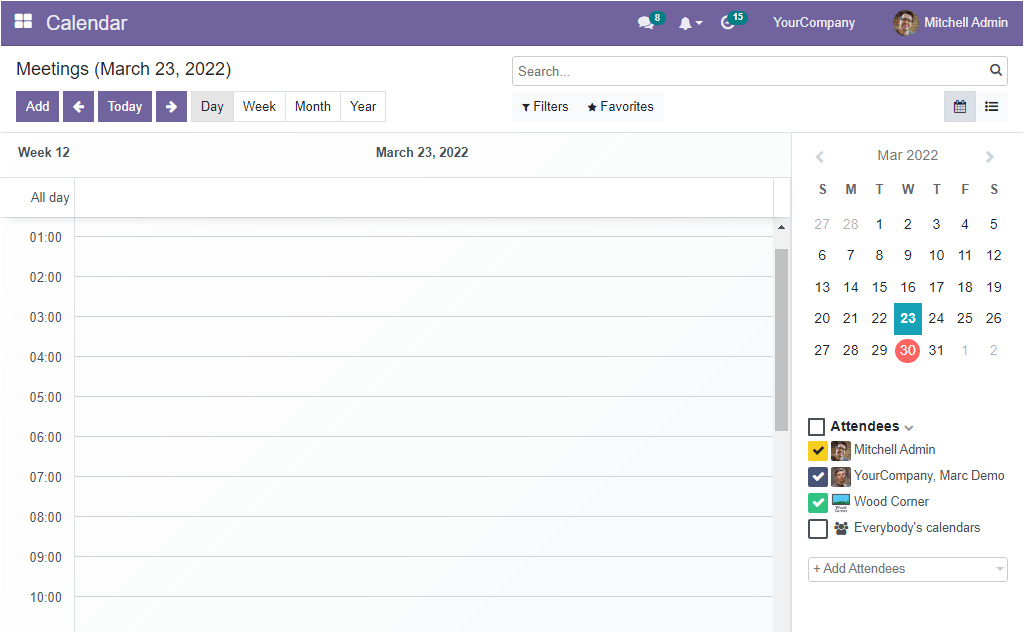
You can offer a gentle press on the Calender menu icon (which is highlighted in the above image). Now you will meet with the Calendar module. The photograph of the home screen window of the OpenHRMS Calendar module is given below.
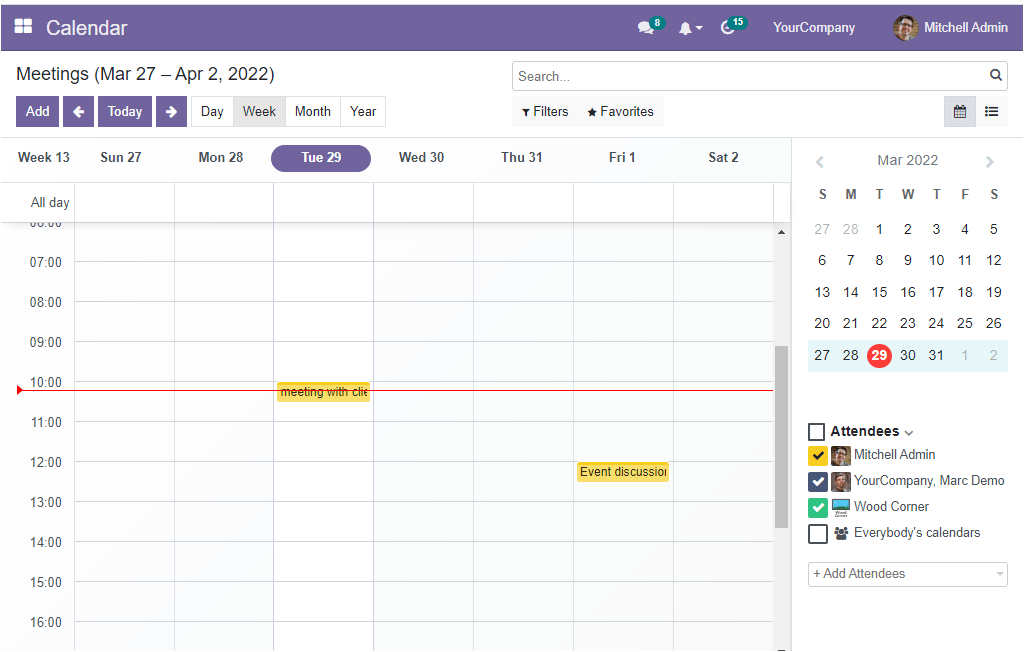
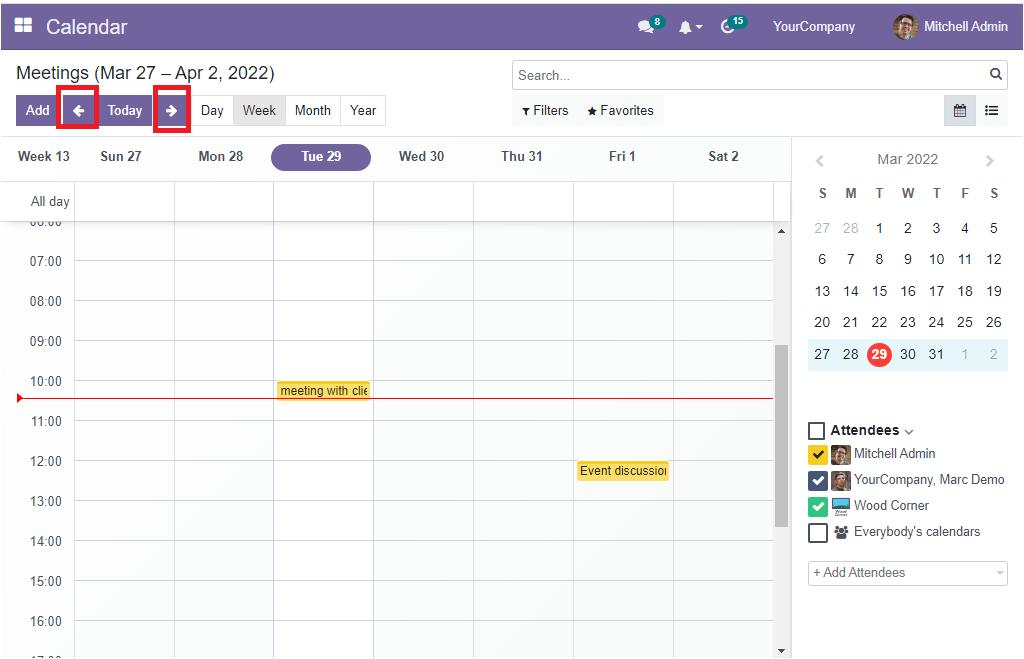
The inventors of the OpenHRMS Calendar module designed the screen with various advanced tools and options. When you look at the above window, you can automatically gain a knowledge of the entire process. The above screen denotes the meeting records in a week base calendar. The current week's number, days in this particular week, and the time in hours will clearly depict the window. In case you want to view the previous or next weeks, you can click on the Previous and Next buttons represented with an arrow mark.
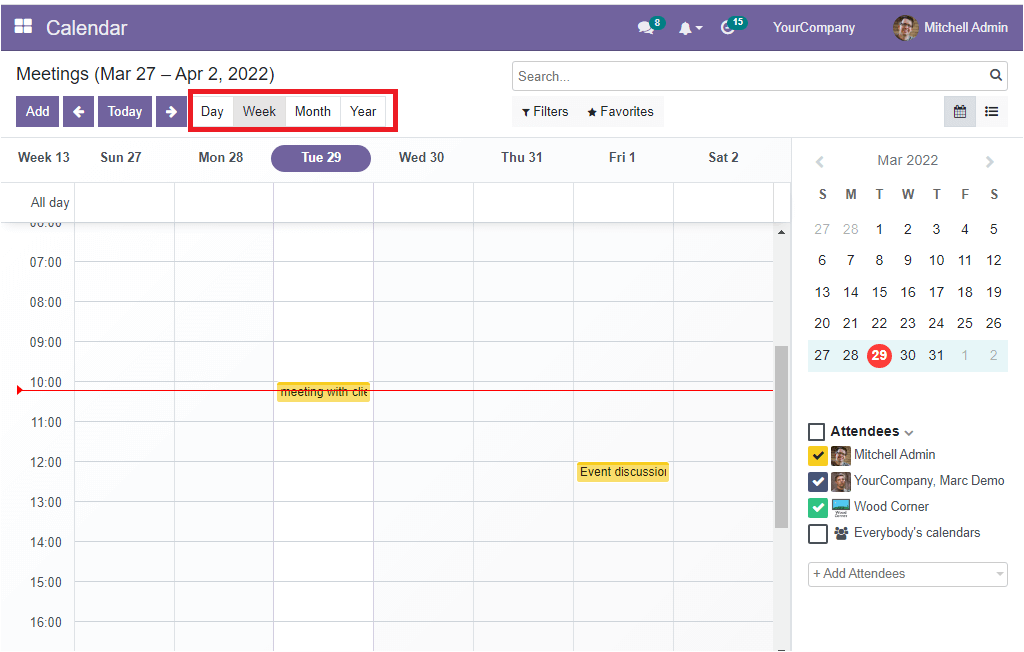
In addition, the week calendar can be changed to Day, Month, and Year basis by choosing the right menu.
If you select the Day, the system will display each hour on this particular day, as shown in the image below.
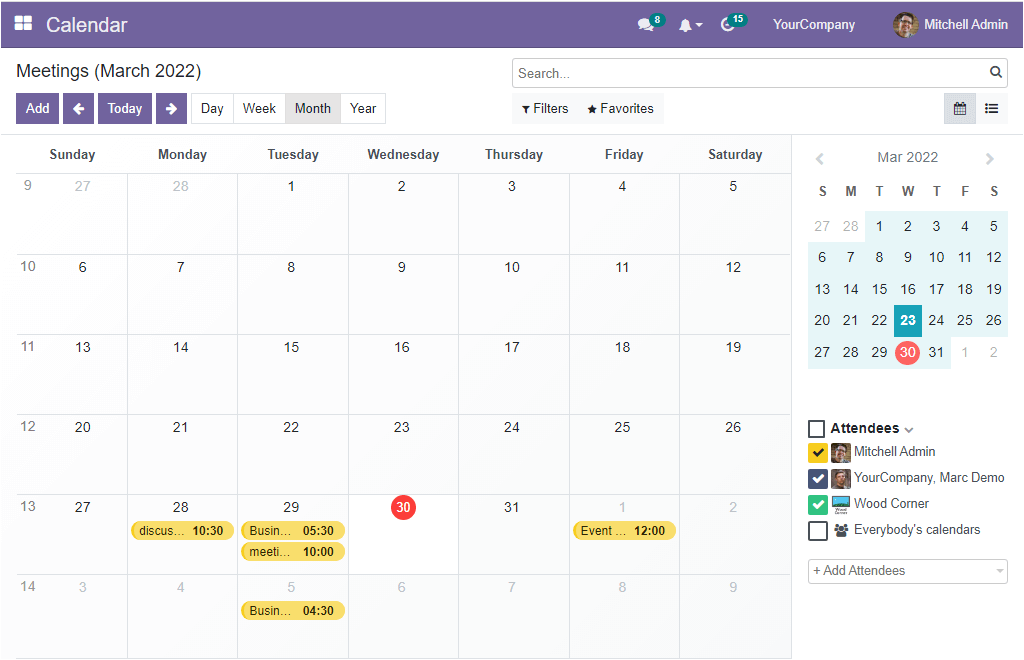
When you click on the Month button, the system depicts the screen on the basis of a monthly calendar.
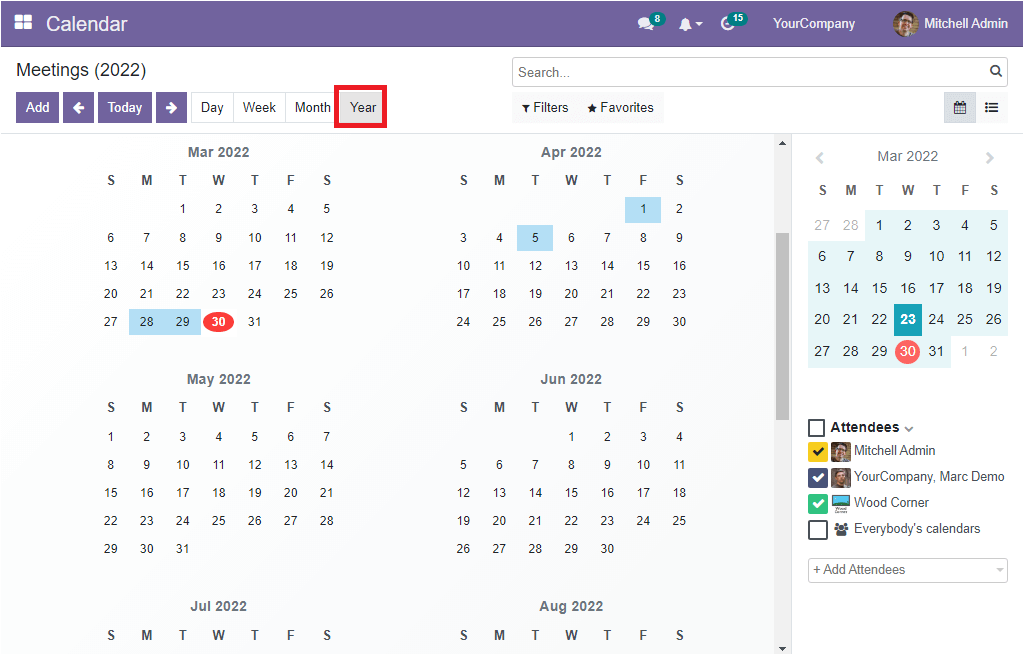
You can see the whole year by selecting the Year button.
If you want to schedule a meeting, you just need to select the required date. At the moment you click on the date, the system will depict a pop up as shown below.
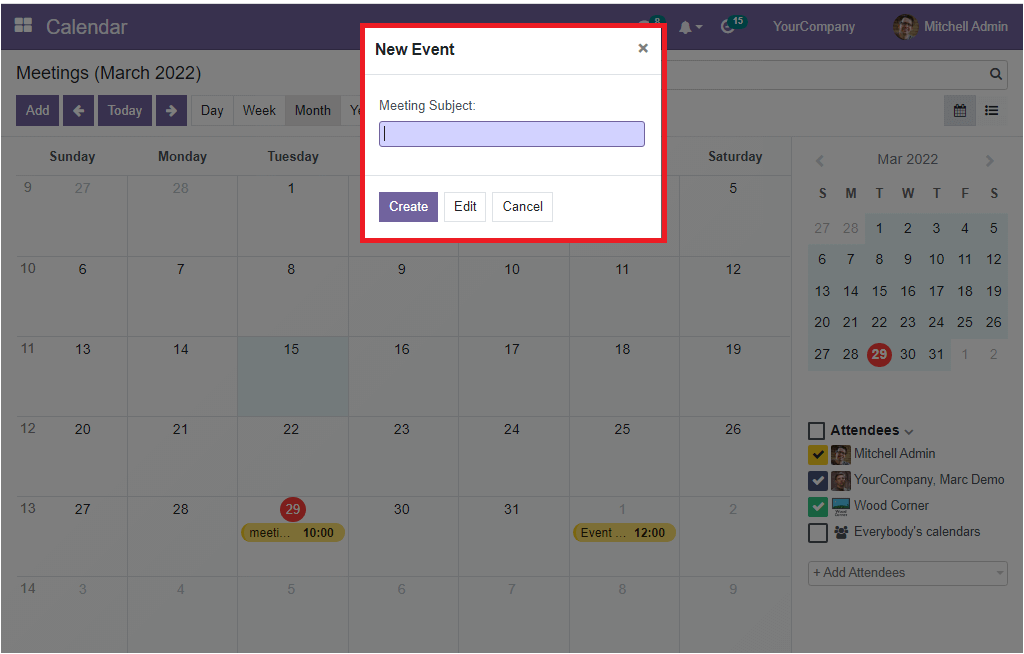
You can fill the Meeting Subject in the pop-up and click on the Create button. Now the newly created meeting will be displayed as
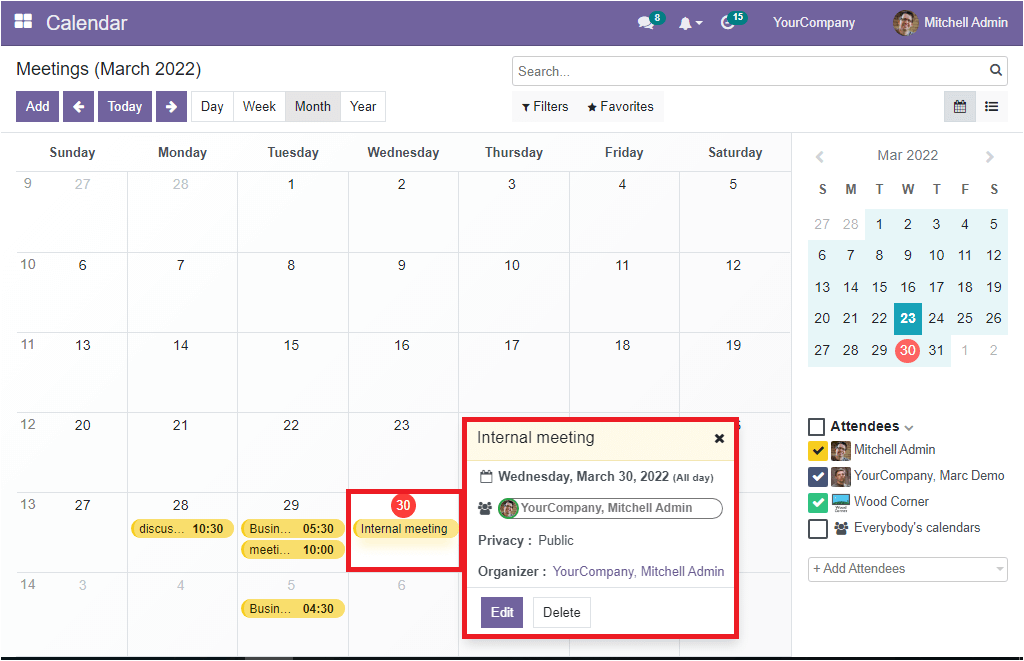
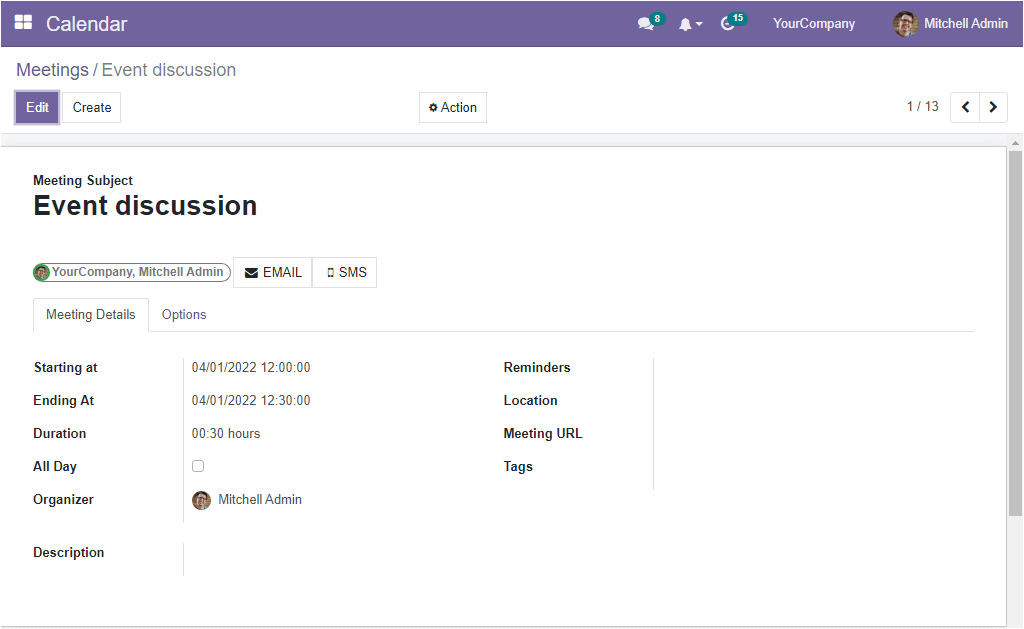
The meeting title, meeting date, company details, privacy policy, organizer and other details are displayed in the small window. If you click on the Edit button, you will be able to provide the full details of the meeting in a new window.
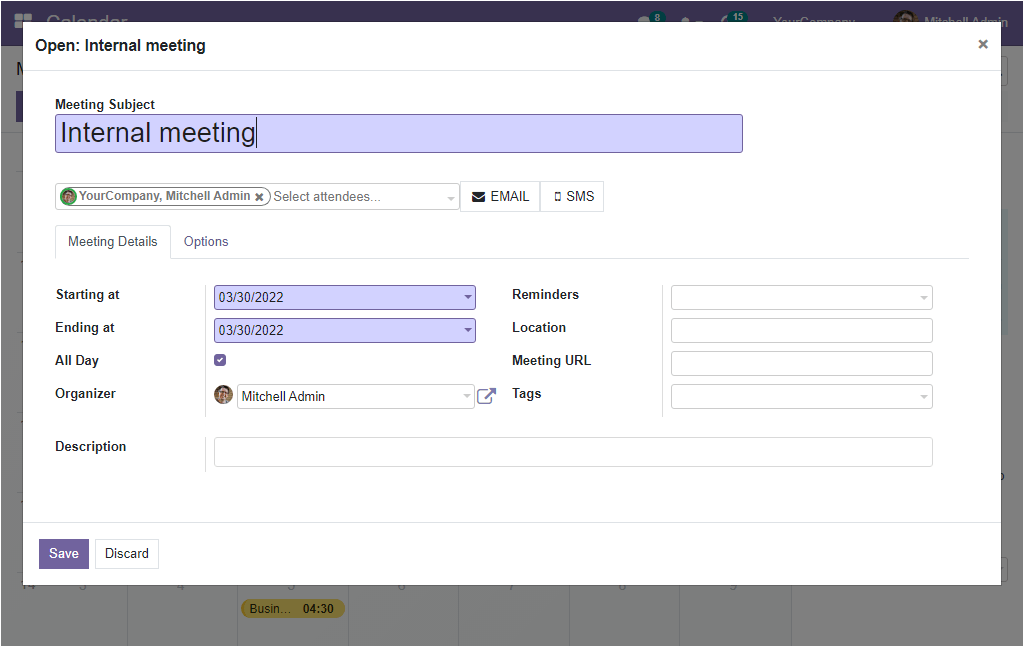
The meeting subject, starting and ending date of the meeting fields will be auto allocated, and the remaining fields can be filled with suitable data. (We can discuss the window in detail later).
If you consider the right portion of the window, which is highlighted in the image below.
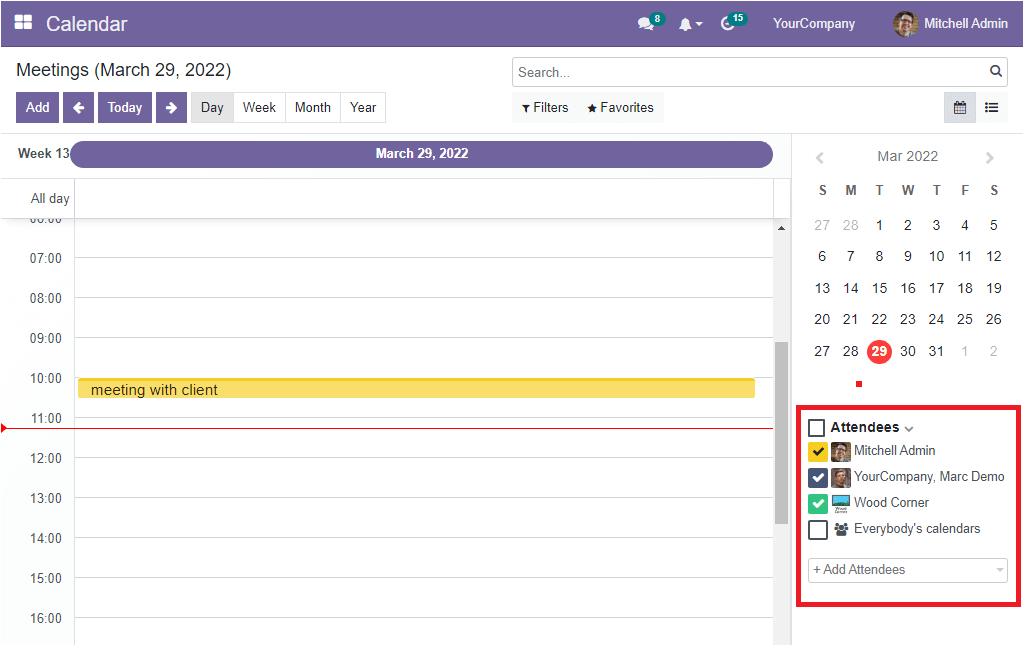
Here you can see the calendar, which will be very useful for scheduling and managing the meetings and appointments. Just below the Calendar, you can see the details of the Attendees. If you want to add more attendees, click on the +Add Attendees option. Now you will get a pop-up window where the system lists all the names already been installed in the system.
Similarly, the Calendar view of the OpenHRMS Calendar module allows you to apply various filters to filter out the window. To access these options, you can click on the Filters tab. Now the system displays all the default as well as customizable filters as shown below.
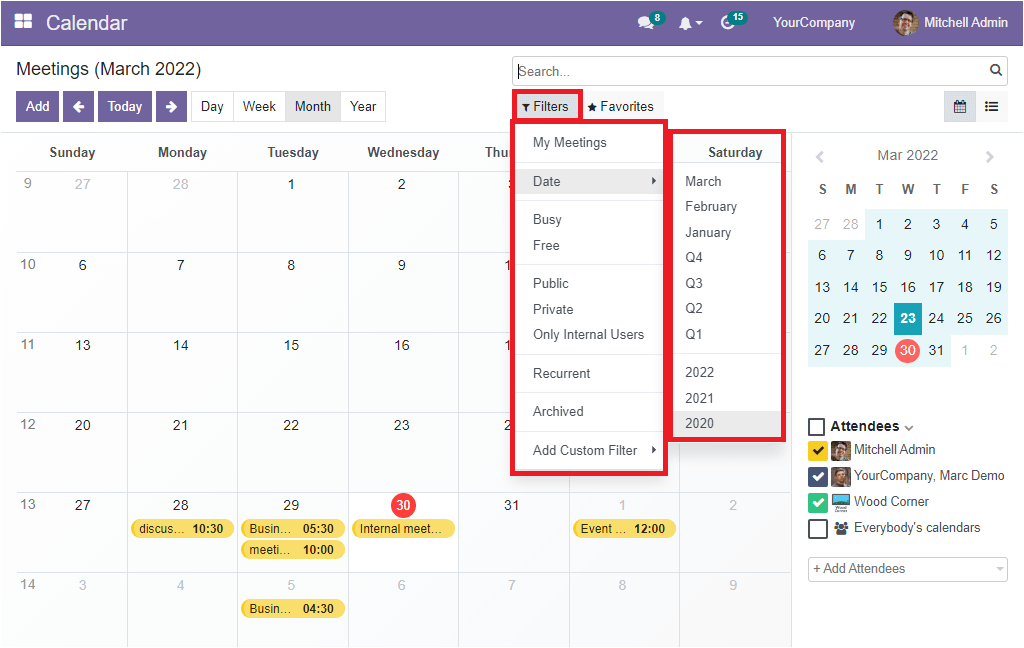
The default filters offered by the system are My Meetings, Date(Month, Quarter and Year), Buzy, Free, Public, Private, Only Internal Users, Recurrent and Archived. The Add Custom Filter option allows you to customize various custom filters. Further, the Save current search option can be accessed from the Favourites tab.
Apart from the Calendar view, the system supports managing the meeting details in List format. To access the List view, click on the List view menu icon available on the top right.
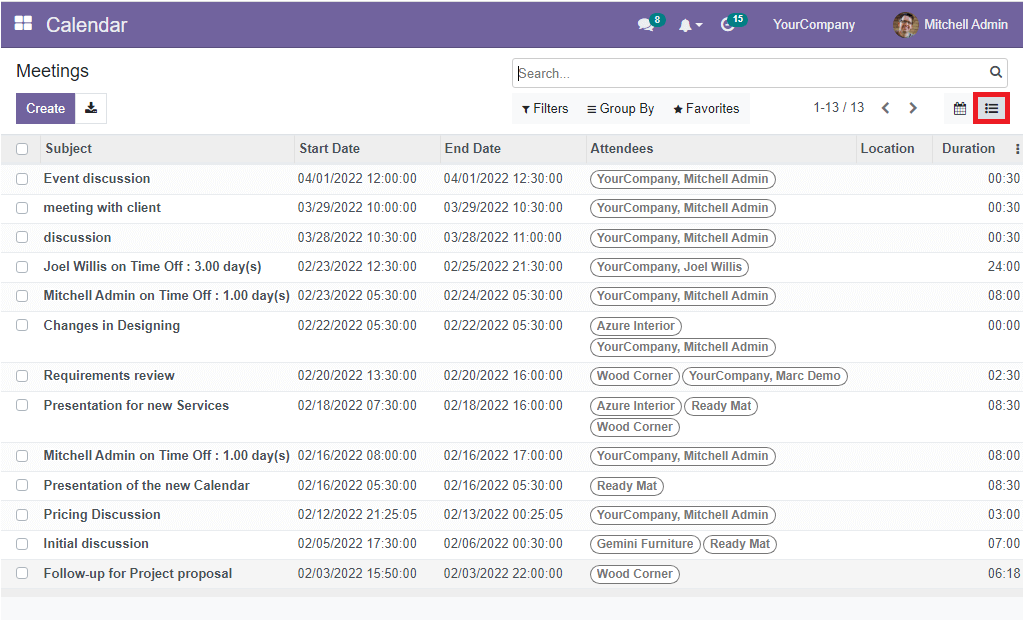
As you can see from the list of meetings in the List view, the Open HRMS platform displays all the saved Meetings in the system together with the details such as Subject, Start Date, End Date, Attendees, Location and Duration. You can select each of the meeting records for a detailed overview.
All the Filters described in the Calendar view will also be obtained under the Filters tab. Furthermore, the Group By option allows you to add new custom groups, and the default filters are also available. The default group by options available here are Responsible and Availability. Moreover, the Import Records option also be listed along with the Save current search option under the Favourites tab.
Now let us click on the Create button to understand the steps required for creating a new meeting. As soon as you click on the Create button, you will navigate to the Meetings creation window.
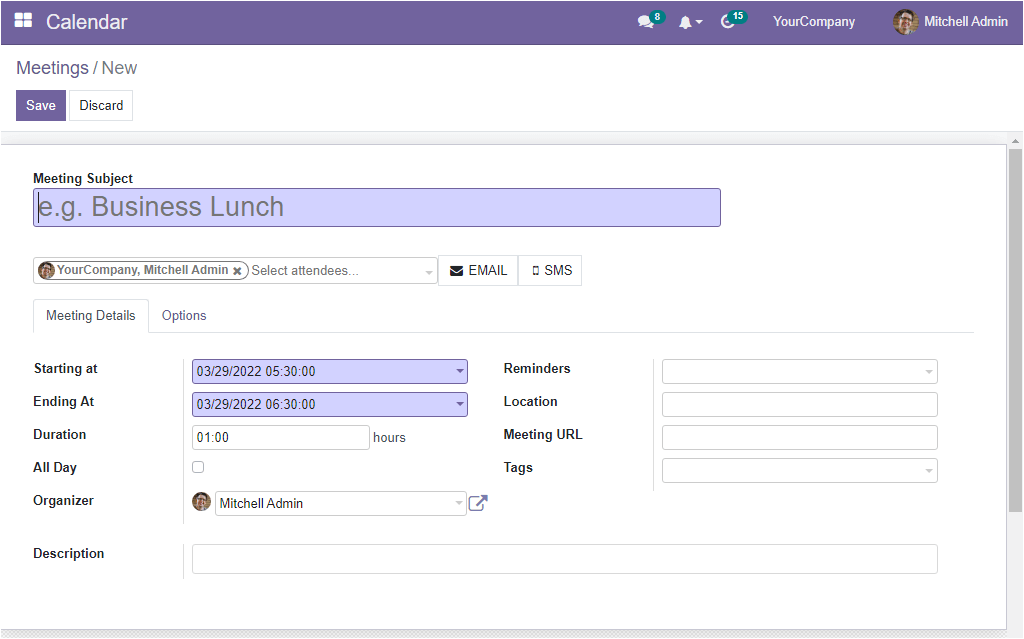
The creation window provides you with the space for filling the Meeting Subject. The window allows you to list the Attendees. The meeting details can be defined under the Meeting Details tab. In this tab, you can view different options. The Starting at field can be filled with the event's start date. Also, the stop date of the event can be specified in the ‘Ending At’ field.
Further, the duration of the event in hours can be defined in the Duration field. You can enable the All Day option if it is a recurrent meeting. Moreover, the system will automatically allocate the Organizer as the login user. If you want to change the person, you can change it and specify the organizer using the dropdown menu.
The Reminders field lets you set reminders for this event so that the notifications will be sent to all attendees to remind them of the meeting. The Location of the event can be described in the Location field. Also, the Meeting URL and the Tags associated with the meeting can be defined in the specified fields. Finally, you can give a description of the event in the Description field. Now all the fields under the Meeting Details tab are described.
Now you can click on the Options tab to fill the fields under this tab. Here you can see the Recurrent option.
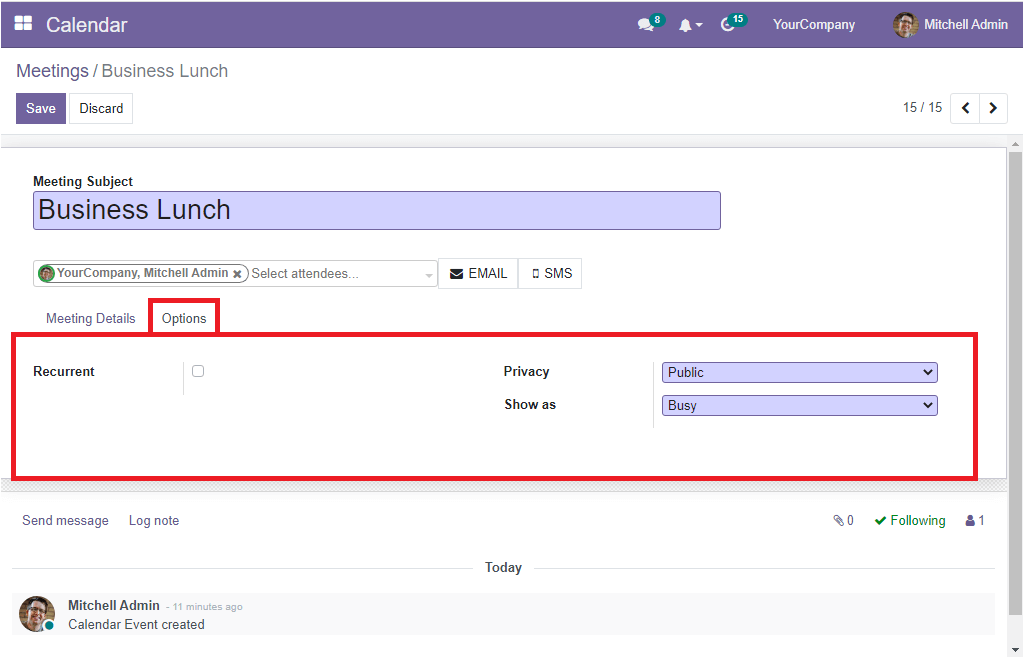
If the event or meeting is recurrent, you can activate the Recurrent option. Now the system will display two more fields, as shown in the image below.
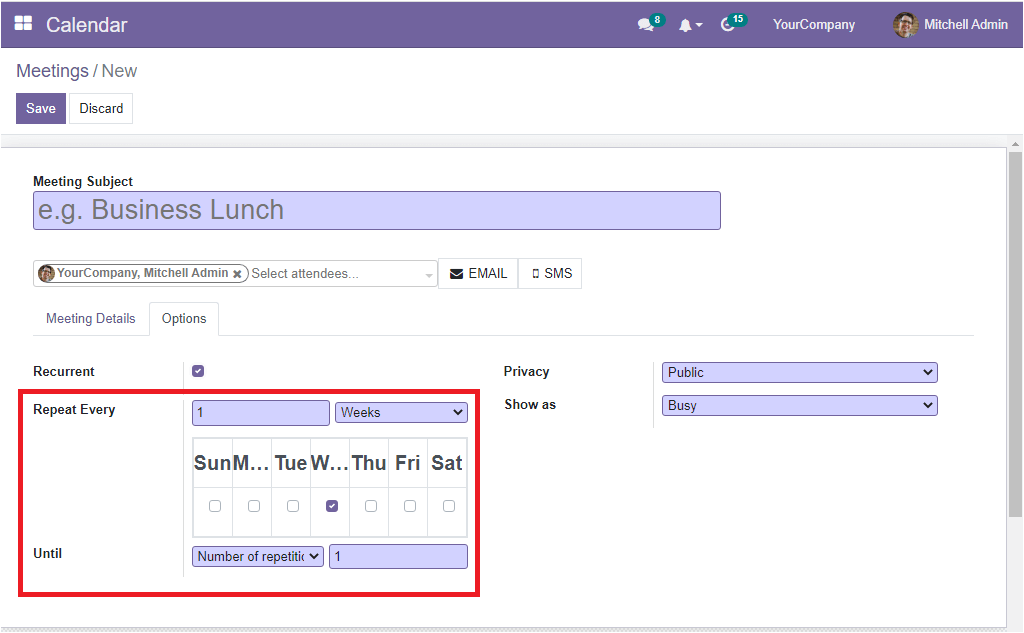
The Repeat Every field allows you to specify whether the recurrent meeting wants to be repeated daily, weekly, monthly or yearly. If you choose the interval, the event will be automatically repeated at that specified interval. You can also choose which day will be wanted to repeat the event. Further, the Until field helps you to specify the end date of the event, the number of reparations, or even if it is a meeting required forever, it can also be mentioned. In addition, how many times you want to repeat this activity can also be mentioned in the specified field.
Similarly, you have the Privacy field, which will allow you to mention the people to whom this event will be visible. Also, the Show As field will enable you to set it as either Busy or Available. If the time is shown as busy, this event will be visible to other people with either the full information or simply Busy written depending on its privacy. Use this option to let other people know that you are unavailable during that period of time.
If the time is drone as “free” the event won't be visible to other people. You can use this option to let other people know that you are available during that period of time.
Apart from all these options, you can also send emails and SMS to attendees. The options is highlighted in the image below.
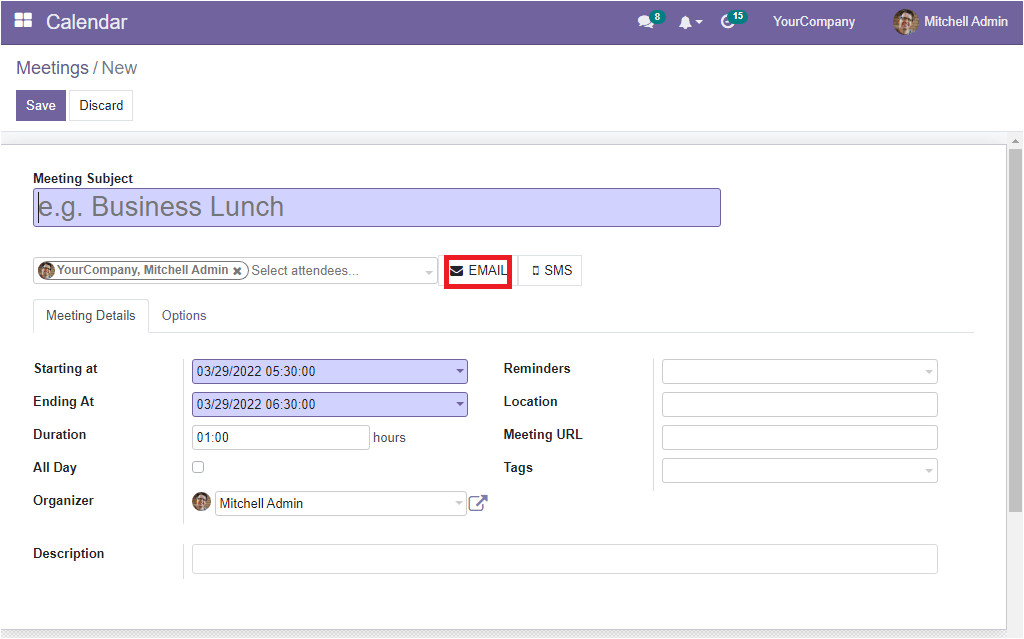
If you want to send an email, click on the EMAIL button. Now the system will depict a pop-up window as shown below.
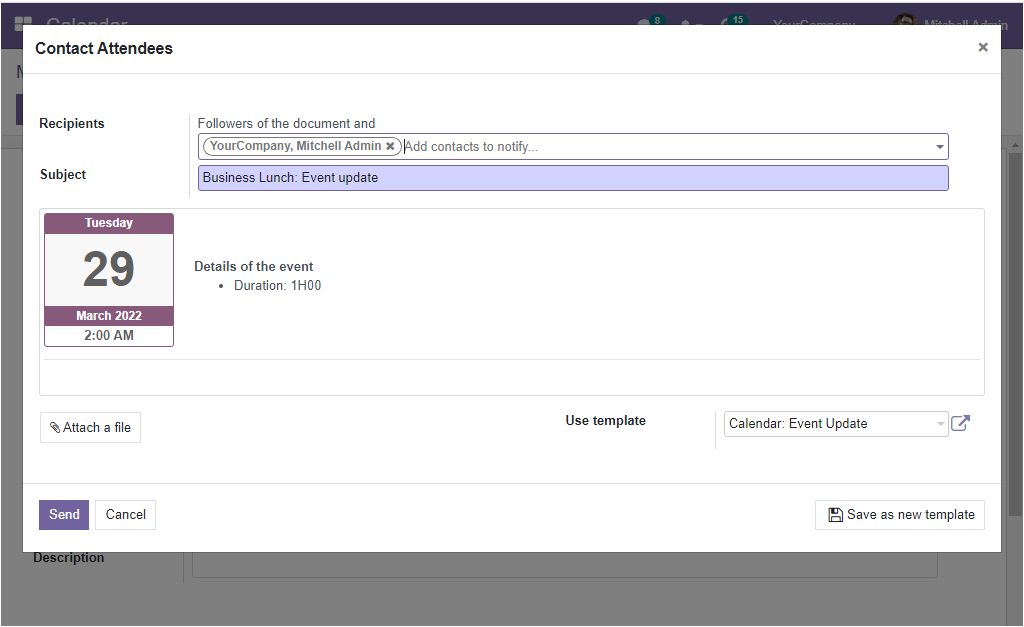
The subject and the other details of the meeting are automatically filled in the window, and you can add the recipients in the Recipients tab. If having any documents for attaching, you can attach them on the Attach a file field. After giving details, you can send the email by clicking on the Send button.
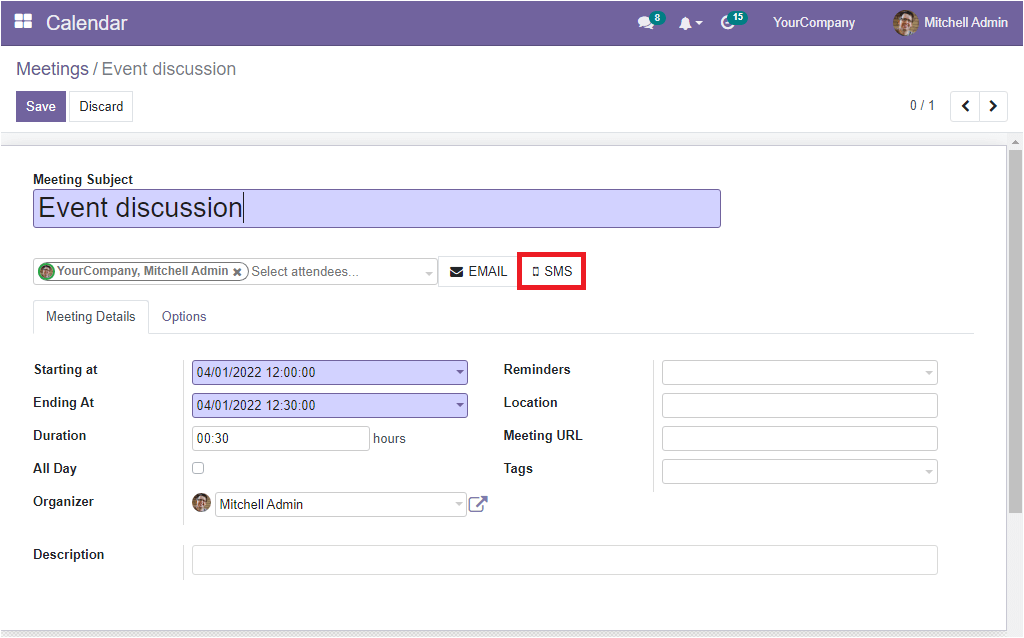
In the same way, you can send an SMS by clicking on the SMS button.
Now the system will depict a new pop up as shown in the image below.
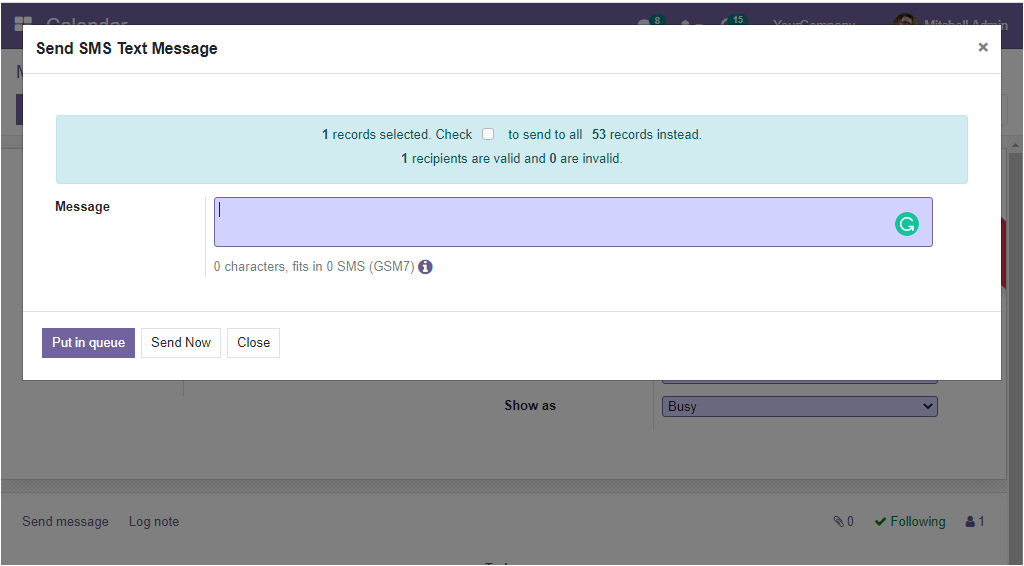
The message you want to send can be given in the Message field.
The OpenHRMS Calendar module helps you to keep an account of all the meetings scheduled in your company. the module will help you to avoid clashes while managing multiple conferences and meetings.