A Detailed Analysis of Configuration Tab in Open HRMS Recruitment Module
The Open HRMS is a set of open-source HR management modules suitable for large, medium and small scale businesses. The user friendly and intuitive HR management software offers painless and happier HR and employee processing. The system will assist you in effectively managing all the complex operations of your HR department and helps to bring maximum potential.
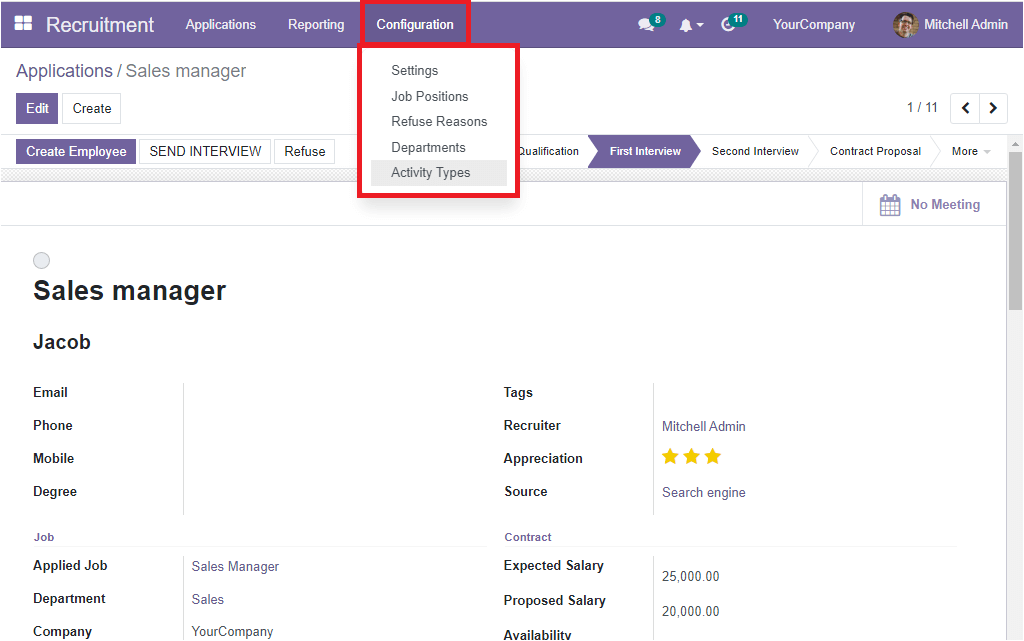
The Recruitment module can be observed as one of the foremost modules offered by the Open HRMS platform. It is a well-regulated applicant tracking system that will streamline your recruitment process. All the operations required for recruiting candidates will be managed. The platform helps you to list and publish your job openings, helps to set up recruitment stages, track the details of each applicant and guide you to choose the suitable candidates at the right time. The platform allows you to configure various options to make the recruitment process more accessible. When you look into the Configuration tab, you can view multiple options.
Here in the blog, we can gather all the options available under the Configuration tab of the Open HRMS Recruitment module.
Settings
Job Position
Refuse Reasons
Departments
Activity Types
 Setting
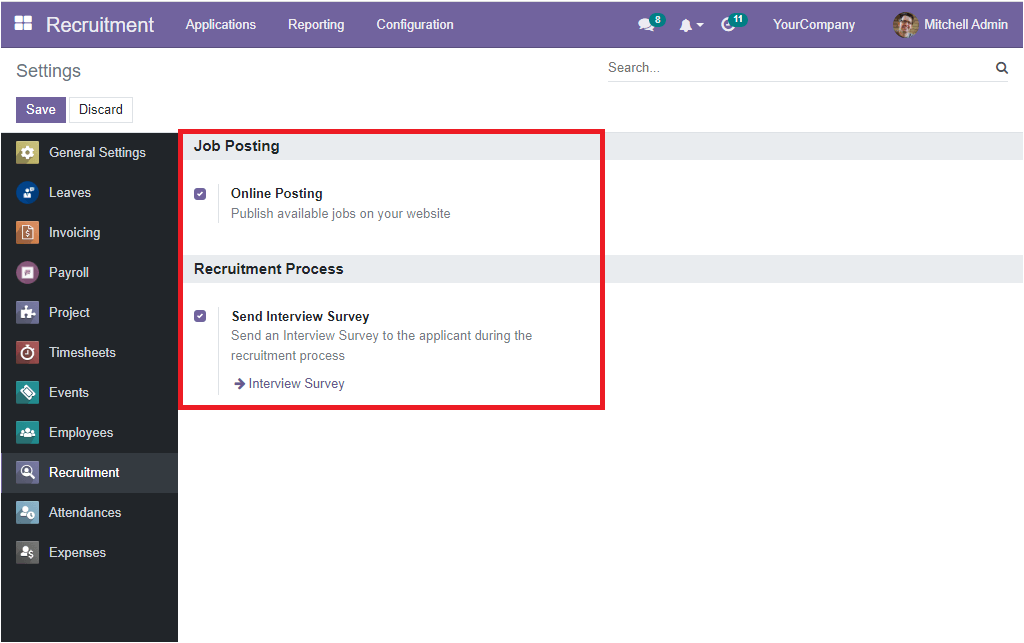
When you open the Settings window, you will notice a few options that you can activate for getting more features into your Recruitment dashboard. In the Job Posting section, you can activate the Online Posting option to publish available jobs on your website. For activating this option, you can check the box on the left of the option. After checking the box, click on the Save icon to mark the changes. In the Recruitment Process section, you can activate the Send Interview Survey option to send an interview survey to the applicant during the recruitment process.
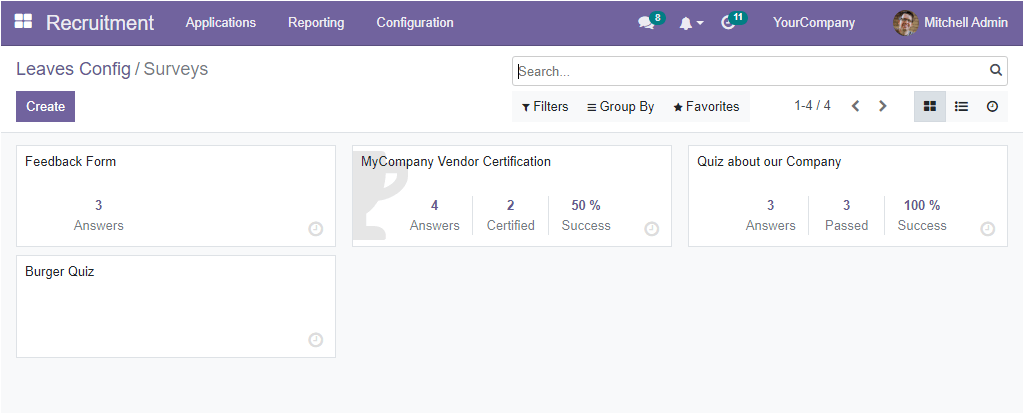
When you click on the Interview Survey option, you will be directed into the Surveys window as shown in the image below.
Job Positions
The Recruitment module available in the OpenHRMS platform allows you to create various Job Positions. The Job Positions menu can be viewed under the Configuration tab of the Recruitment module, and it will direct you to the Job Positions window. The Job Positions window is designed in a way that showcases a preview of all the already created Job Positions. The preview itself give you the main details of each Job Position such as Job Position, Department, Current Number, Expected New Employees, Total Forecasted Employees, Hired Employees, Status and Company. The window will display each Job Position record in detail if you select the required record. Even you can have editing in already created job positions. Based on your company size and type, there will be a lot of job positions to manage. So you will have a large number of Job Position records to work. It is tough to search for a particular record from the whole list. The system offers various sorting and grouping functionalities to manage all these difficulties. These options are included in the Filters, Group By and Search tabs. Inside the Filters tab, you have the default filters and an option called Add Custom Filter for customizing more filters based on your requirements. The default Filters listed under the Filters tab are My Job Position, My Favourites, In Position, In Recruitment, and Unread Messages.
Similarly, the Group By tab allows you to group the records in the Job Positions window based on different criteria. The default group by options included in the Group By tab are Department, Status and Company. The Add Custom Group option can be used to customize different groups.
In addition, the Favourites tab involves Save current search and Import records options. Also, you can view the option for exporting all the records into the excel sheet. You will get the menu icon on the top left side near the Create button.
The Create button offers you the way into the Job Position creation window.
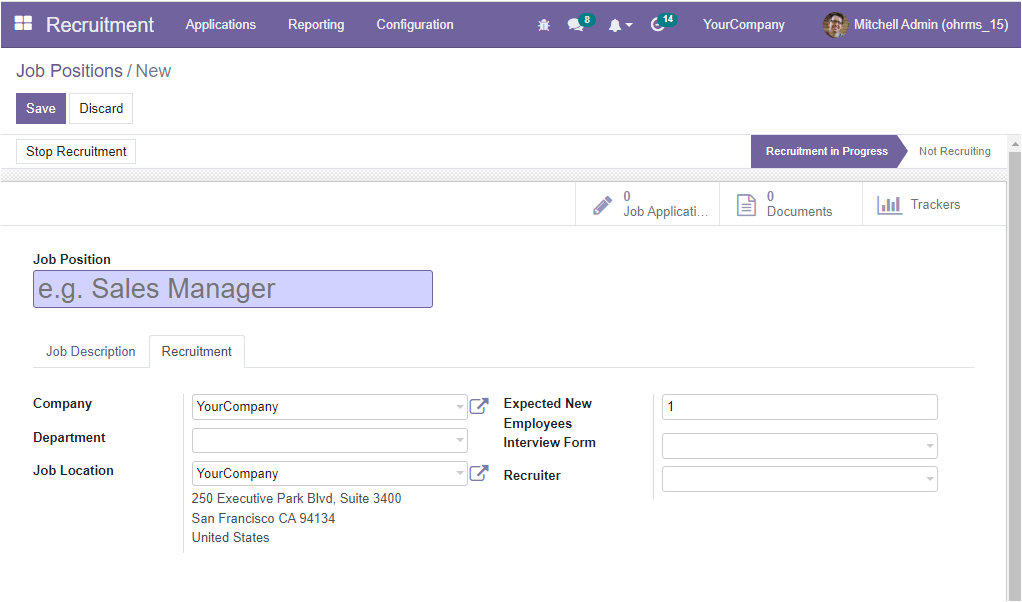
At first, you can fill the Job Position field with the name of the job position. A short description of the job Position can be given inside the Job Description tab. The Recruitment tab permits you to determine the recruitment details. So here you can write down the Company name. In the Department field, you can define which department belongs to this job position. Further, the address where the employee is working can be described in the Job Location field. Also, the Expected New Employees field can be filled with the number of new employees you expect to recruit.
Moreover, the Interview Form field allows you to choose an interview form from this job position and you will be able to print/answer this interview from all applicants who apply for this job. At last, you can mention the name of the Recruiter using the dropdown menu. Aside from all these options, you can also view some smart tabs based on your installed modules. The different tabs are located on the top right, which is: Job Applications, Documents and Trackers. The Job Applications tab link you with the Job Applications window, where you can specifically view the Job Applications received for this Job Position. The Documents associated with this Job Position can be viewed by clicking on the Documents tab. The Trackers tab directs you to the Trackers window to view the source of applications. After providing all the details, click on the Save button to save the details. Now the newly created Job Position will be saved into the Job Positions window. While creating an employee, all the configured job positions will be listed under the Job Positions field.
Now we can move on to the Refuse Reasons menu.
Refuse Reasons
It is quite natural to refuse some applications during the process of recruiting. Always the reason behind the refusal will be common. So the OpenHRMS Recruitment platform always allows you to predefine various refusal reasons to save a huge amount of productive time. In the Configuration tab, you will see the Refuse Reasons menu which will allow you to access the Refuse Reasons window.
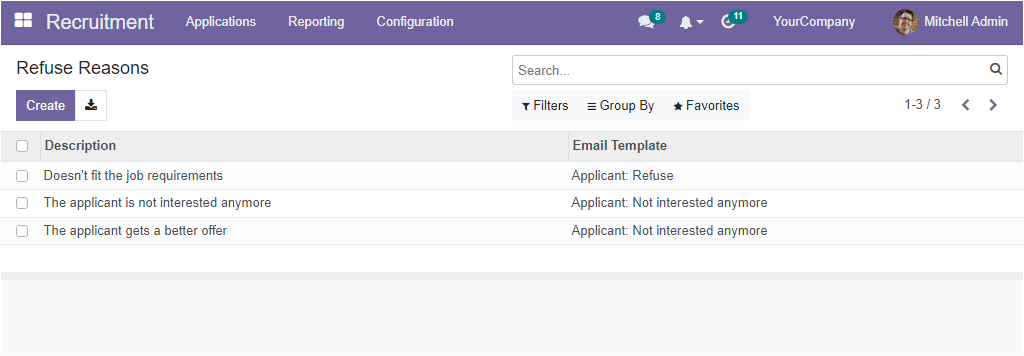
When you open the window, the window will recollect all the refuse reasons described previously in the platform. If you want to include more refuse reasons, you can press the Create button. Then the system will illustrate a new line where you can provide the new refuse reason.
Department
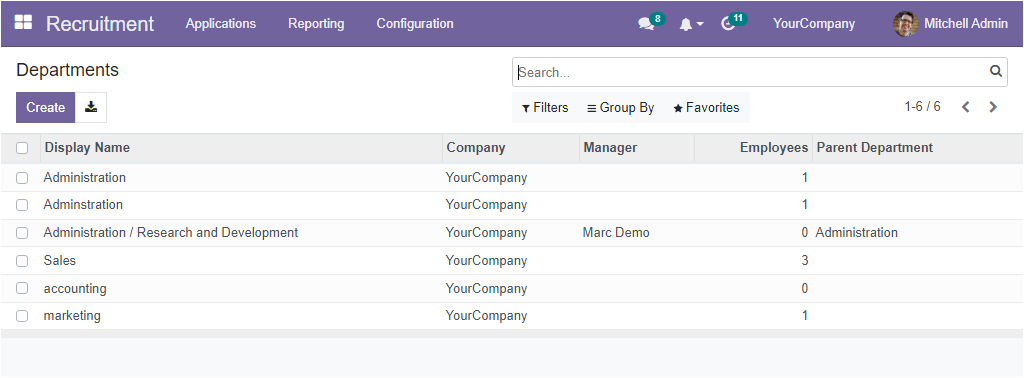
The Department menu situated under the Configuration tab of the OpenHRMS Recruitment module is the right choice for creating and managing various departments of your organization. All the configured departments will be listed under the applications and Job positions window while you create a new application. The Department's menu display every department described in the platform with all the information regarding each department such as Display Name, Company, Manager, Employees and Parent Department.
The Create button can be used to access the Department creation window. The creation window will look like in the image below.
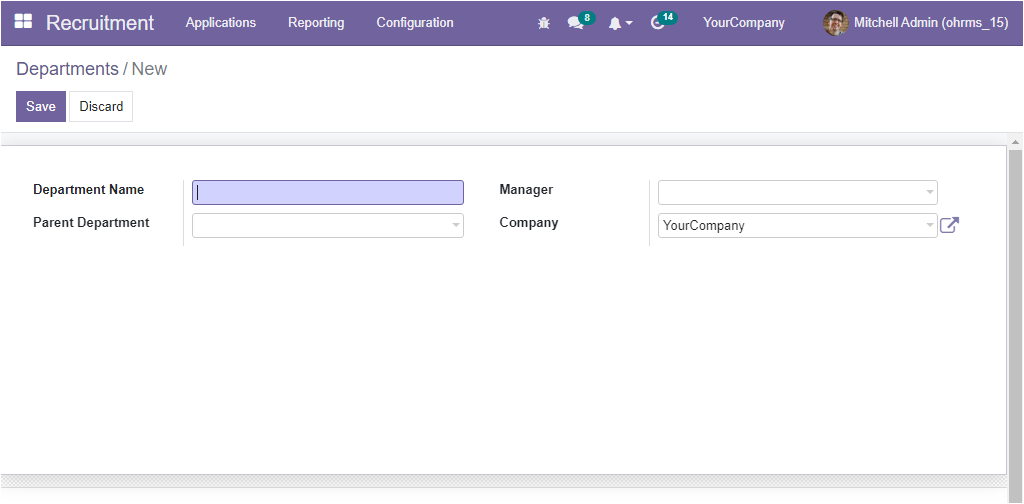
You can type the Department Name in the specified area. The Parent Department can also be mentioned along with the Manager and Company. After giving the details, click on the Save button to save the newly created department into the system.
It is clear how to configure a department and now we can move to the Activity Type window.
Activity Type
The OpenHRMS platform gives so much importance to handling activities. The activities are considered in OpenHRMS as a kind of follow-up. With the help of this feature, the user(you) can designate tasks of a particular type to the responsible persons and schedule them. When you look into the Configuration tab of the Recruitment module itself, you can view the Activity Types menu. Using this Activity Types menu, you can enter into the Activity Types window. The window will look like in the image below.

The Activity Types window not only assist you to create a new activity type but also help you to manage all the previously created activity types. The essential details of previously created activity types such as Name, Default Summary, Planned In, Type, and Icon is listed in the window. To get the creation form for creating a new activity, you can click on the Create button on the left.
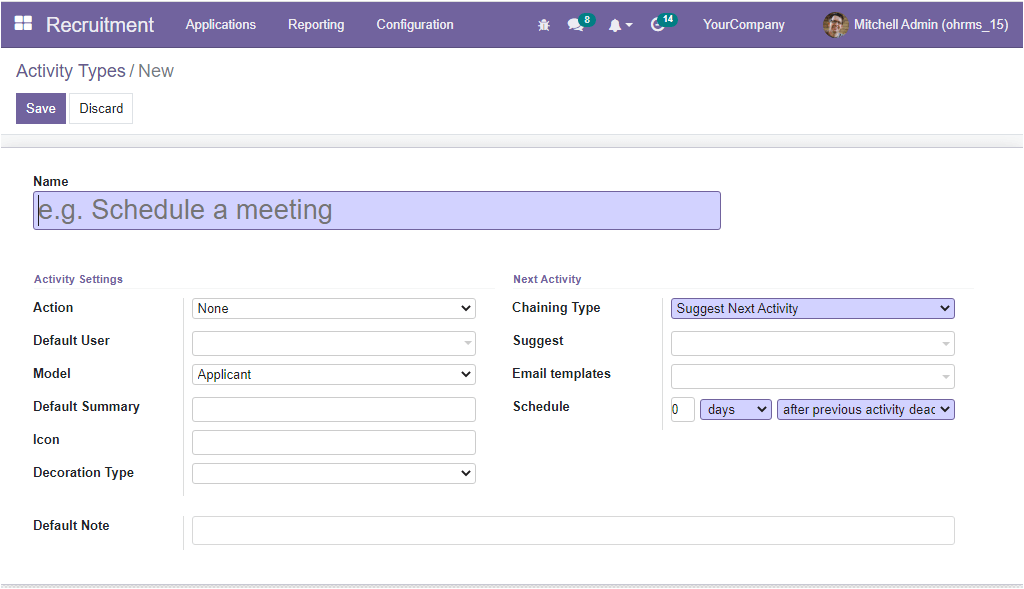
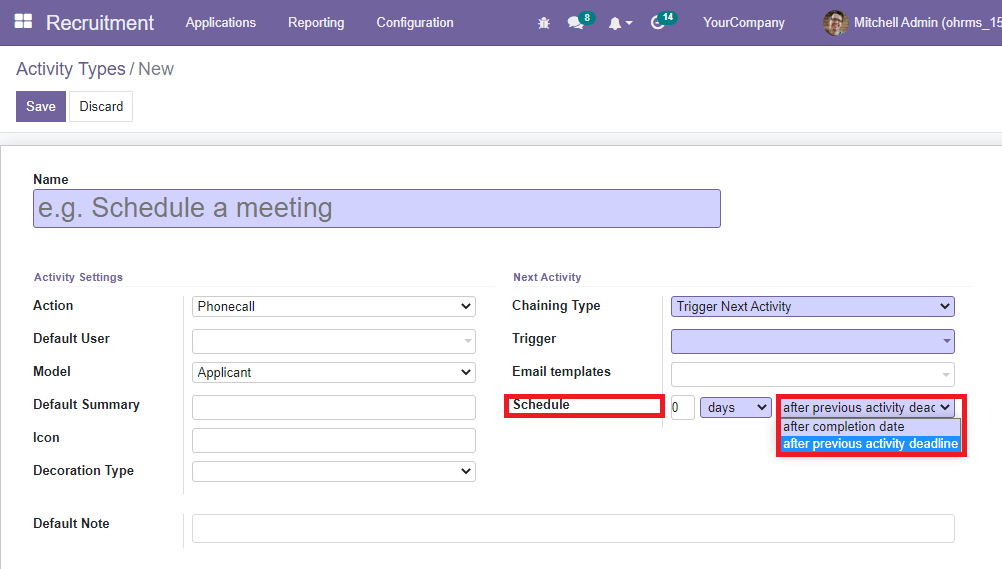
In the creation form, you can define the Name of the Activity Type. Then you can view various fields to fill, which are divided into two categories: Activity Settings and Next Activity. In the Activity Settings section, you can choose the Action from the dropdown menu. The actions included in the dropdown menu are None, Upload Document, Phone call and Meeting. Specify the default user in the Default User field. Then you can define a specific Model if the activity should be specific to the model and not available when managing activities for other models. Next, you can include the Default Summary in the specified area. Then you can allocate Icon and the Decoration Type for this particular activity. The dropdown available in the Decoration Type field displays the Alert and Error options. If the Decoration Type field is filled, the system will change the background colour of the related activities of this type. You can add a default note for this activity using the Default Note field.
In the Next Activity section, you can allocate the Chaining Type as either Suggest Next Activity or Trigger Next Activity. If you select the Suggest Next Activity option, you will get a field to suggest the next activities once the current activity is marked as done. In case if you are selected Trigger Next Activity as the chaining type, you can set the next activity in the Trigger field. So this mentioned activity will be automatically scheduled once the current one is marked as done. In addition, you have the provision to add Email Templates in the specified area for sending mail to the applicant if the activity is scheduled. Finally, the Schedule field allows to plan the action deadlines. So you can select the number of days/week/month before executing the action. Similarly, the Type of Delay can be set in two ways: after the completion date and after the previous activity deadline.
Once you fill in all the required data, you can click on the Save icon to save the newly created activity type.
These all are the options available under the Configuration tab of the OpenHRMS Recruitment module. Further, if you activate the developer mode, you will get extra options such as Stages, Tags, Degrees, and Source of Applicant under the Configuration tab.

If you want to know more about the Open HRMS Module, visit our Page Employee Recruitment.