How to Create a GOSI Register Using OpenHRMS Payroll
GOSI - General Organization for Social Insurance is a Saudi Arabian government establishment dealing with social insurance in the country. It provides services for various persons, including employees, employers, retired employees, health care providers, and others. All the services offered by this agency are only applicable under the social insurance law of Saudi Arabia.
OpenHRMS Saudi GOSI contribution module is developed exclusively for organizations in Saudi Arabia. The module is crafted cautiously to manage the GOSI contribution from the employees and employers in Saudi Arabia. All the Saudi GOSI contribution features are available on the platform. This module aims to enable organizations to handle the GOSI contribution for Saudi citizens effortlessly. The features bound in this system only apply to persons of Saudi Arabian nationality within the age group of 18 to 60.
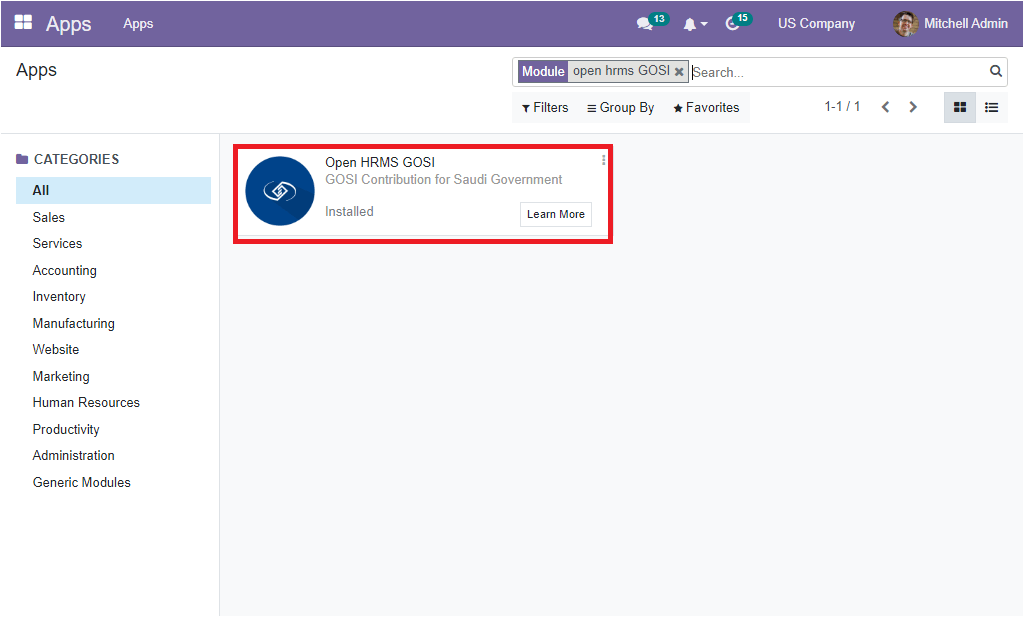
The OpenHRMS Payroll module is the right choice to smooth handle Payroll in Saudi Arabia. The uniquely molded Saudi GOSI module is the perfect way to handle the GOSI contributions of the country. You can effortlessly install the Saudi GOSI module from the App store. If you use the search option, you can easily find the module, as shown in the image below.
Once the module is installed, you can obtain the feature in the Employees module and the Payroll module because the module is integrated with these two modules.
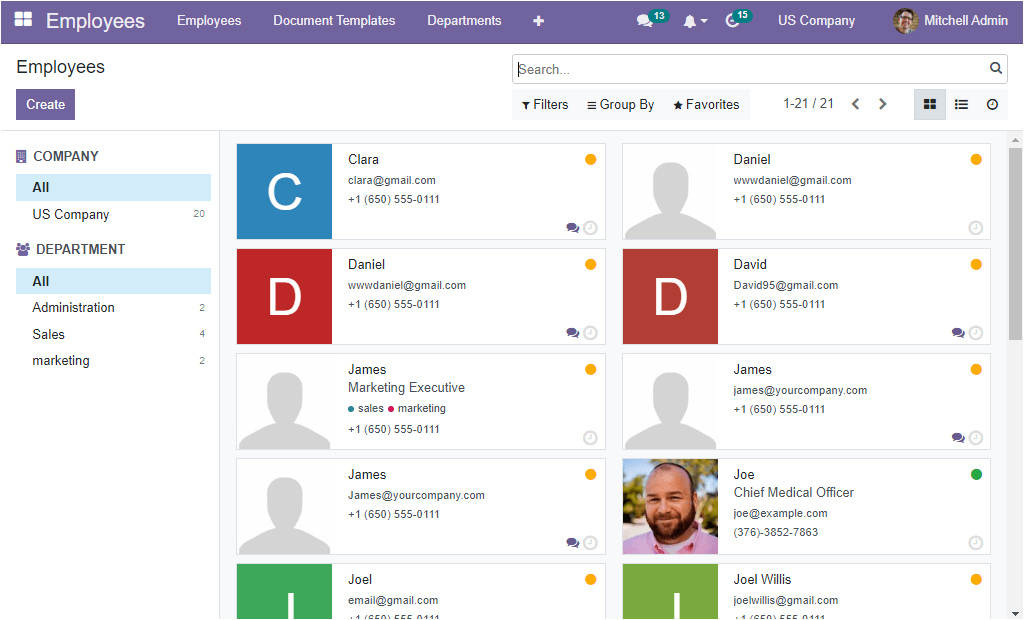
Now let us open the Employees window to view the newly included options.
To check the functionality, let us create a Saudi citizen with all the details. For that, we can open the Employee module.
Then, we can click on the Create button to create a new employee. In the Employee form view, we can provide the employee name as Zayed in the Name field. Then fill in the Job Position field. We can set the Job position as Sales Manager. After that, provide all the required information, such as Employee Card Number, Salary Card Number or Account Number, and all other information in the corresponding fields. The Resume details can be given under the Resume tab. Likewise, you can give Work Information, Private Information, HR Settings, Insurance Details, Employee History, and other details under the respective tabs.
Under the Private Information tab, you have the possibility to define the Nationality(Country), Gender, Date of Birth, Place Of Birth, AGE, Country Of Birth, and Eligible For GOSI as shown in the image below.
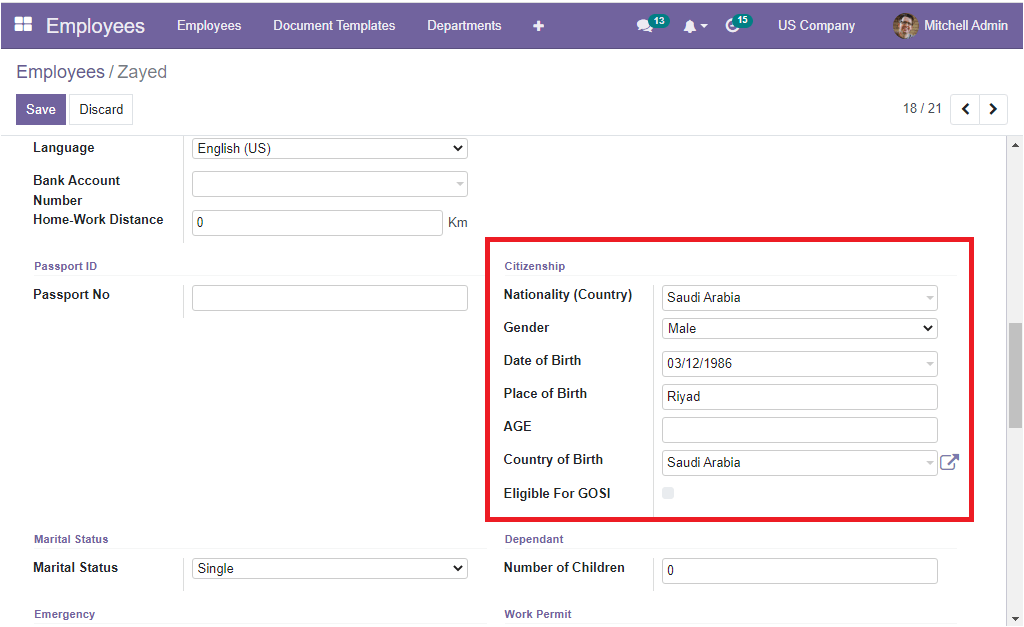
Here we can provide the employee's Country as Saudi Arabia, Gender as Male, and include Date of Birth. You should remember that the GOSI contribution is eligible only for the age limit between 18 to 60. After providing the necessary information, you can save the data by clicking on the Save button. Once you save the record, the employee form will display an additional tab called GOSI Information, as shown in the image below.
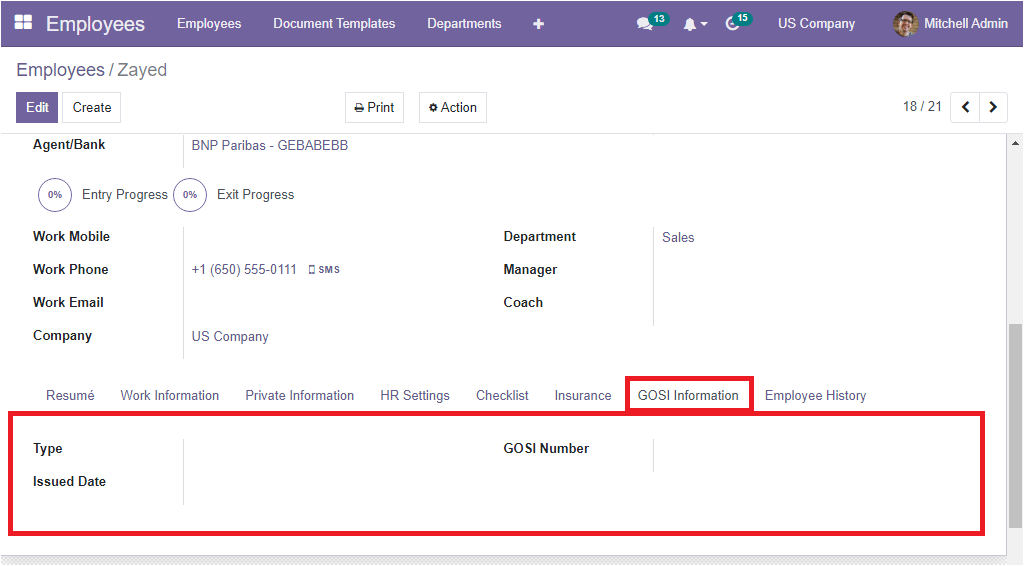
Under the GOSI Information tab, you have the fields to describe the Type of GOSI, Issued Date, and GOSI Number. Here, we can provide Saudi as a Type. Then with the help of a calendar pop-up, we can allocate the date in the Issued Date field. The GOSI Number can be given in the GOSI Number field. After providing details, save the record.
Now we have added GOSI eligibility for the employee Zayed. So let us move on to the Payroll module.
In the OpenHRMS Payroll module, you can view the GOSI Register menu in the nav bar, as shown in the image below.
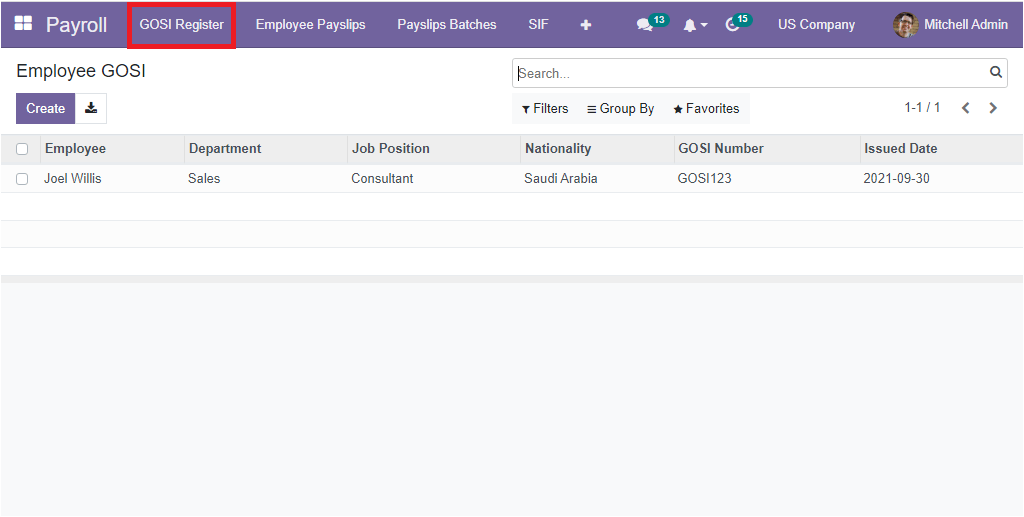
The well-fixed Employee GOSI window will manage all the information regarding the configured GOSI Registers with the details such as Employee Name, Department, Job Position, Nationality, GOSI Number, and Issued Date. The Filters, Search bar, and Group By options are so handy for finding particular data or satisfying any conditions.
With the help of the Create button, you can create GOSI Registers. The moment you click on the Create button, the system will lead you to the new window, the GOSI reation window, where you can view a form view, as shown in the image below.
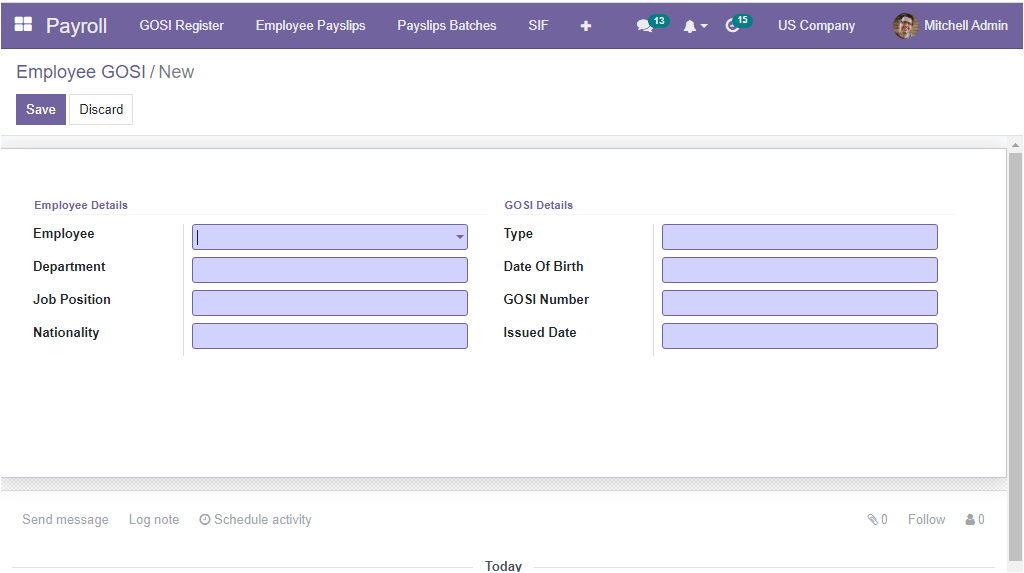
The form view will display various fields related to Employee Details and different fields to record GOSI Details. The first section includes Employee, Department, Job Position, and Nationality fields. In the GOSI Details section, you can view the fields such as Type, Date of Birth, GOSI Number, and Issued Date. So here in the Employee field, we can choose the employee Zayed with the help of the dropdown menu. When we choose the employee, all the other fields will be automatically allocated with the relevant information we already provided in the employee window.

We can save the data using the Save button on the top left. Now for the employee Zayed, employee GOSI is defined.
Right now, the system will allow you to create a payslip for the GOSI Contribution of the selected employee. For that, we want to go to the Employee Payslips window and generate a payslip for Employee Zayed.
Let's click on the Employee Payslips menu available on the nav bar.
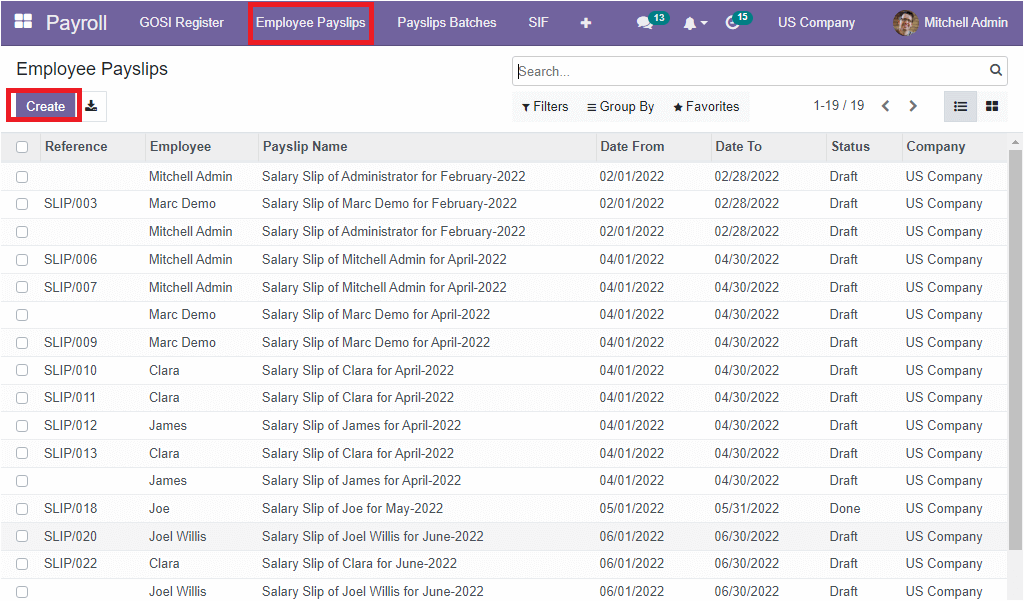
Click on the CREATE button from the Employee Payslip window to create a new Payslip. The Payslip creation window is depicted below.
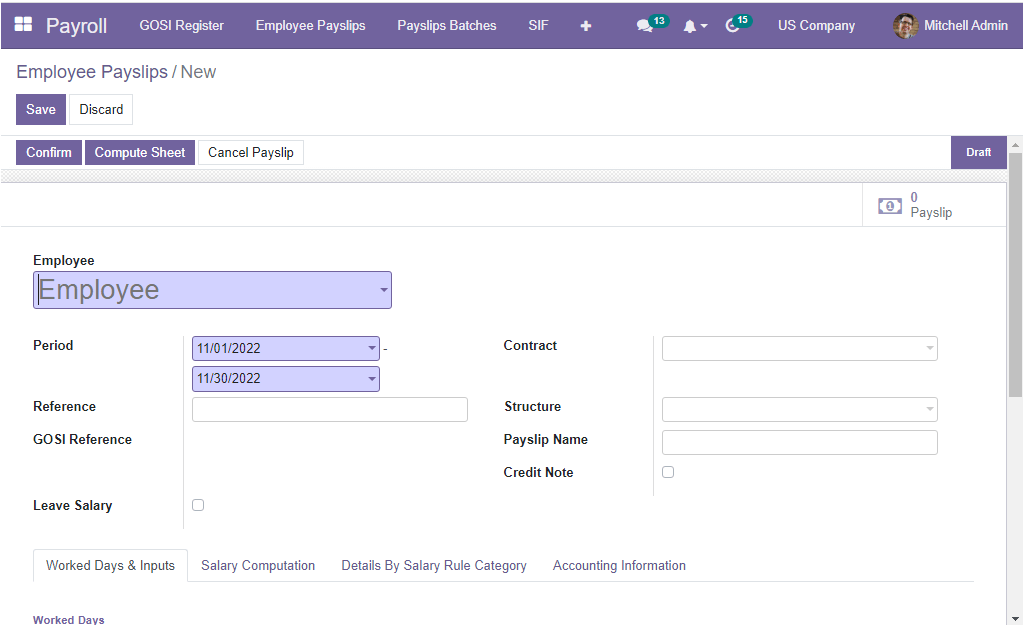
Using this Employee Payslip form view, we can easily generate a payslip. We can provide the name of the employee in the Employee field. Also, we can provide all the necessary information, such as start date and end date( in the Period field), Reference, GOSI Reference, Contract, Structure, and Payslip Name in the corresponding fields. You can also enable the Leave Salary and Credit Note field. The Salary structure given in the contract will be automatically displayed in the Structure field.

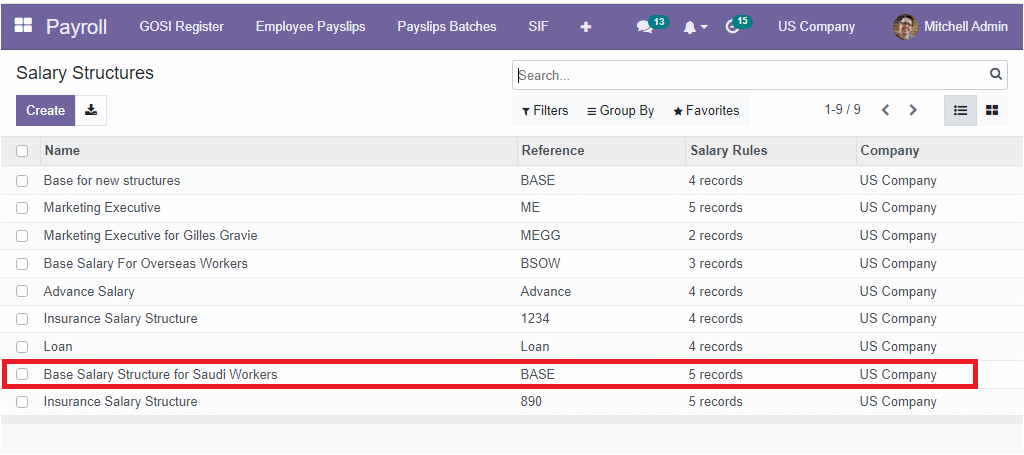
While installing the module, a new salary structure will be created automatically in the backend, which is the ‘Base salary structure for Saudi workers’ as shown in the image below.
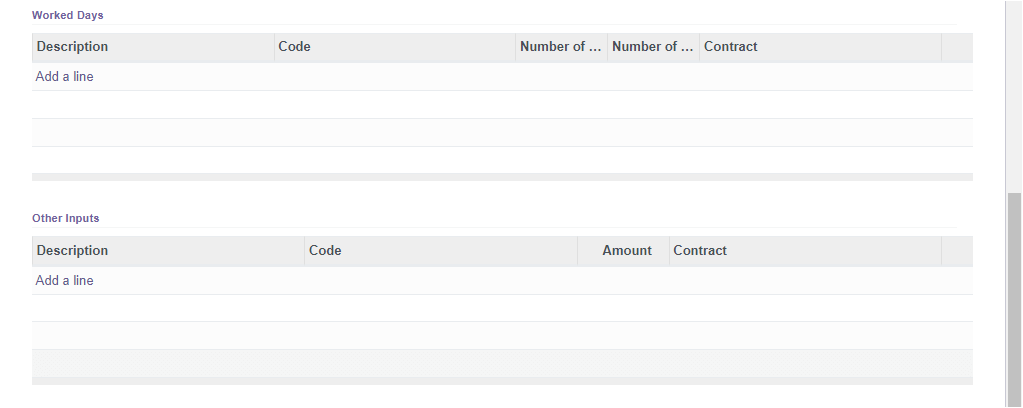
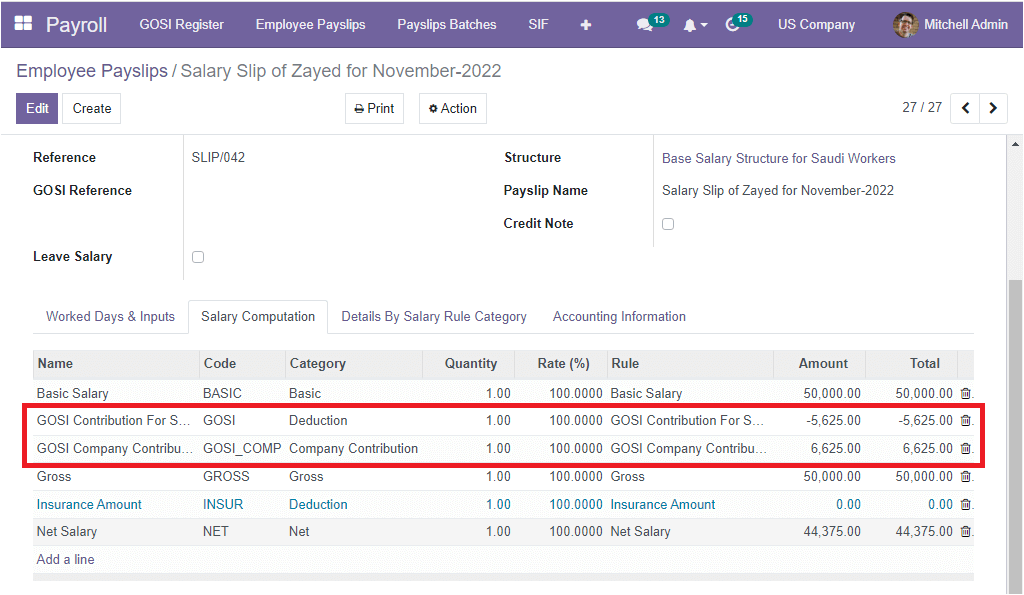
After giving the necessary information in the Employee Payslips window, you can click on the Comput Sheet button to view the salary computation. , Every detail regarding the salary computation will be automatically displayed under the Salary Computation tab, as shown in the image below.
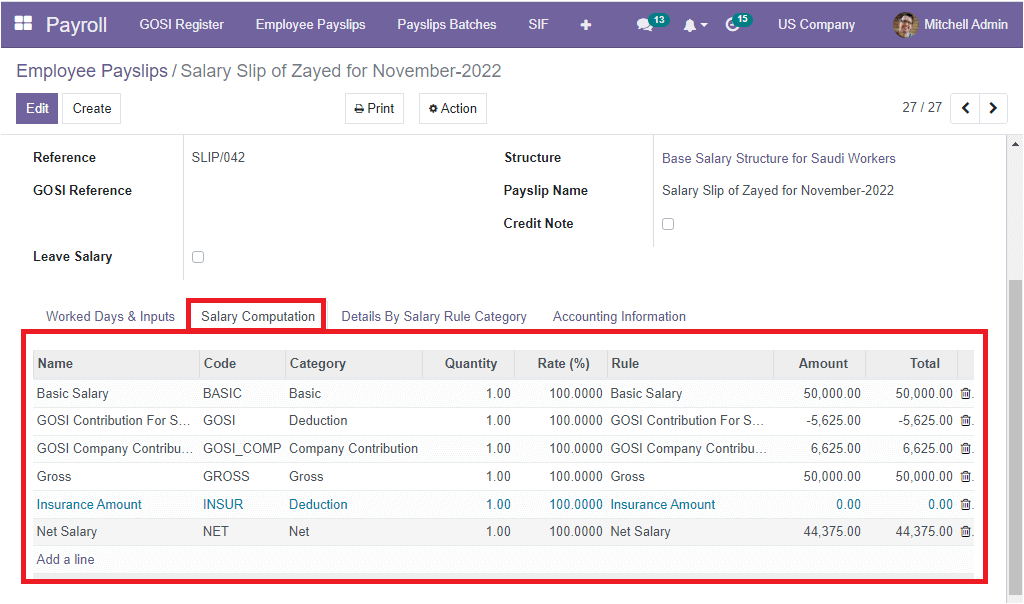
Here in the Salary Computation tab, you can observe the computed salary. The GOSI Contribution for Saudi employees is deducted from the employee's basic salary. In addition, the GOSI company contribution for Zaed is also displayed in the tab.
All these details will be automatically added for any GOSI-eligible employees. Now you can confirm the Payslip by clicking on the Confirm button.
The Saudi GOSI module available in the OpenHRMS platform aims to enable organizations to handle the GOSI contribution for Saudi citizens effortlessly. Have a look at the following blog to explore more about Open HRMS GOSI Contribution Module. Open HRMS GOSI Contribution Module