Every organization may occasionally call unexpected special or urgent meetings without giving prior notice. It might be quite difficult to individually advise each person in an organization about these unforeseen circumstances. It is quite impossible to individually call every employee, especially if the organization has a huge workforce. There isn't enough time to obtain each one. To control these circumstances, a sophisticated and well-defined digital announcement system is required. The Announcement module, one of the platform's minor components, is intended to provide comprehensive support within the company. The module's functions and advantages for an organization's resources vary. The Announcement module's primary goal is to assist the organization in managing its formal announcements.
The competent authority can successfully address all difficulties and problems with company announcements by using the Announcement module. Additionally, this will enable communication with your staff so that the official announcement may be made. Additionally, the module enables you to attach any type of document. The module may handle all internal notifications, including those for meetings, special events, future holidays, discussions, etc.
This chapter goes through the OpenHRMS module's features. The Announcement module is available for download from the App Store. The Announcements menu icon will now be displayed in your database, and on selecting the module, you will get the page, as shown in the screenshot below.
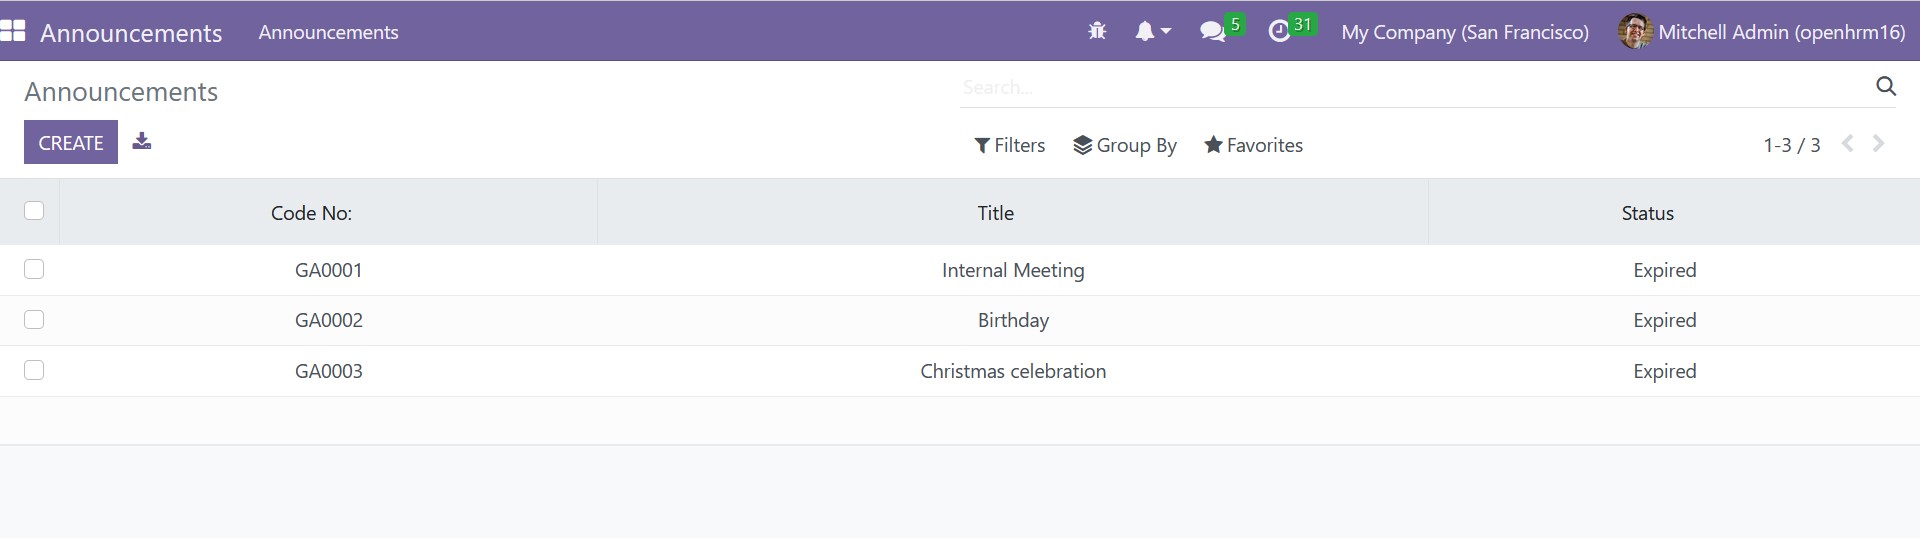
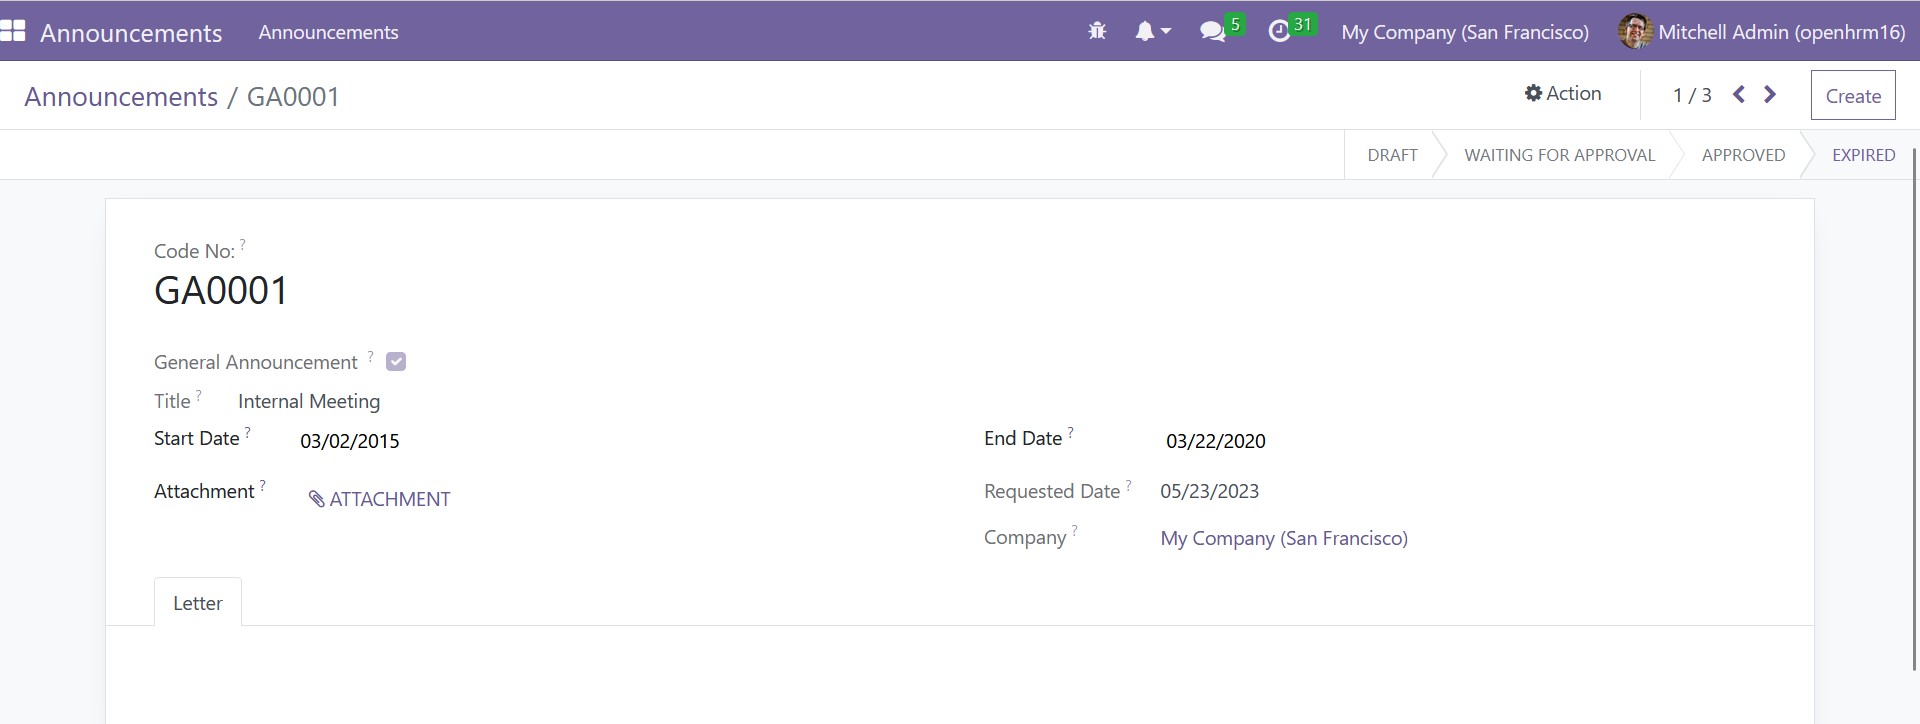
All of the announcement details created in your organization can be managed via the Announcements box. As a result, the window will show all the data related to the prior announcements. Each announcement's Code No, Title, and Status are included in the preview. You can choose the appropriate record if you want to see the complete details of any of the announcements that were previously discussed. The system will now show all of the announcement's information on its screen. Let's select the first announcement, Internal Meeting, as an example. The system shows every piece of information, as demonstrated below.
The system's sorting and categorizing features let you apply several filters and grouping options to your entries. To handle it systematically, the platform created certain sorting functionalities that are all found under the Filters, Group By, and Search tabs. You can search for the data you need using the search tab. The Filters tab additionally shows pre-set and editable choices that can be used to filter out your window. Let's select the Filters tab to see the option. Now a dropdown menu will appear as shown in the figure below.
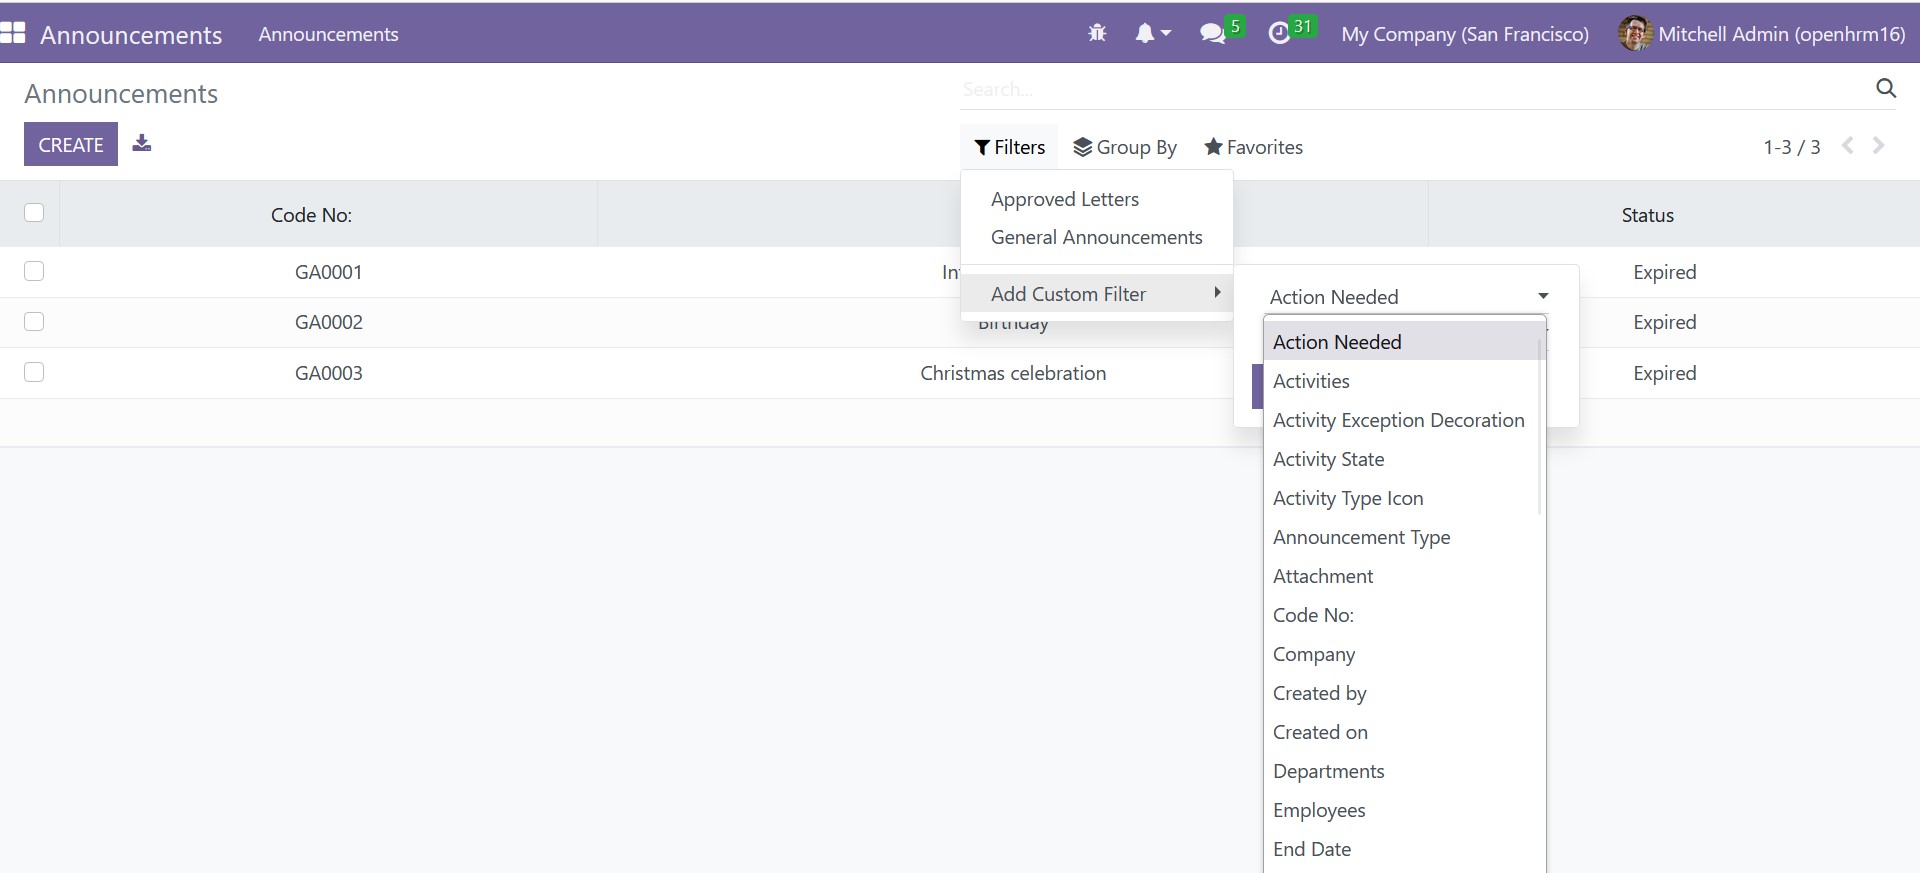
Approved Letters and General Announcements are the default filters that are included in the list. You can categorize or group the announcements records using the Group By option and the menu's fields. The options to Save Current Search and Import Records are located on the Favorites tab. Using the Export All menu option, you can export all the data in the window to an Excel sheet.
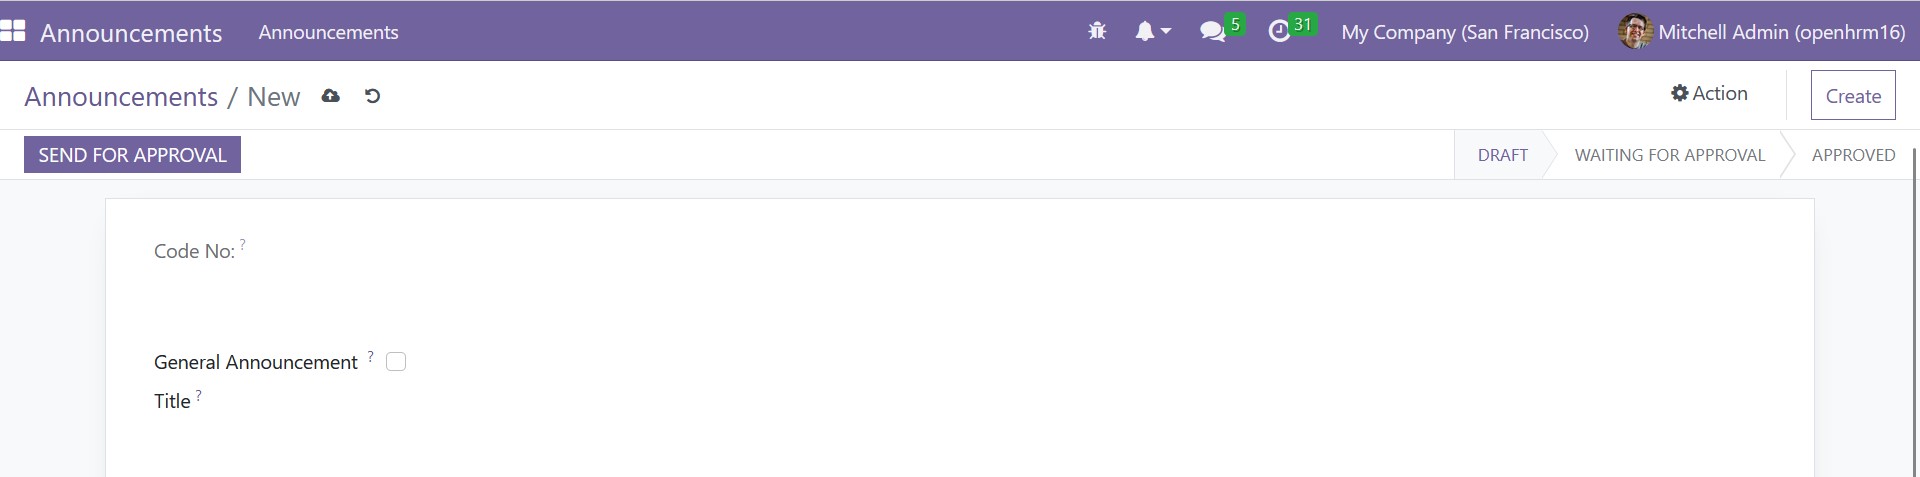
Let's now look at how to make a new announcement. The Create button is located in the top left corner of the window and can be used to start a new announcement.
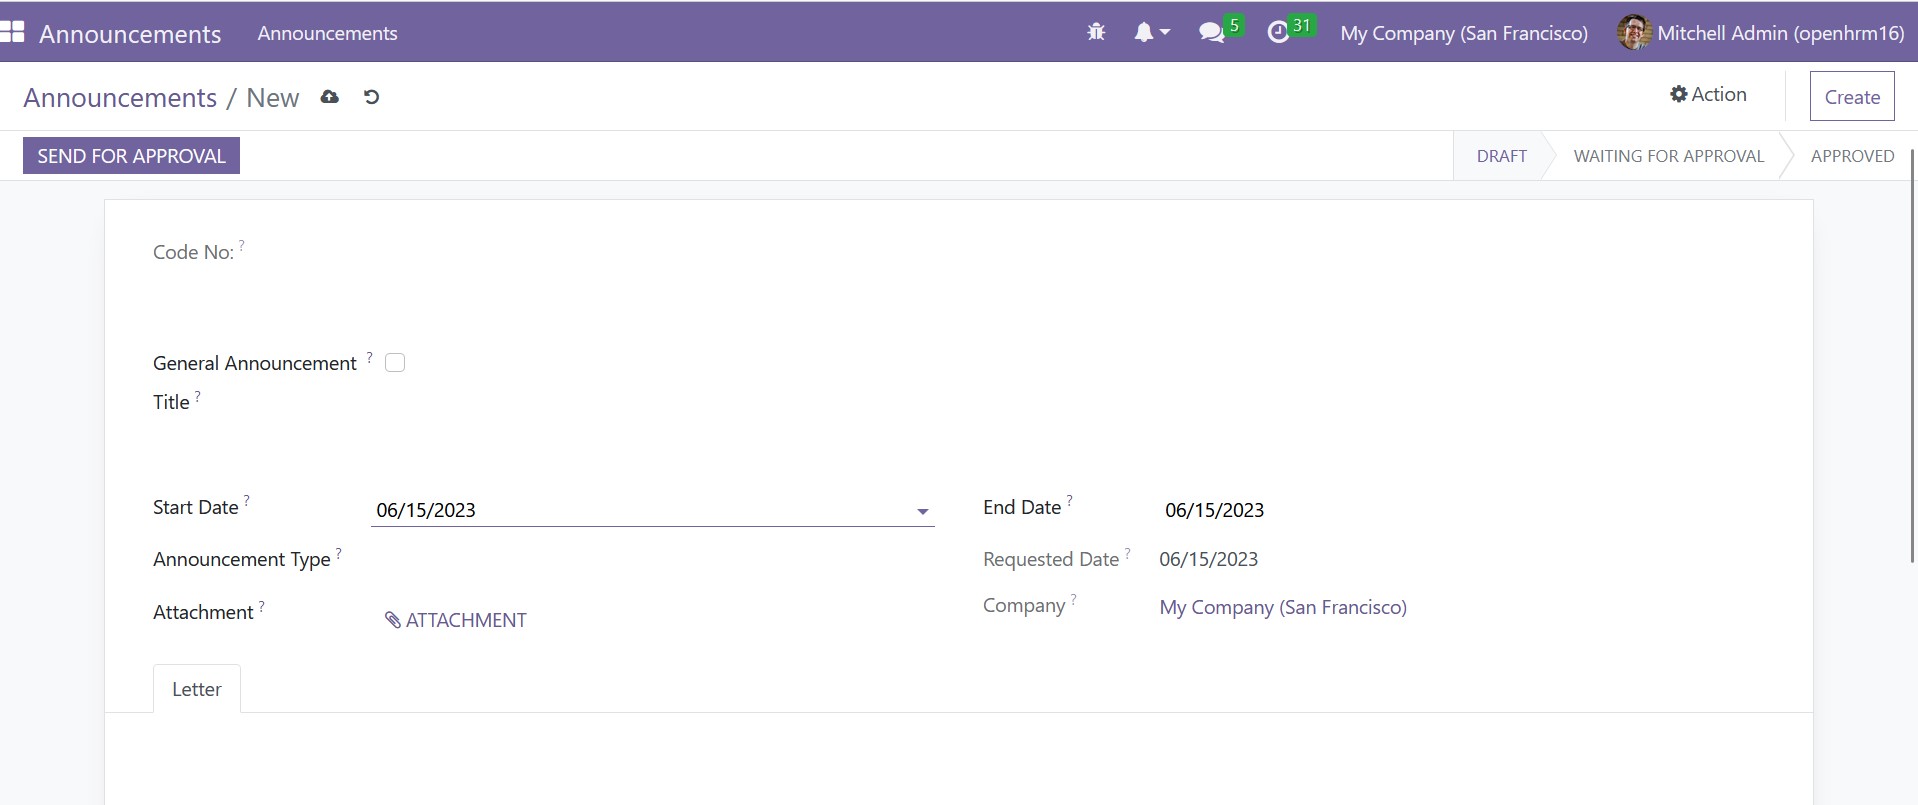
You can see the Code No field in this creation form, where the value is automatically produced when a record is created and the value and sequence are based on the general announcement field. If the announcement is a general announcement, you can make it public by turning on the General Announcement option. Additionally, the Title field can be used to characterize the announcement's topic. Additionally, the designated sections can be used to define the announcement's Start Date and End Date.
The Requested Date column will automatically contain the created date for this announcement record. The login user's company, if it works with multi-companies, can also be indicated in the Company field. A copy of your letter can also be attached in the Attachment area. Additionally, the letter tab is where the announcement's content may be found.
You can leave the general announcement field empty if the announcement is not a general announcement. You can see an additional field called Announcement Type in this example thanks to the form view. You can define the announcement type in this area.
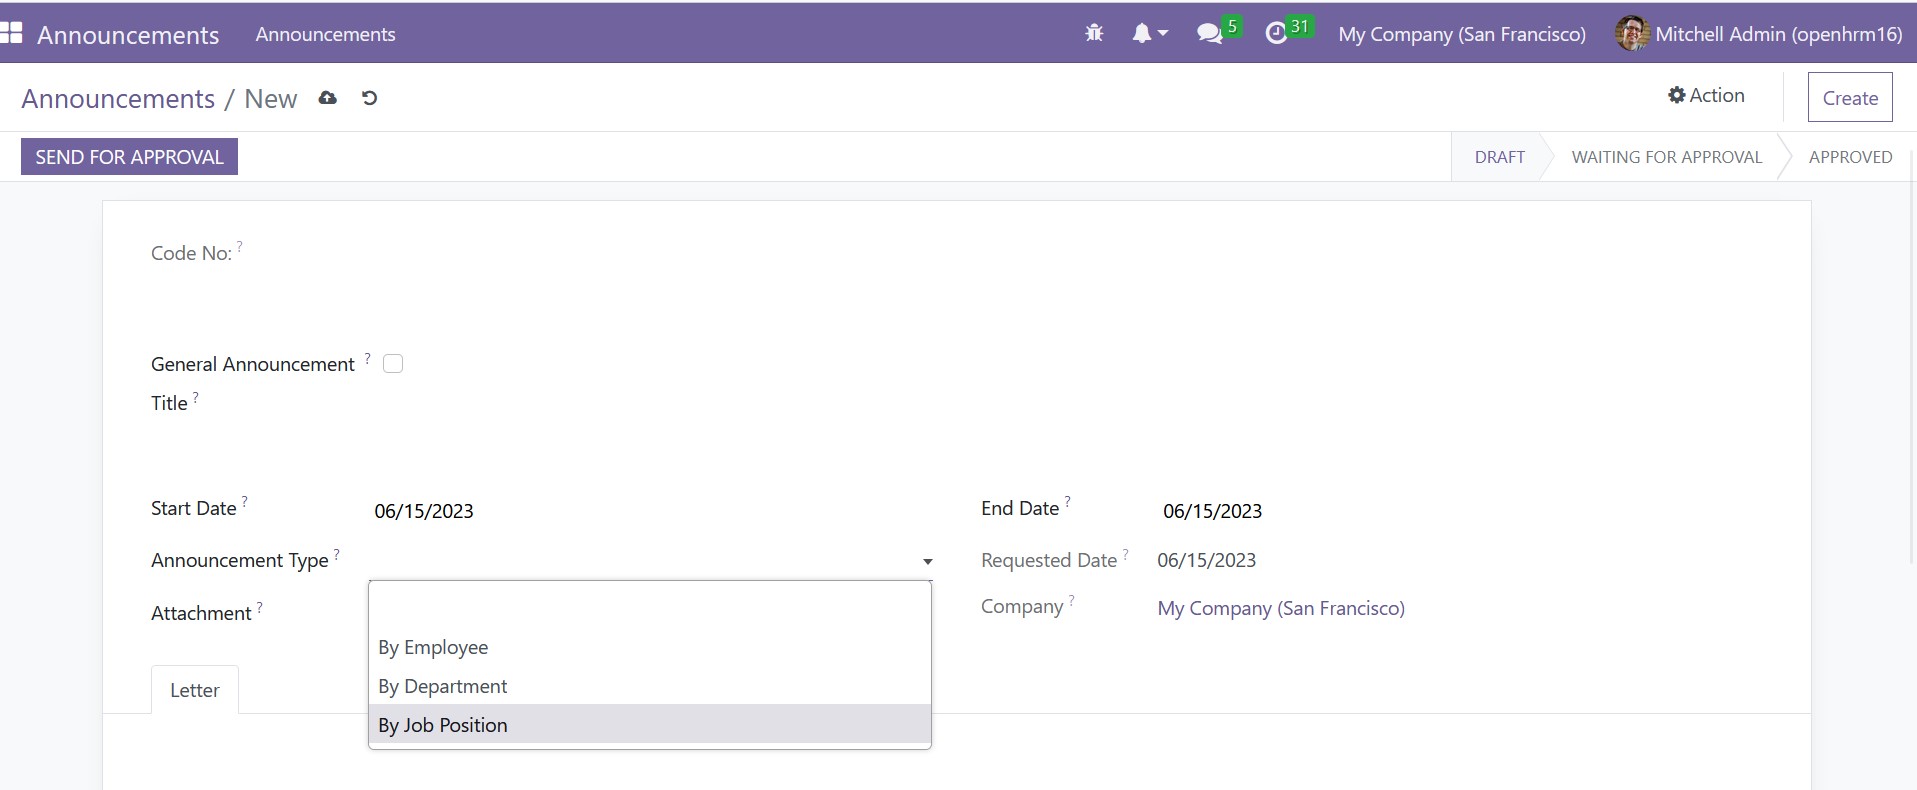
You can enter the announcement type in the Announcement Type section. By Employee, By Department, and By Job Position are just a few of the types available in the dropdown menu under the heading "Announcement Type." You will also be given a field to mention the person if you choose By Employee. The relevant fields for the By Department and By Job Position selections will also show up.
You can save the record by clicking the Save button in the top left corner of the window after providing the announcement's necessary details. You can now see that a certain code number is automatically entered into the ‘Code.No:’ area. The code number sequence will begin with "GA" for general announcements and "AN" for all other categories. The freshly formed form will be like the illustration below.
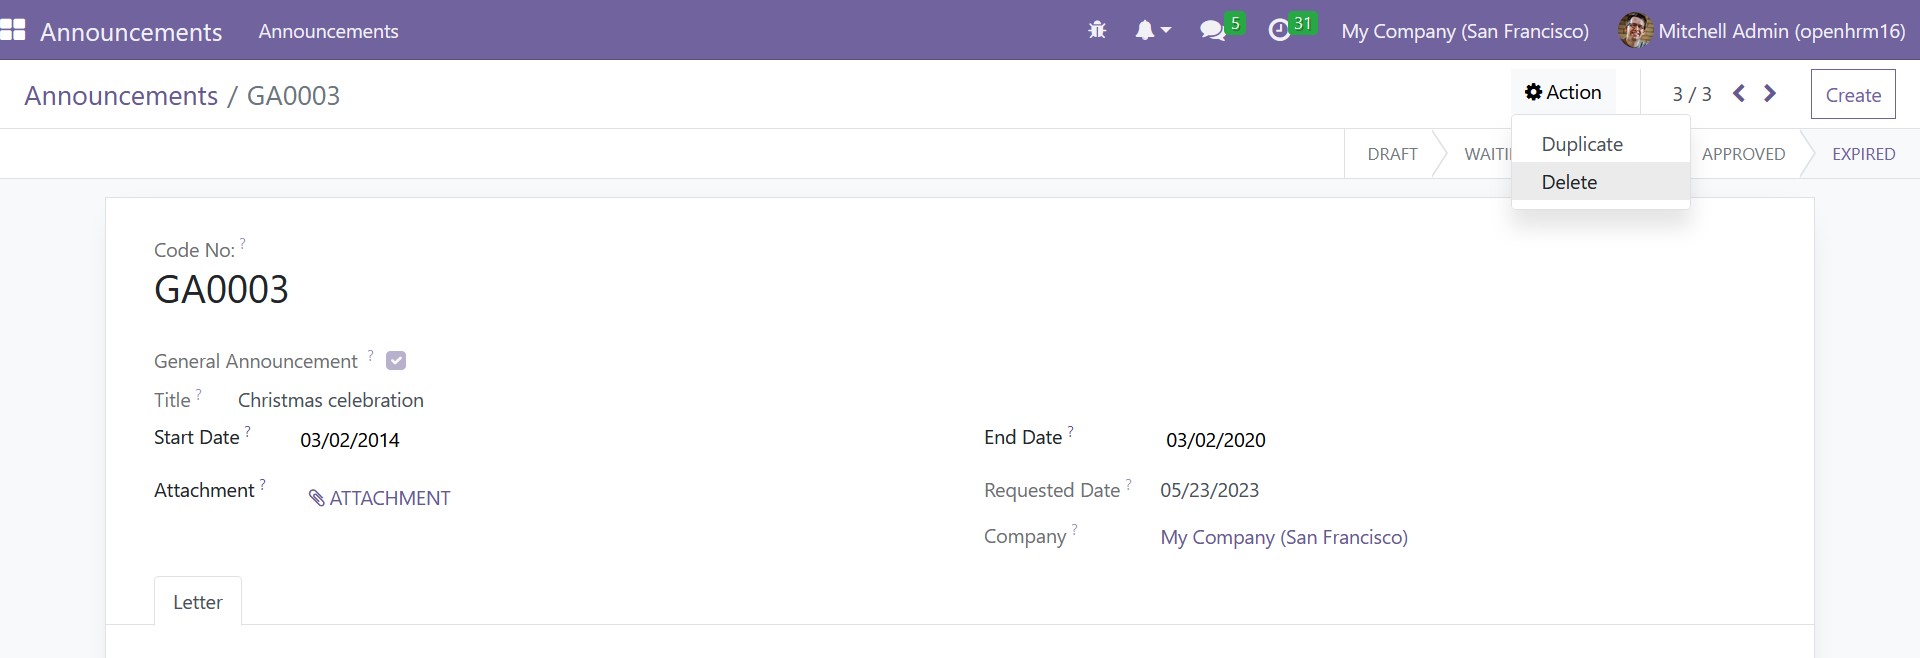
The Action button is visible on this screen and is indicated in the image above. If you are necessary to make any modifications to the announcement. The Duplicate and Delete choices are also available via the Action button. The window also features the Send For Approval button. This button only requires one click to send this newly made announcement for approval.
The screen's right top will display the various stages as Draft, Waiting For Approval, and Approved. The announcement's current state will be marked in a dark shade. You can tell that the window above is in the Draft state by looking at it. The status will be altered automatically in accordance with how the announcement is handled.
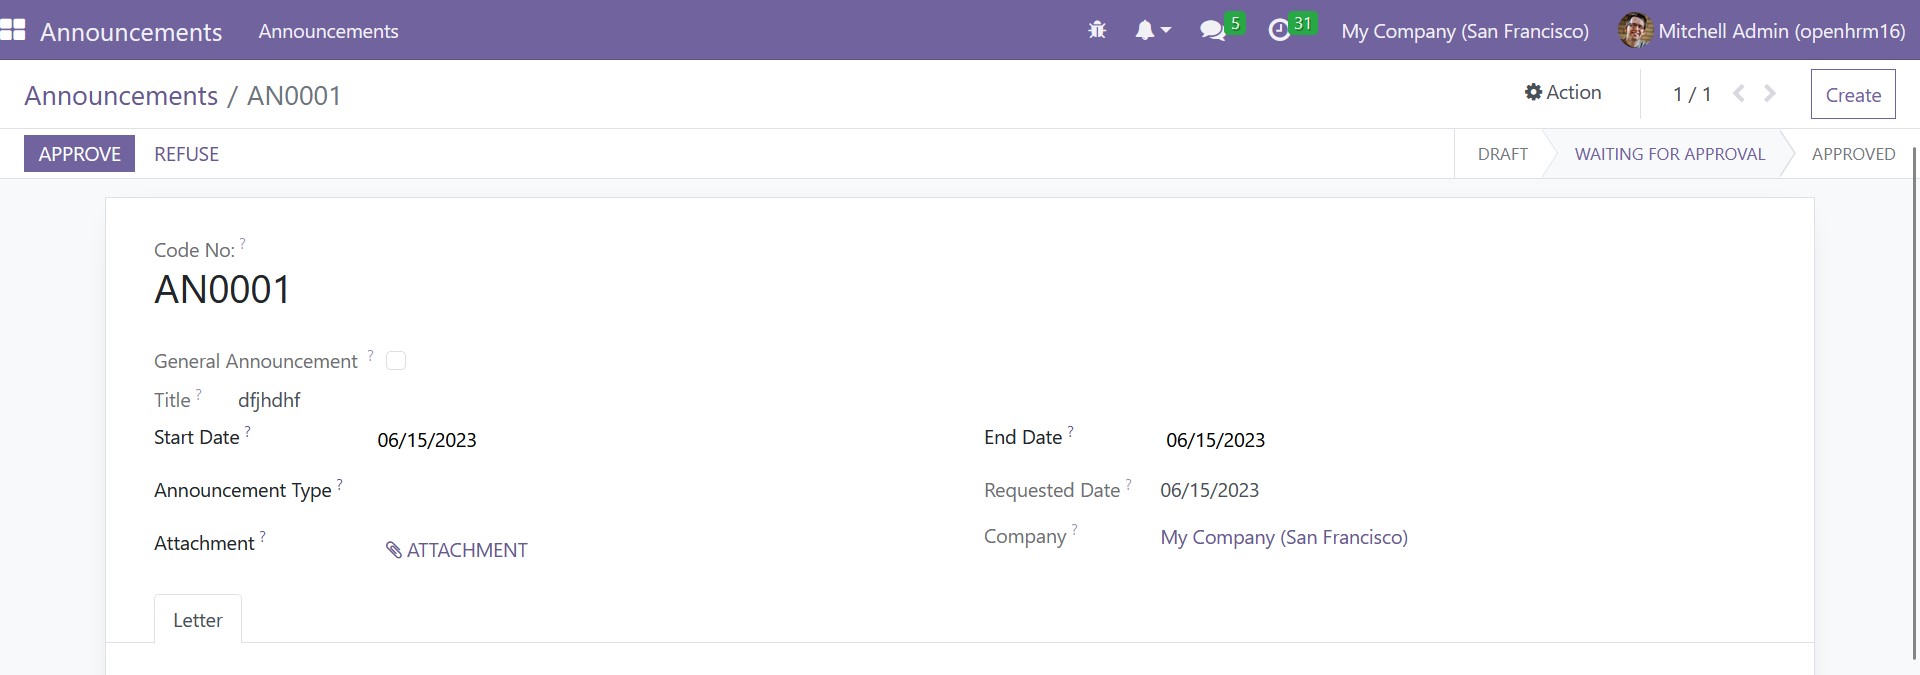
As soon as you submit it for review, it moves on to the subsequent stage, Waiting For Approval. Similar to the image above, the screen shows the Approve and Refuse options on the right. By using the Approve option, the interested party can give their approval for the announcement.
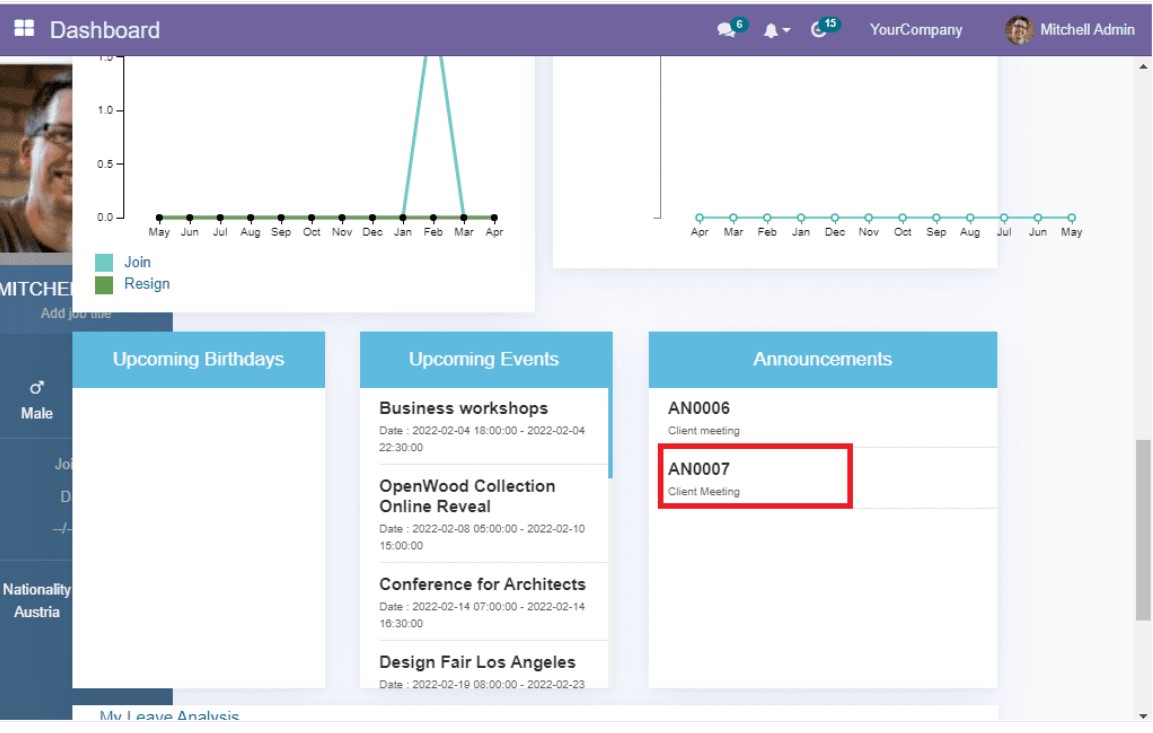
The Employee Dashboard module will display the announcements that were created in the announcement module. If it's an all-staff announcement, it will be displayed on their dashboards. Any announcements regarding a specific employee, department, or job position will be displayed on the dashboard of the relevant employee. Let's start by making a new announcement so that we may test its functionality. In order to let Mitchel Admin know that there will be a customer meeting today, let's make an announcement. Therefore, we are able to offer the Title as a Client meeting. The Start and End Dates should be provided.
You can choose the By Employee option for the Announcement Type, and you can enter the employee's name (Mitchel Admin) in the corresponding field. Additionally, we can mention the login user's firm and the requested date. The Announcement content can be described under the Letter tab. The Employee Dashboard pane will display the announcement details once the request for an announcement has been authorized. Let's open the Employee Dashboard panel so we can see this. You can view the constructed announcement's specifics here, under the announcement area, as shown in the image below.
This is all about how the OpenHRMS Announcement module operates. It is simple to communicate common corporate messages and statements to your staff thanks to a simple yet effective module.