All information related to an employee will be helpful for an organization for better employee management. So the employee documents need to be maintained with too much care because it is manifested as evidence of important information, activities, and practices.
The Employee Document module developed by the OpenHRMS suite is a practicable tool that allows you to keep track of employee-related documents such as certificates, job descriptions, resumes, passports, licenses, appraisal reports, and more. All these critical documents are significant not only for the HR department but also it will be very essential for the growth of the organization.
The HR documentation must be done cautiously on the basis of each organization's policies and requirements. The OpenHRMS suite offers a well-defined Employee Document Management module for its users. When you install the module into your system, the features and tools to handle employee documents will be visible in the OpenHRMS Employees module.
So let us open the Employees module. Here, under the Configuration tab, you can see an Employee Document Types menu.
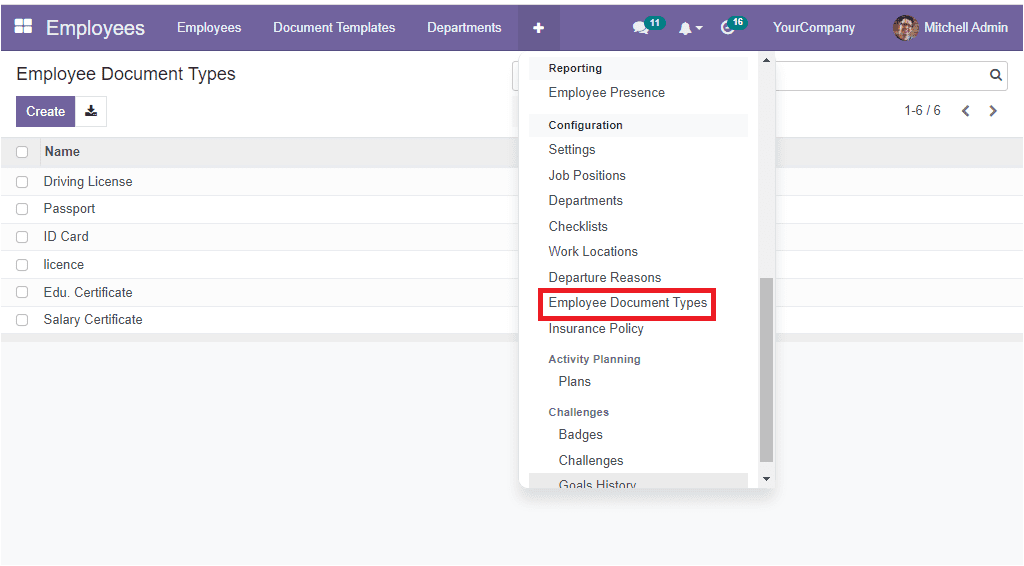
The Employee Document Types menu icon allows you to enter into the Employee Document Types window. This window manages all the configured document types and will exhibit the preview of all already configured document types.
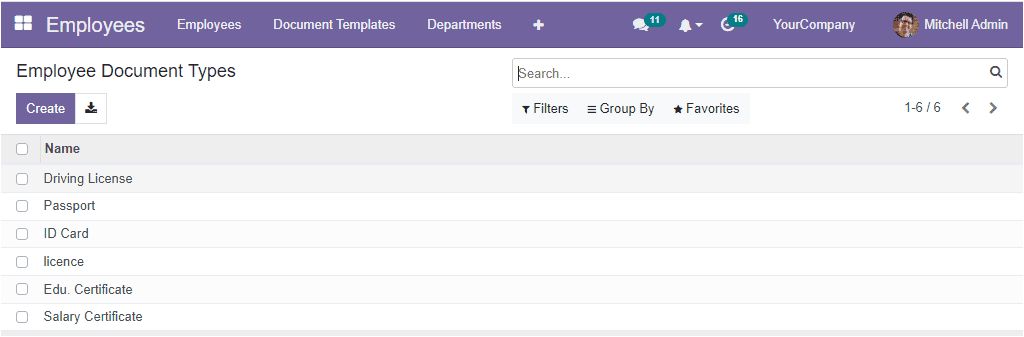
Here, in the above screenshot, you can view various document types such as Driving Licence, Passport, ID Card, and many more aspects. It is also very simple to create a new document type. You just need to click on the Create button on the top. Now you will be able to create a new one in the displayed space. Using this document types menu, you can configure various document types which your organization requires.
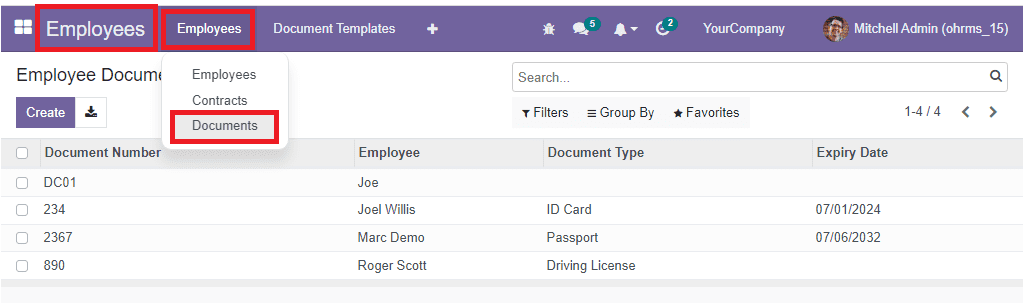
Apart from this option, the OpenHRMS Employee module manages a separate menu for managing the Documents with the help of the Employee Document module. Using this menu, you can create documents for your employees. To access the Document menu, you can go to OpenHRMS -> Employees-> Employees ->Documents.
The Documents window will display all the employee documents that we already created in the system, and this option is very useful for managing employee documents. We know that various important papers and documents must be in mind when dealing with employees. It is also necessary to keep all these records very neatly and carefully. The OpenHRMS Employee Documents module provides significant importance to managing employee documents, and it introduced a separate platform for managing documents. Moreover, its digital document-keeping system makes it more secure and convenient.
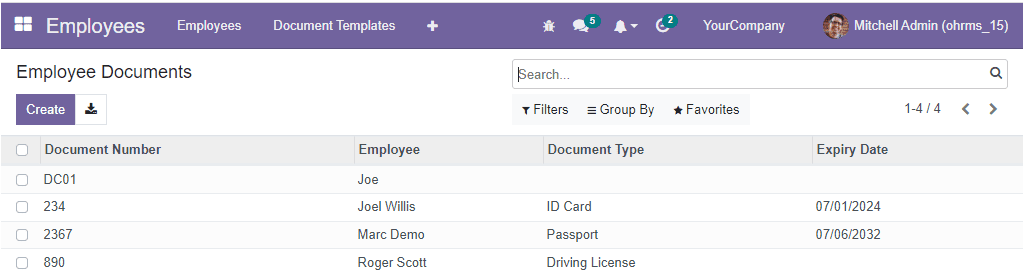
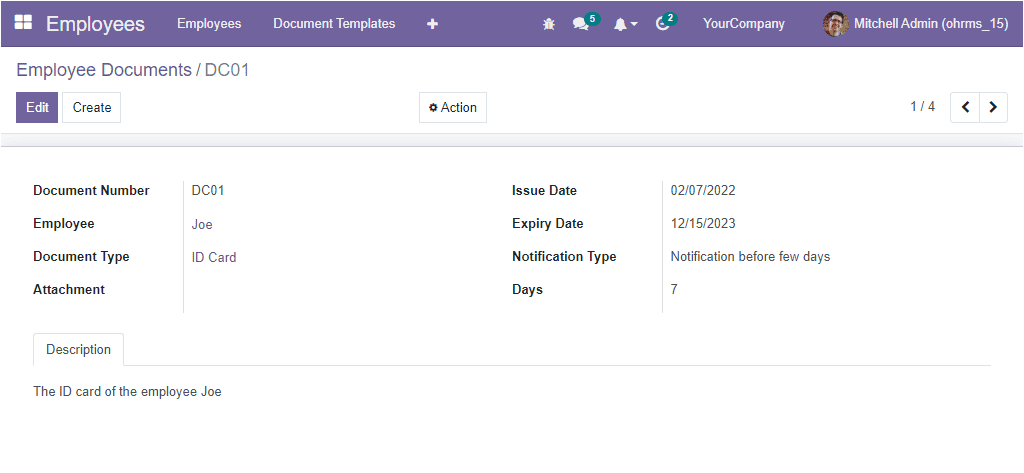
When you look at the Employee Document window, you can view the preview of all the documents entered in the system along with the details such as Document Number, Employee Name, Document Type, and Expiry Date. If you want to view the described documents in detail, click on the respective one. Now the system will depict the detailed view of the particular document where you can view all the details and even have some editings if required. For example, if you want to view the details of the document number DC01 attached to the employee Mr.Joe, you can just click on the record. The document will open up as shown in the image below as you click on the record.
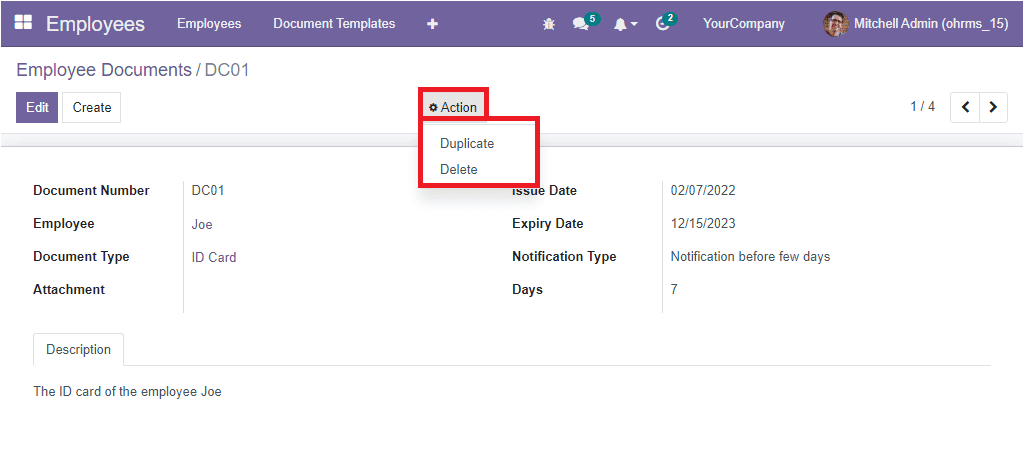
On the top left side of the window, you can view the Editbutton. Click on this button if you want to do any editing on the record. It is also possible to do additional actions such as Duplicate the document or Delete the document using the options available under the Actions tab.
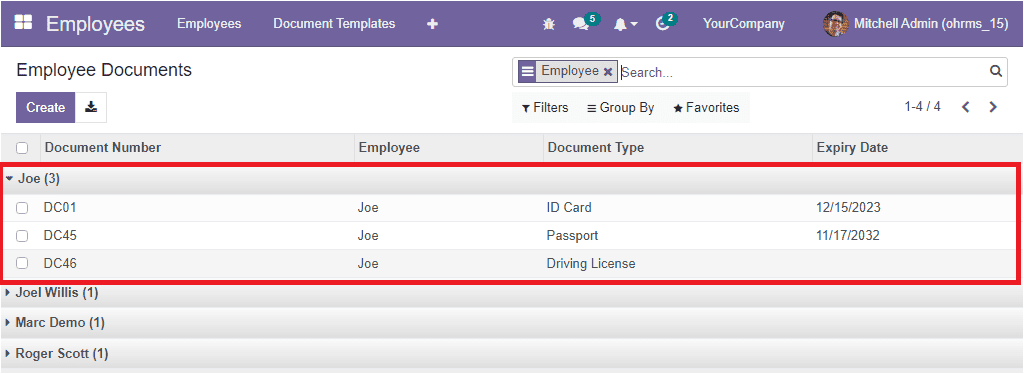
Back to the Employee Document window, Under the Group By tab, you can view the default group by option ‘employee‘.
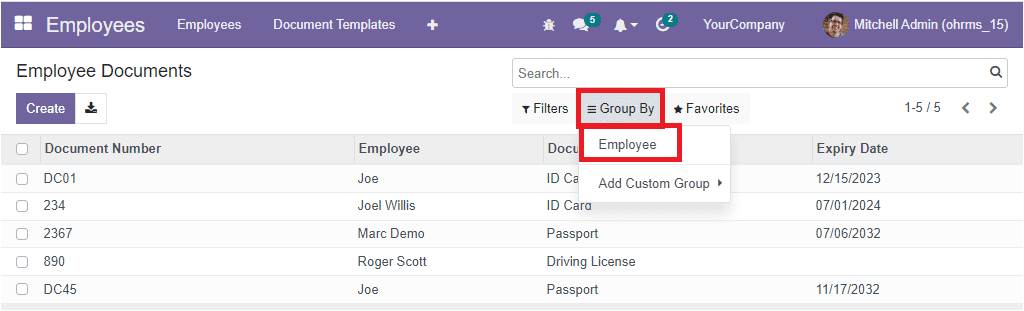
This default option allows you to categorize the documents based on employees. If you apply the Employees option to categorize the list, the window will look like the image below.
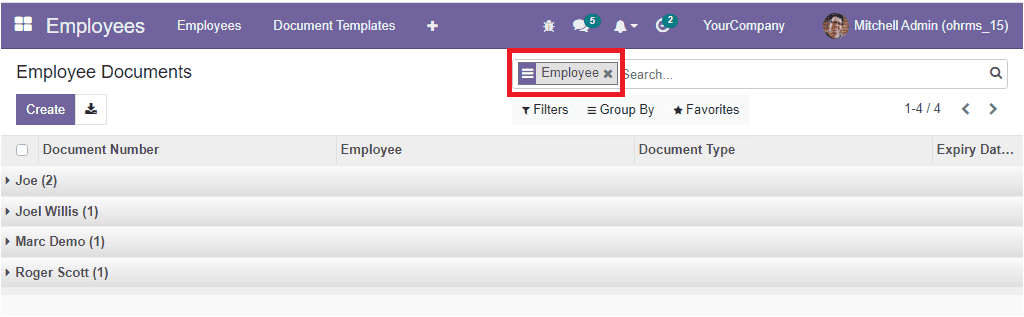
Now you can collect the document by clicking on the respective employee. You can quickly access the required document, and it is very useful, especially when you have a lot of documents to manage. Just click on the employee name, the system will display all the documents associated with this particular employee as shown in the image below. For example, if you want to view a document of employee Mr. Joe, you can just click on this data. Now the system depicts all the documents associated with him as opened below.
Moreover, the platform allows you to customize more Group By and Filtering options by using the Add Custom Filter and Add Custom Group options. In addition, the Favorites tab includes the Save current searchand Import records menu.
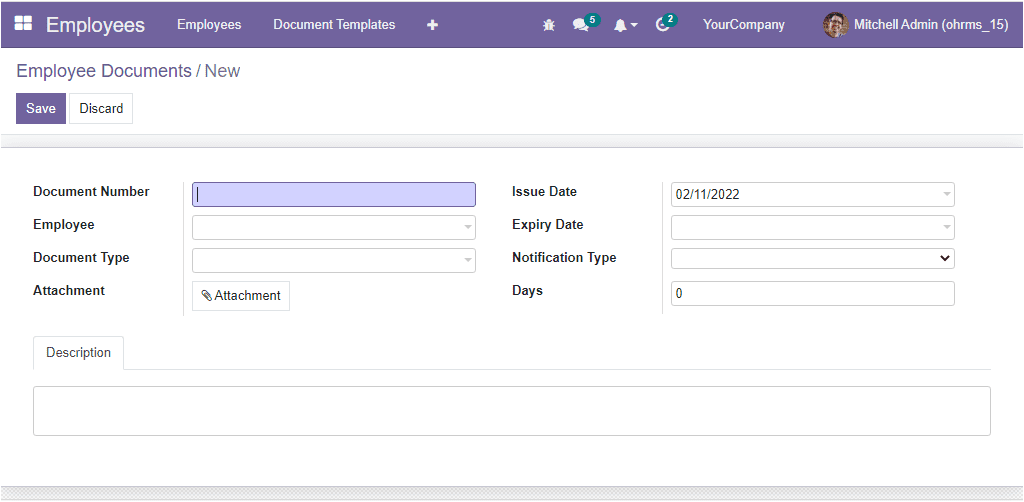
When you look into the left portion of the Employee Documents window, you will see a Createbutton and Export Allbutton, as shown in the image below. The Export All button helps you to export all data into an excel sheet. The Create button allows you to create new employee documents. Suppose you click on the Create button, and you will depict an Employee creation window, as shown in the image below.
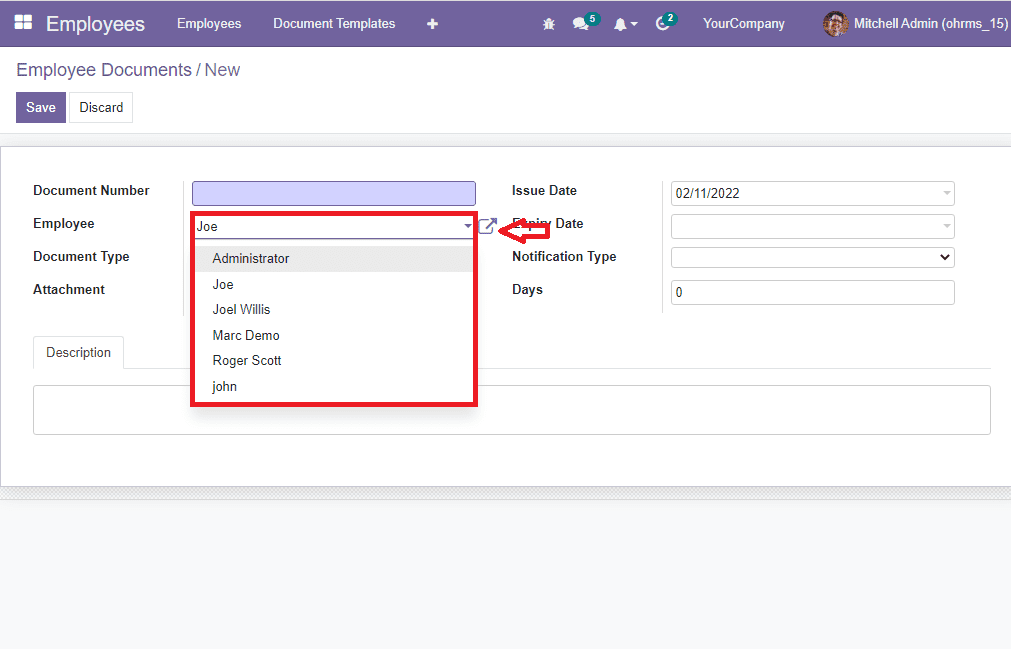
In the Document Number field, you can give your document number. The employee name can be described in the Employee field using the dropdown menu. All the configured employee names will be listed in the dropdown menu as shown below.
The external link option denoted with an arrow mark will allow you to view the details of the employee. After defining the Employee, you can specify the Document Type. The system gives you a separate menu to configure various Document Types in the module's Configuration tab, which we discussed earlier. All the configured Document Types will be listed here in the dropdown menu. You can also create a new Document Type here itself by typing the document type. After providing the Document Type, you can attach a copy of your document in the Attachment field.
Moreover, the date of issue and expiry date can be allocated in the Issue Date and Expiry Date fields, respectively. Then you have the chance to select the Notification Type. Here the system provides you with different notification types as described below.
Notification on expiry date: You will get a notification only on the expiry date.
Notification before a few days: You will get a notification in two ways. On expiry date and a number of days before the expiry date.
Every day till expiry date: You will get a notification of the number of days till the expiry date of the document.
Notification on and after expiry: You will get notifications on the expiry date and continue up to days.
If you did not select any, you would get a notification before seven days of document expiry.
You can fill the Notification type with a suitable type, and you can specify how many days before you want to receive the notification email in the Days field. Finally, you can include a short description on employee documents under the Description tab, if any. Once you fill in all the required information, you can save the newly created document by clicking on the Save button available in the top left corner of the window.
By following these steps, you can create various documents for your employees., Now, let us move on to the Document Templates tab.