A Human Resource Management System can be evaluated as a key competitive business tool for organizations and firms to effectively manage their employees and related operations. The digitalized system will provide numerous advanced essential tools to fulfil the requirements and demands of the HR department of any organization.
One of the eminent human resource management software, the OpenHRMS system, is equipped with several separate modules. These modules are designed to manage different operations and tasks related to a company's resources. The Employees module embedded in this platform is capable of managing each of your employee-related functions. Here in this chapter, we will discuss the OpenHRMS Employees module in detail.
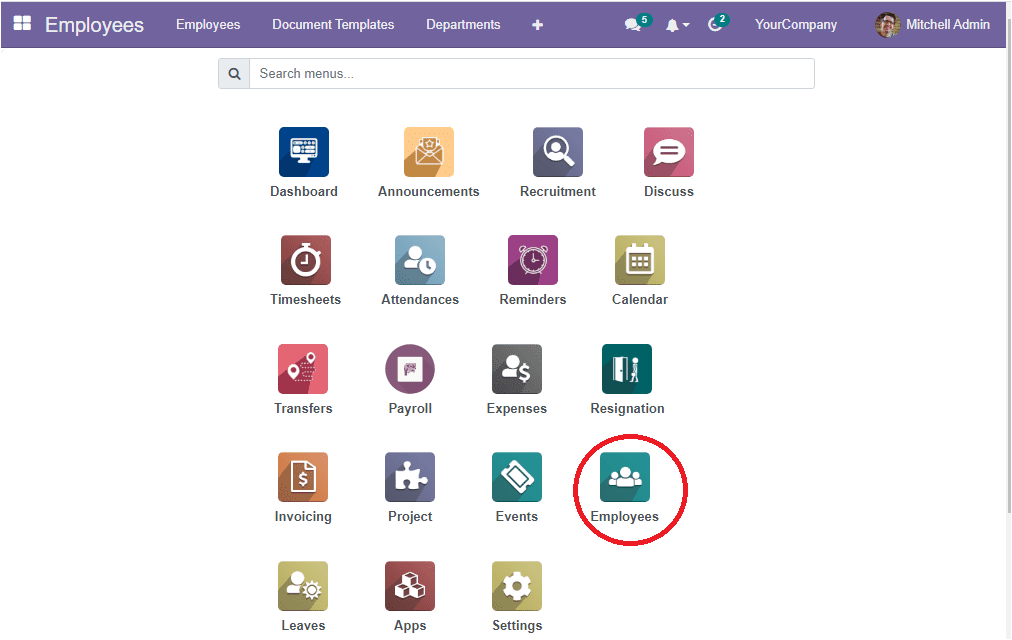
When you look into your OpenHRMS database, once you have installed the Employees module, you will see the Employee module icon in the main dashboard window of the database, as highlighted in the image below.
If you are not installed the module into your system, you can go to the Apps page and install the module
Now you will have access to the Employee module by pressing on the Employees icon in the main dashboard.
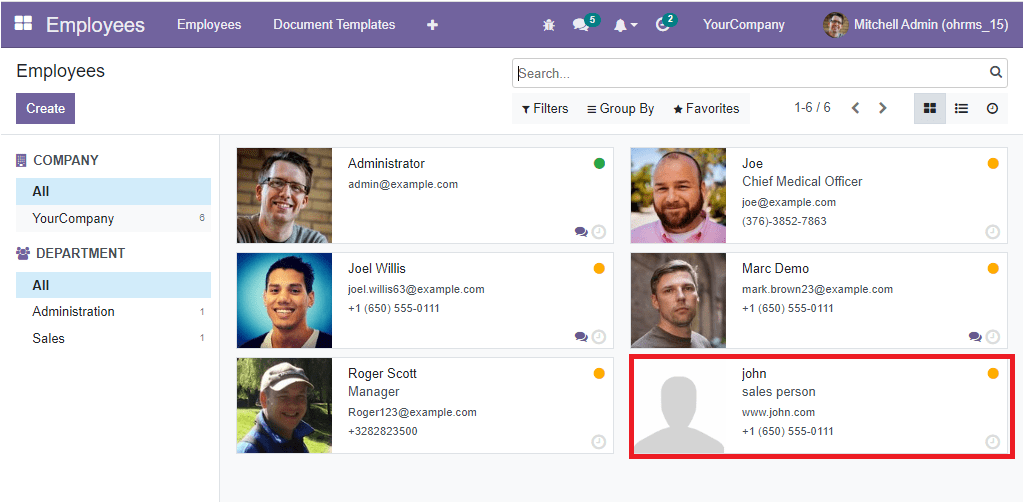
The opening window of the OpenHRMS Employees module is embedded with employee details, as shown in the screenshot below.
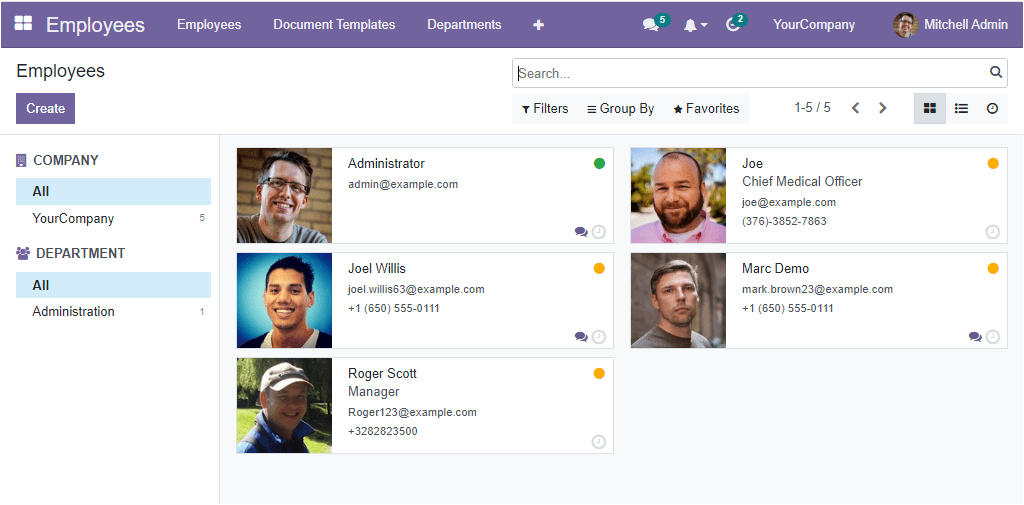
As you can see in the above image, the Employee dashboard window is designed in a way that users can get an overall idea about each employee by just viewing the employee dashboard itself. That is, the employee window will depict the overview of your pre-configured employees along with their details. The system displays employee data in different views such as Kanban, List and Activity view. The above image depicts the Kanban view.
Generally speaking about the Employee window, it is a well structured, data-rich window where the right portion manages the employee profiles, and the left portion is specifically designed for categorizing and filtering purposes. As a result, the left portion of the window includes various options to organise your employees based on different criteria. You can view and arrange your employee profiles based on company-wise and department-wise. Under the Company, you can have the company list. If the platform is working on a multi-company basis, the system will depict the employee profiles based on their company. All the employees working in a particular company will be listed under that particular company name. Also, the number of employees working in a specific company will be specified along with the company name. For example, here in the window, you can view the company called ‘Your Company’ is listed under the company section and the number of employees working in that particular company will also be mentioned as 6.

In addition, it is also possible to view all the employees by clicking on the “All” option.
Likewise, the window helps you to categorize the employees based on their department. The departments associated with your company and the count of employees in each department will be listed under the DEPARTMENT section.
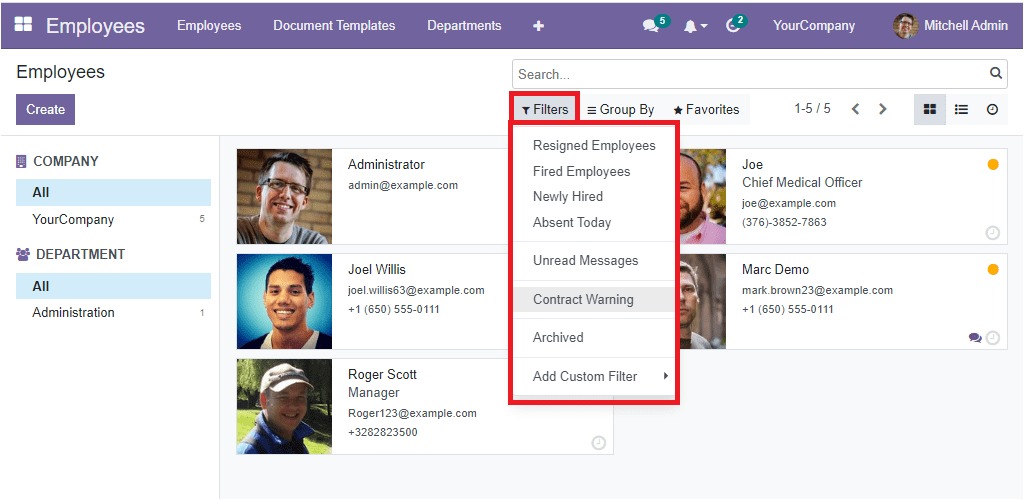
Apart from these advanced options, the window also includes Filters, Group By, Favorite and Search options on the top of the window. These options are very useful for sorting, grouping, and searching your required data. It is beneficial for removing unwanted searching. When you click on the Filters tab, you will be showcased with many default filters and the Add custom filter option. You can apply all the default filters for quickly accessing that particular data. The default filters available in this window are Resigned Employees, Fired Employees, Newly Hired, Absent Today, Unread Messages, Contract Warning, and Archived. You can also customize new filters based on your company requirements by clicking on the Add Custom Filter option.
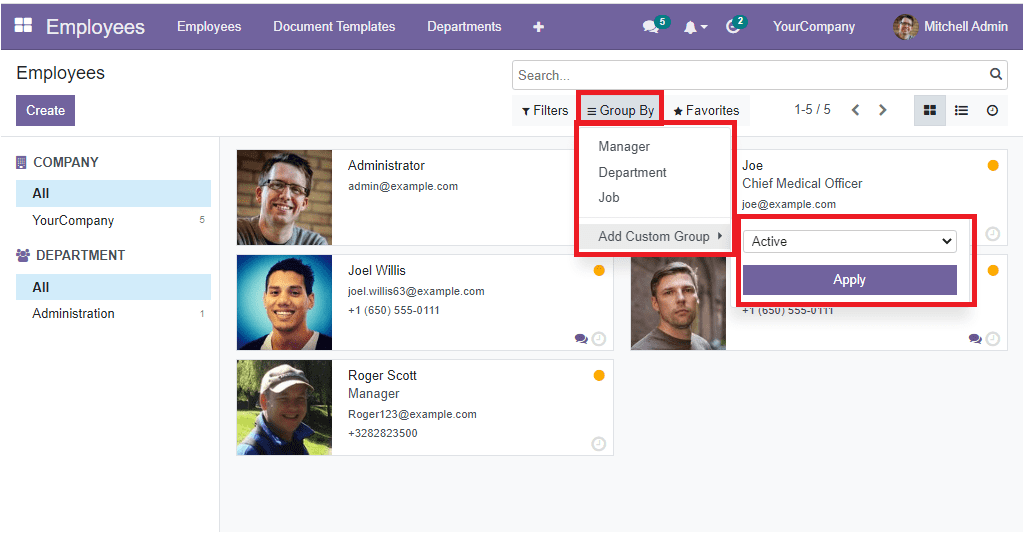
You can also group the employees based on their manager, department, and job by applying the default Group By options. Here it is also possible to add custom groups.
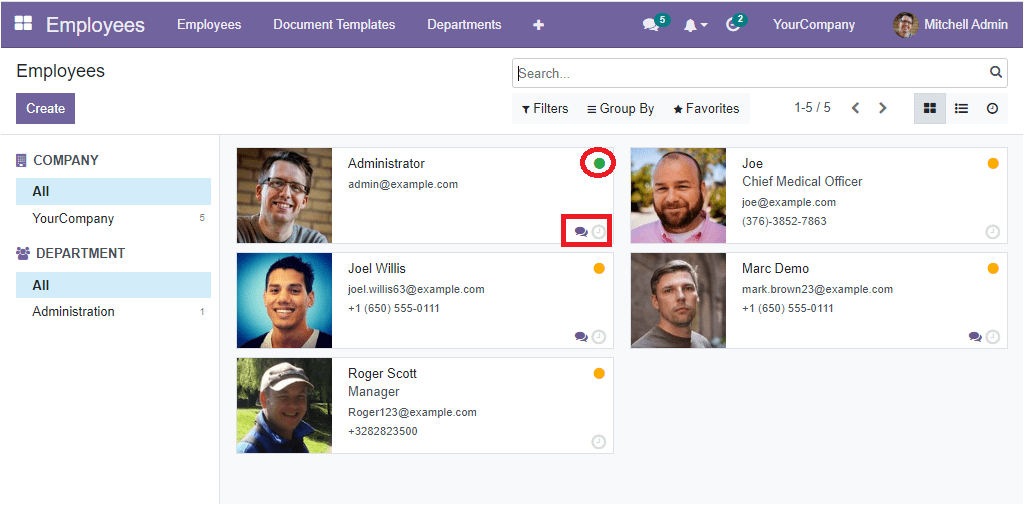
In the well designed Kanban view, the details of the employees are managed in a separate card-like structure, and each card displays the name of the employee along with the photograph of that particular employee, their contact number and email address. Additionally, the icon available on the top right corner of each employee denotes whether he or she is present or not with a unique color code ( as highlighted in the given image). Also, in the bottom left corner, you can see the icon for chat and for schedule activity. These two options are also highlighted in the image given below.
When you click on the small chat icon, a chat window will appear on the right bottom as shown in the image below.
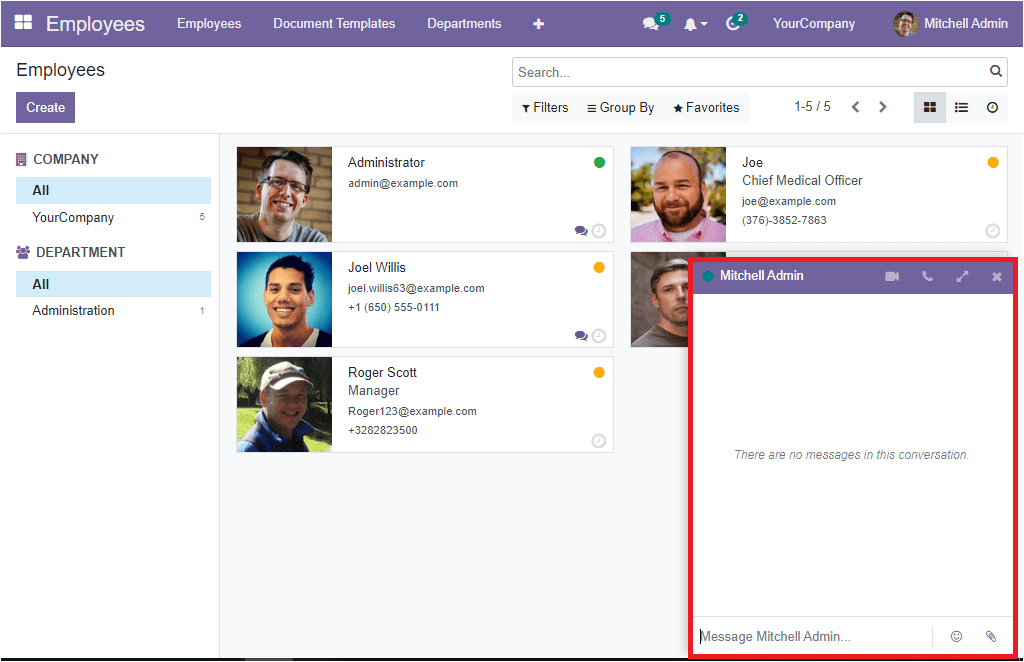
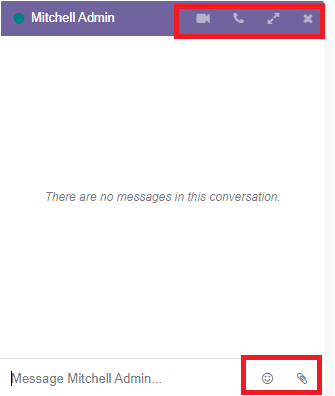
Using this chat widget, you can simply message your employees. You can also add smileys into your chat by clicking on the smiley icon. Moreover, you can attach files to your chat. Similarly, you can start a video call, Phone call, open this chat in discuss, using the respective icons. You can see these icons on the top right of the chat pop up window.
The small clock icon will allow you to schedule an activity. When you click on this icon, you will display a dropdown where you can click on the Schedule an activity button to schedule a new activity.
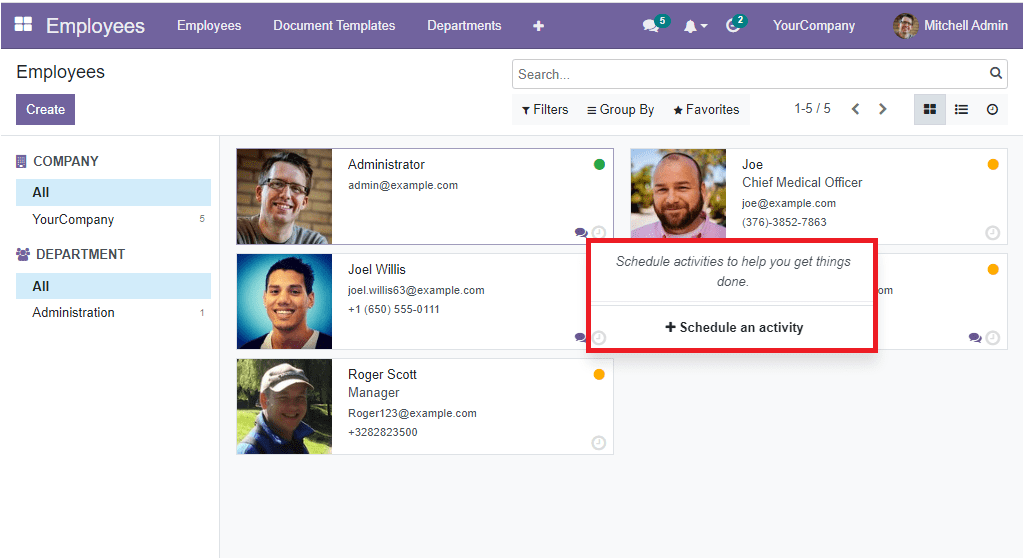
The moment you click on the +Schedule an activity button, you will navigate into the Schedule Activity window as shown below.
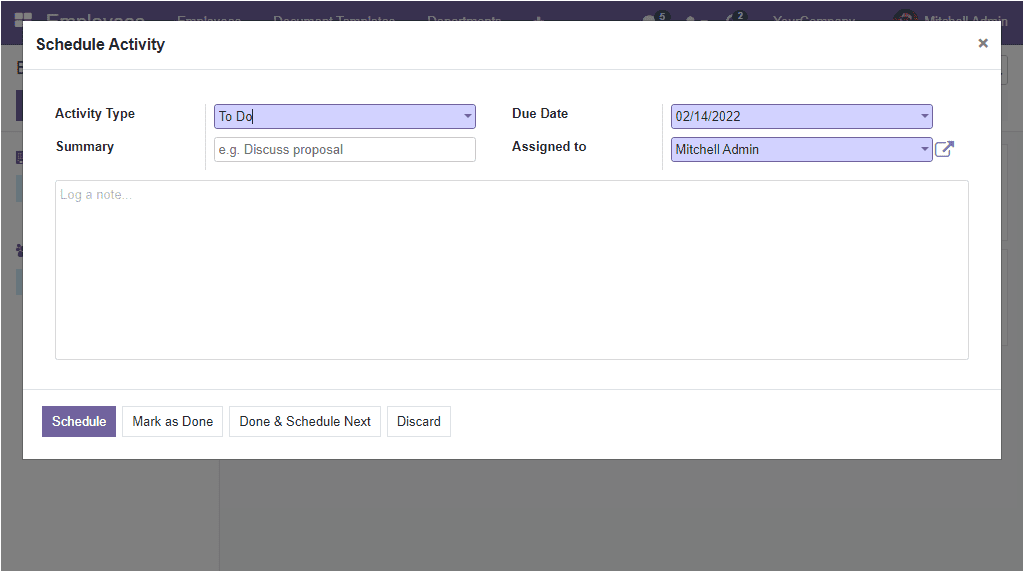
To schedule a new activity, you should define the Activity Type from the drop-down menu. The drop-down menu includes all the pre-configured activity types.

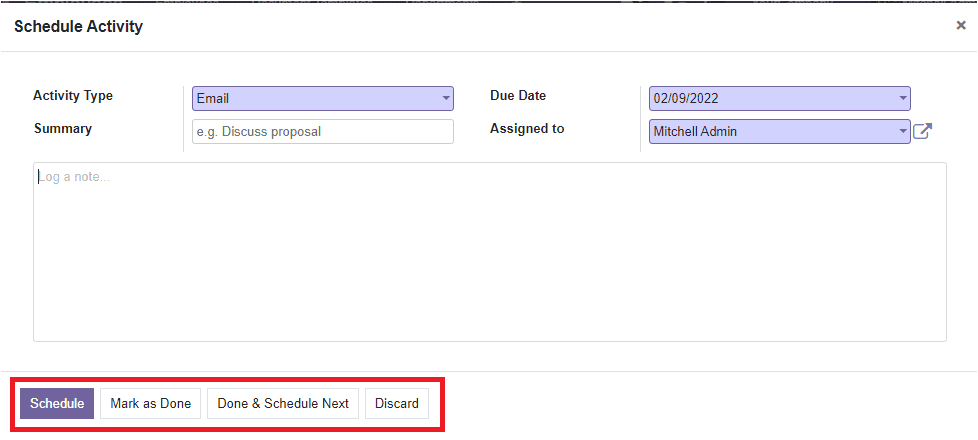
After defining the Activity Type, you can allocate the Summary and log a note in the allowed space. The Due Date and the Assigned person will be auto allocated in the specified area. Schedule, Mark as Done, Done & Schedule Next, and Discard buttons are available at the bottom of the window where you can select the suitable one.
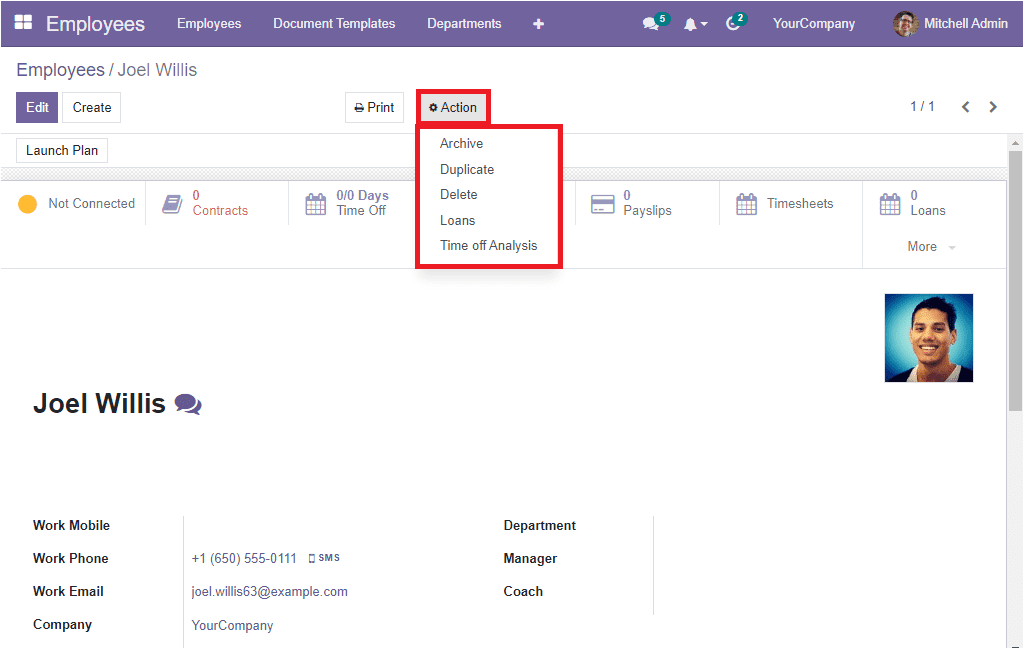
Back to the Employees window, to view the full details of the employee, you can press on the corresponding employee data. For example, if you want to view the details of the employee named Joel Wills, you can press on the preview of Joel Willis. Now the window will open up as shown below.

Here you can view every detail of Joel Willis. If you have any necessity to edit the details, you can do it by clicking on the Edit button, which can be accessed from the top left corner. In addition, you have the provision to take print of the corresponding employee badge and time off summary by clicking on the respective Print Badge, Time Off Summary menu available under the Print option.
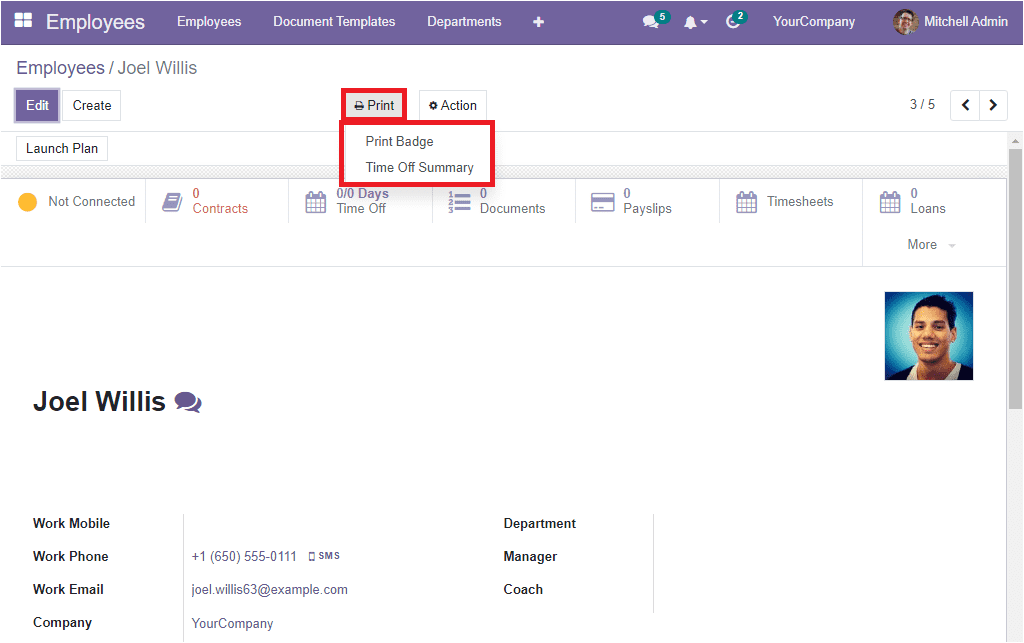
Additionally, you can perform various additional actions by clicking on the Actions button. The Action button includes Archive, Duplicate, Delete, Loan and Time Off Analysis options.
Let us have a look at the List view of the OpenHRMS Employee window.
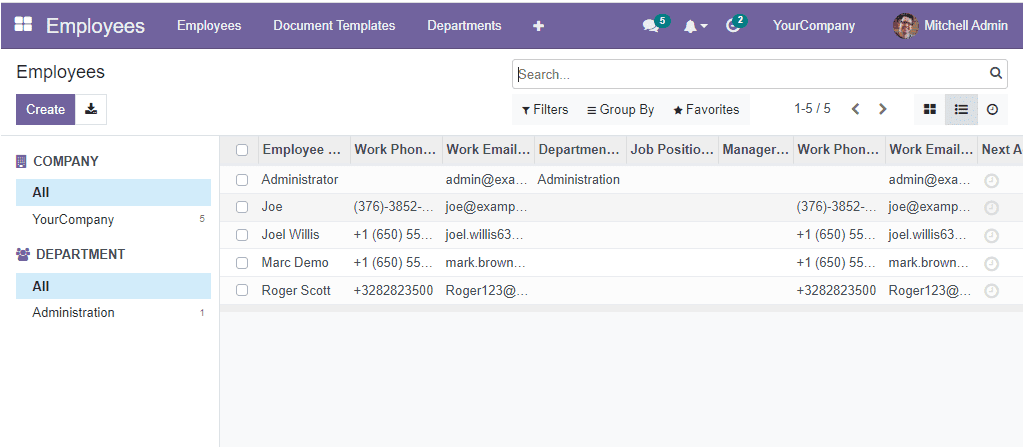
Here the employee records are listed along with the essential details such as Employee Name, Work Phone, Work email, Department, Job Position, Manager, Work phone, Work Email, and Next activity. The image of the window is depicted below.
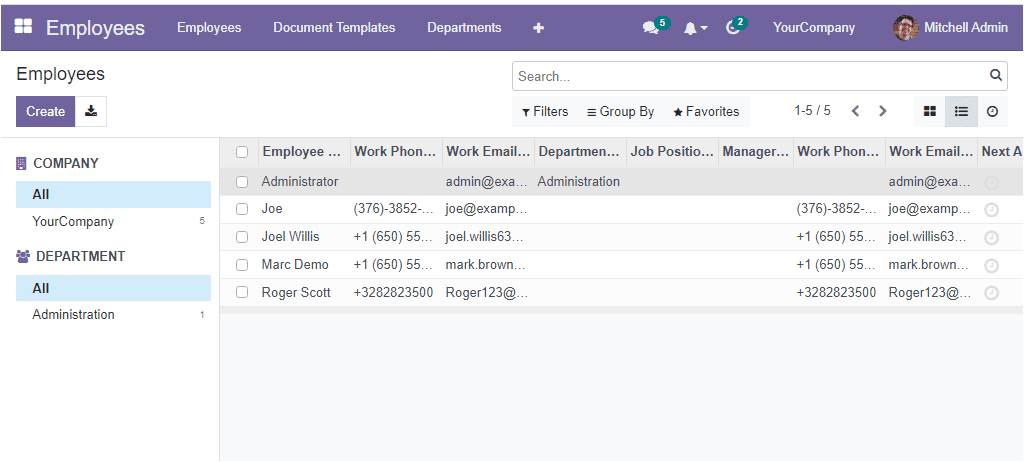
The Activity menu icon available on the top right corner (as highlighted in the image below) allows you to access the activity window.

Now we made a detailed analysis of the Employee window. Now let us discuss how to create a new employee in this system.
To create a new employee, you want to do first is click on the Createbutton situated in the top left corner of the Employees window. As soon as you click on this button, you will enter into a new window where you can see the creation form.

You can create and store your new employee details using this employee creation form. First, you can provide the Employee’s Name in the specified field. Then allocate a Job Position and upload the employee's photograph in the specified area. After filling in these details, you can define some tags to identify the employee quickly. Next, you can add the employee's contact details such as Work Mobile, Work Phone, and Work Email. Similarly, the employee's department, the manager responsible for the employee and the Coach can be defined in the fields Department, Manager and Coach respectively. Once you provide all the details mentioned above, you can click on the SAVE button to save the details.
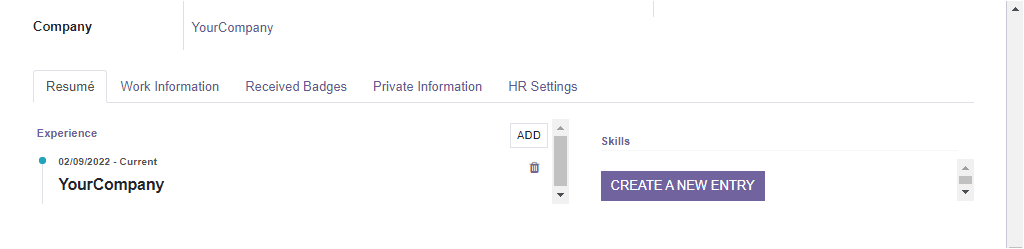
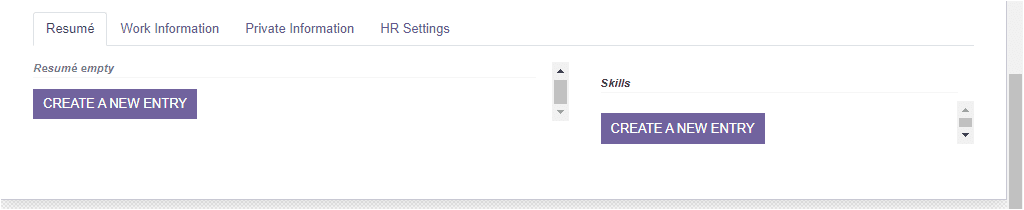
Apart from all these mentioned details, the window includes various tabs such as Resume, Work Information, Private Information and HR Settings. When you look at the Resumetab, you will see some experiences that the OpenHRMS System automatically generated based on the information we gave earlier. Please note that the details are only generated if you save the employee details that we have already given.
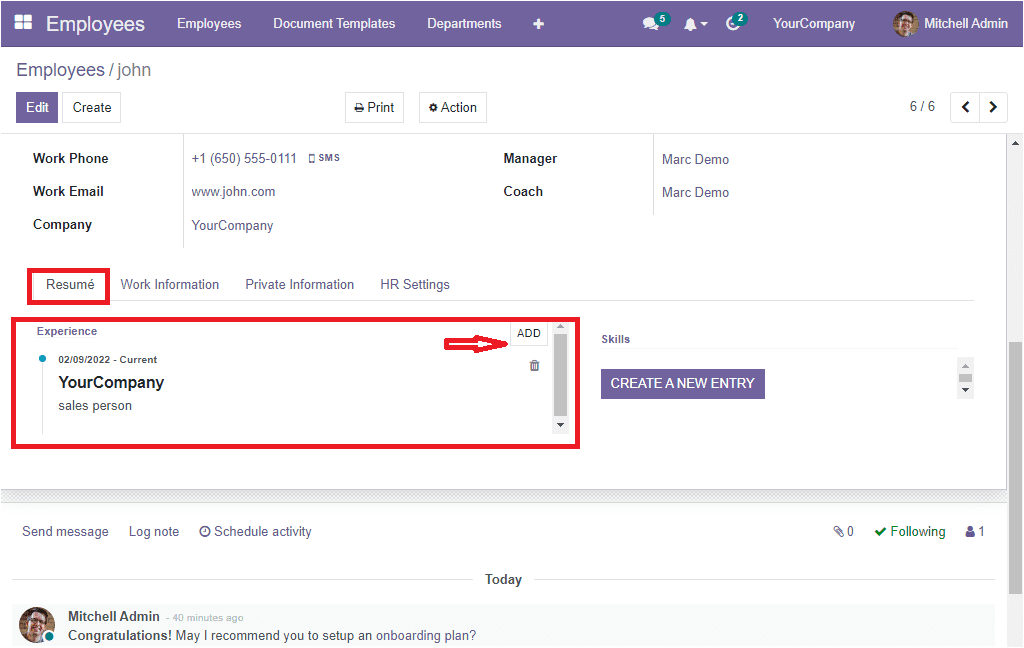
If you want to add more experiences, you should click on the Edit button available on the top left corner of the window and then click on the ADD button available under the Resume tab( highlighted in the above image with an arrow mark). The moment you press the Add button, the system will depict a pop-up window to create resume lines.
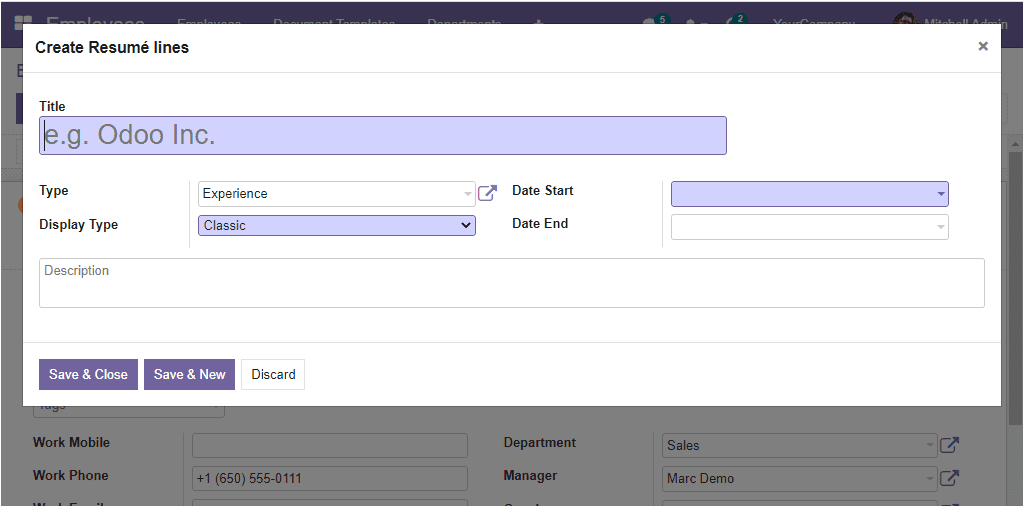
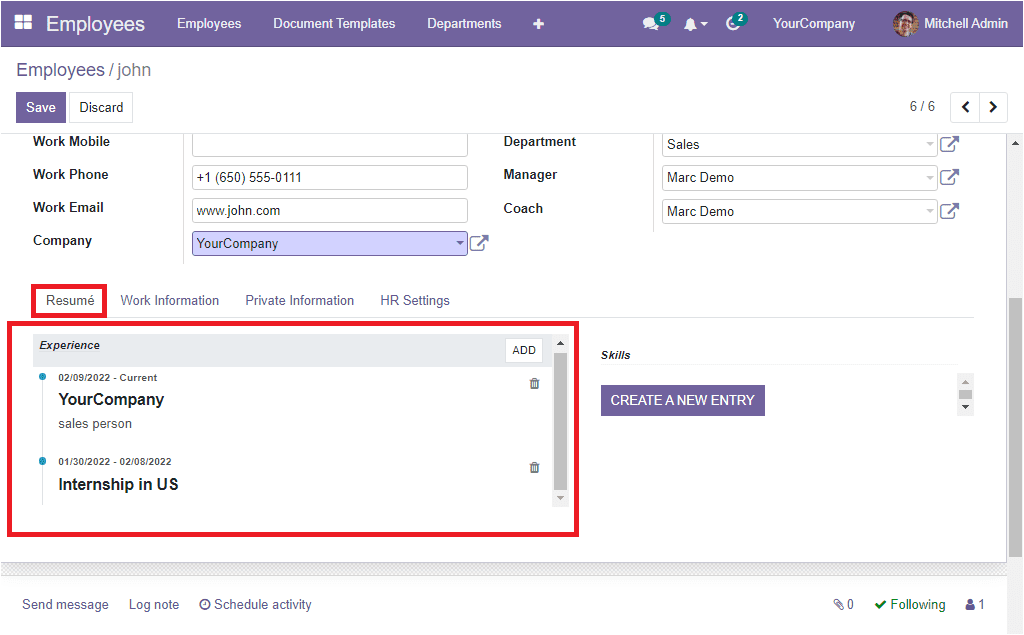
Here you can provide the resume title and specify the Resume type - whether it is Experience, Education or any other. Similarly, you can allocate the Display Type, Start Date and End date in the specified field. For example, if you want to include the details of your employees internship. In that case, you can mention the details of the internship in the title field, Experience as Type, and the time taken to complete the internship should be given in the Date start and Date End fields. You can also provide a small description of the resume line in the Description field. After providing all these details, save the details. Now we can see that the newly created Resume line is saved under the Resume tab as shown below.
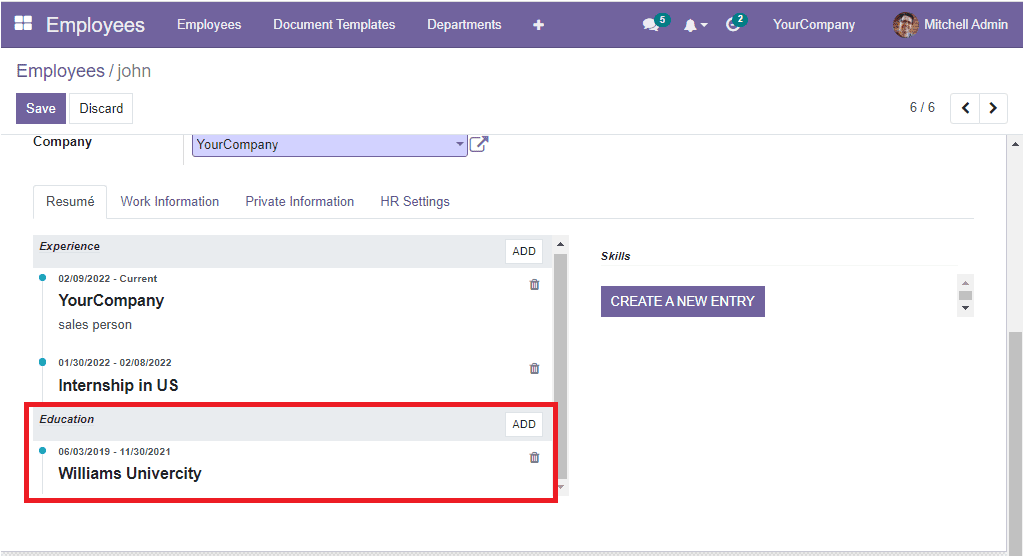
This is how we make new resume lines. In the same way, you can also add education qualifications to your employee resume. If you want to add education, click on the ADD button in the Create Resume line window, provide the educational qualification in the Title field, select education as Type, mention the start and end date and provide the other details. Please note that the OpenHRMS platform allows you to configure various resume types, and all the configured types will be listed here in the dropdown menu. The option for configuring Resume Type can be accessed under the Configuration tab of the module, which we can discuss later. If you have not previously defined the type, it is also possible to create it straight in the resume lines. Once you are done, click on the SAVE button. Now you will be able to view the Education Qualification of the respective employee under the Education section in the Resume tab.
In short, the system helps you to create various resume lines and helps you to categorize and organize the resumes very clearly with different sections.
Similarly, the Resume tab allows you to enter the details of your employee's skills systematically. You can click on the CREATE A NEW ENTRY button available under the Skills section to create a new entry.
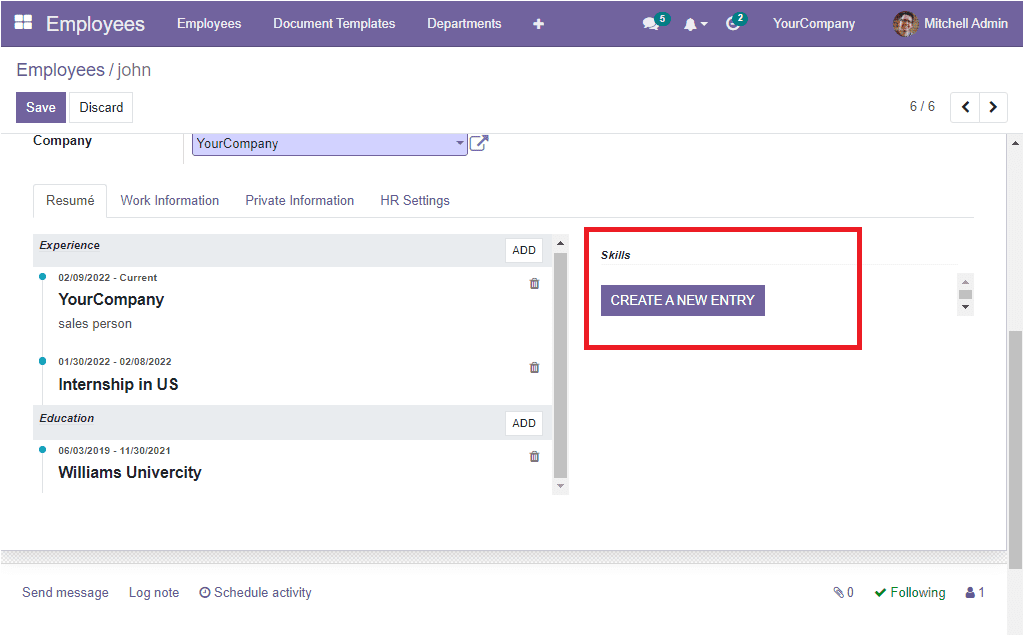
The moment you click on the CREATE A NEW ENTRY button, you will depict a pop-up window for creating skills.
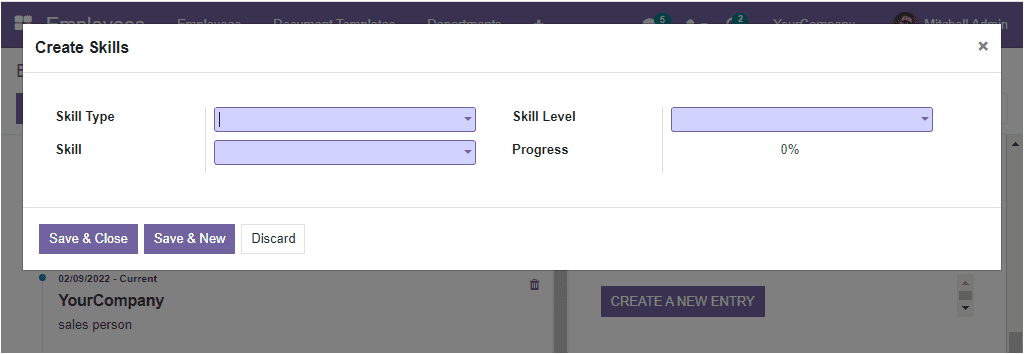
Using this window, you can add any type of skill that you want to configure. For example, suppose the employee has knowledge of different languages. In that case, you can mention the Language as Skill Type, and in the Skill field, you can define the languages that the employee knows. Specify the Skill Level and Progress in percentage in the respective field. These fields will be beneficial to determine how much you mastered this skill.
The system also allows you to predefine the skills using the option Skillsavailable under the Configuration tab of the Employees module. All the configured skills will be displayed in the dropdown menu. In addition, if you want to configure a new skill, it is also possible to create and edit the skills straightly by typing the skill in the provided space. After typing the skill, you can click on the External Link option, as highlighted in the image below.
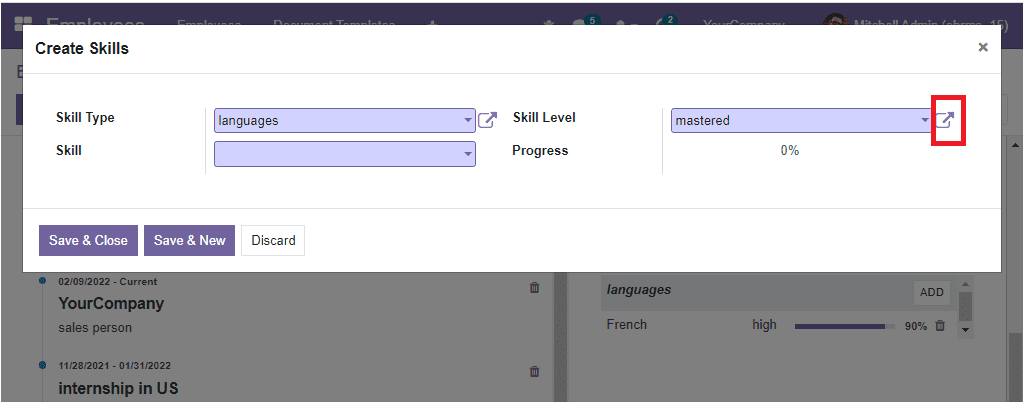
Now you will depict another pop up where you can create the skill level. So you can provide the name of the skill and the progress of the skill in the specified field.
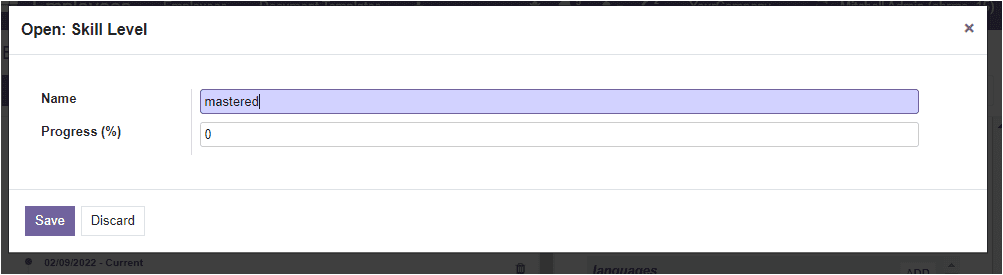
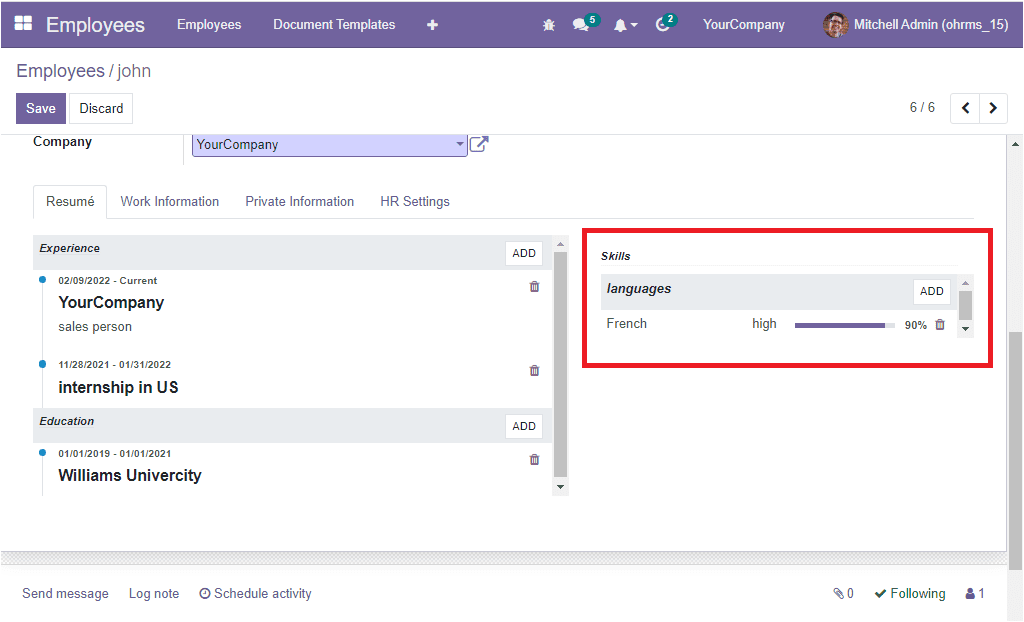
After giving the details, click on the Save button to save details. Now the newly created skill will be viewed in the Skill section. Using the same format, you can define various skills. The defined skill level can be edited by clicking on the respective record. This option is very convenient for you to change the skill level if the employee improves his skill level. For example, we defined the knowledge in the Turkish language as B1, and it is 50 per cent. If the employee improved and gained 90 per cent and C1 level, you can simply change the skill level.
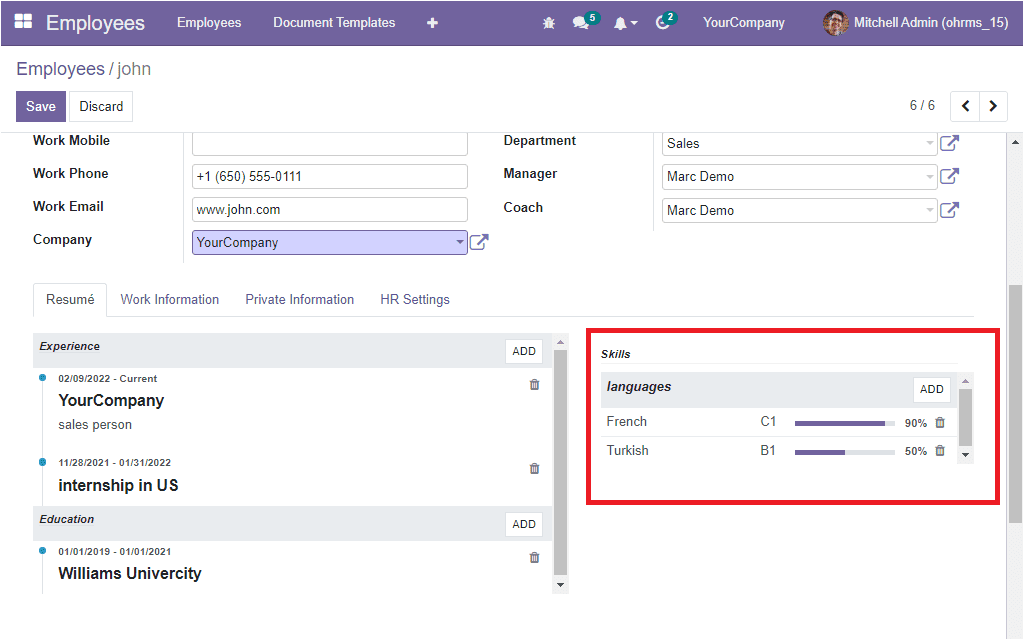
The dynamic OpenHRMS platform allows you to configure the Resume and skills of your employees with simple clicks. Also, the platform keeps all the records, and you can apply filters based on education, skills or others to easily access any data. If you want to sort out the employees who can speak French, you can search it in the Employee window. The system will display all the employees who are able to speak french.
Now let us move on to the Work Informationtab. The Work information tab includes the work-related information of that particular employee. In the Location section, you can view the WORK Address that the system automatically generates based on the company information you gave earlier in this employee creation form. The work location associated with the employee can be mentioned in the Work Location field using the dropdown menu. The work locations can also be configured under the configuration tab. All the pre-configured work locations will be listed in the drop-down menu.
In the Approvers section, you can choose the user responsible for approving the time off of this employee and in the Expense field, you can select the user responsible for approving expenses of this employee.
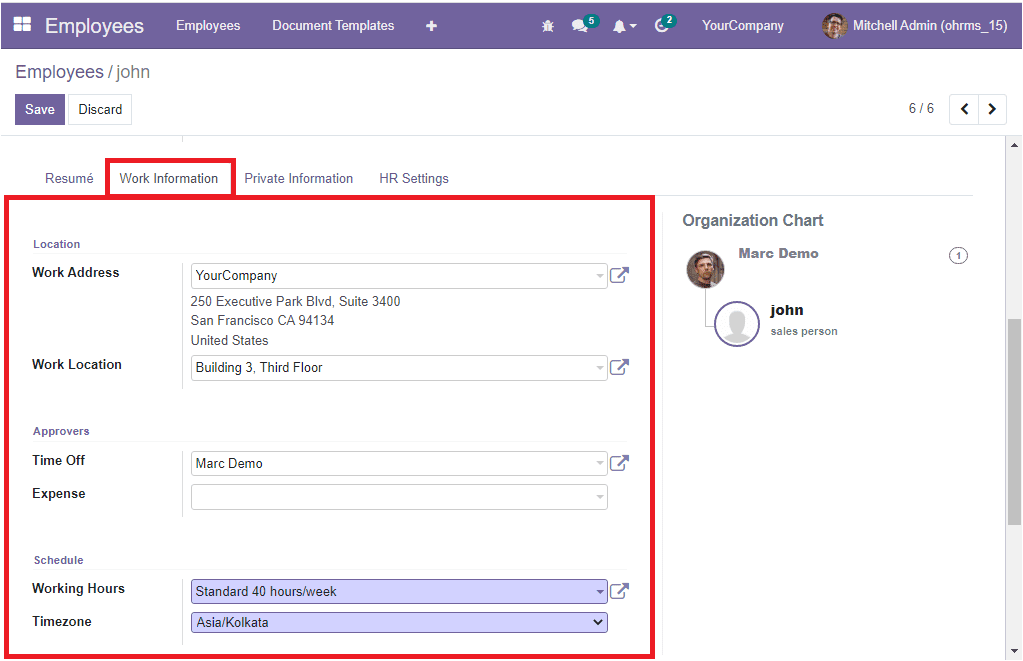
Also, in the Schedule field, you can determine this employee's Working Hours and Time Zone. On the right portion of the Work Information tab, you can view an organization chart of this particular employee as highlighted in the image given.
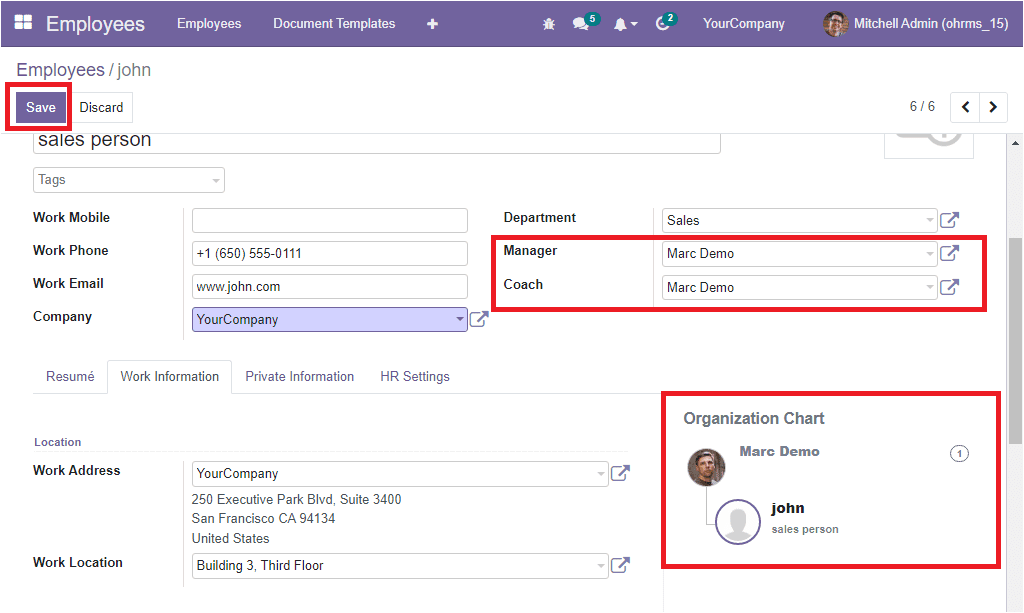
The hierarchy will only be visible once you specify the manager or coach and save the details. This feature will be very useful for the HR department to know which manager is associated with the employee, especially when it comes in the case of large companies.
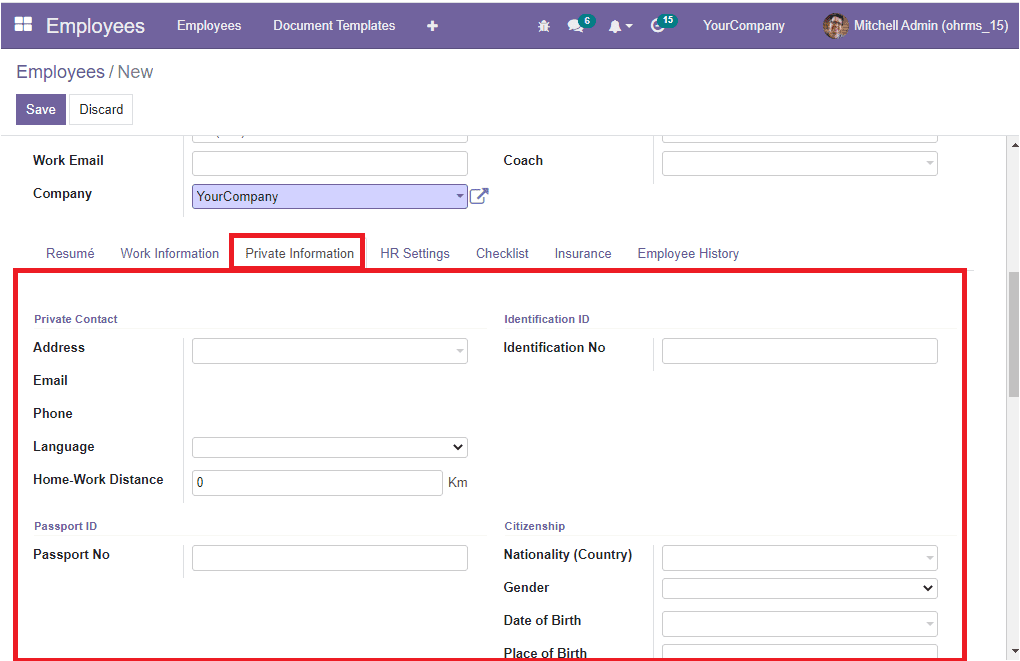
Next, we can look over the Private Informationtab, this tab allows you to keep the private information of the employee such as private contact information, emergency contact information and more details.
In the Private Contact section, you can allocate the private contact address of the employee in the Address field. Also, you can mention the Email address, phone Number, Home- Work Distance in kilometres, and the preferred Language. By selecting the language, all the emails, messages and documents sent to this contact will be translated into this defined language. In addition, you can mention the Passport Number in the specified space. It is also possible to add the Identification Number in the given field. 9 the passport number and identification number options are only visible if you are installed the OpenHRMS Employee Info module).
The citizenship details such as Nationality(country), Gender, Date of birth, Place of birth, and Country of birth can be defined in the corresponding fields. Similarly, in the Marital Status field, you can fill in the employee's marital status, and the number of children can be specified in the Dependent field. Additionally, the Emergency Contact address and the Emergency Phone Number can be given in the respective fields.
The details regarding Visa No, Work Permit No, Visa Expire Date, and Work Permit Expiration Date can be mentioned in the Work Permit section. Furthermore, you are able to upload the work permit of your employee by clicking on the Upload your file option.
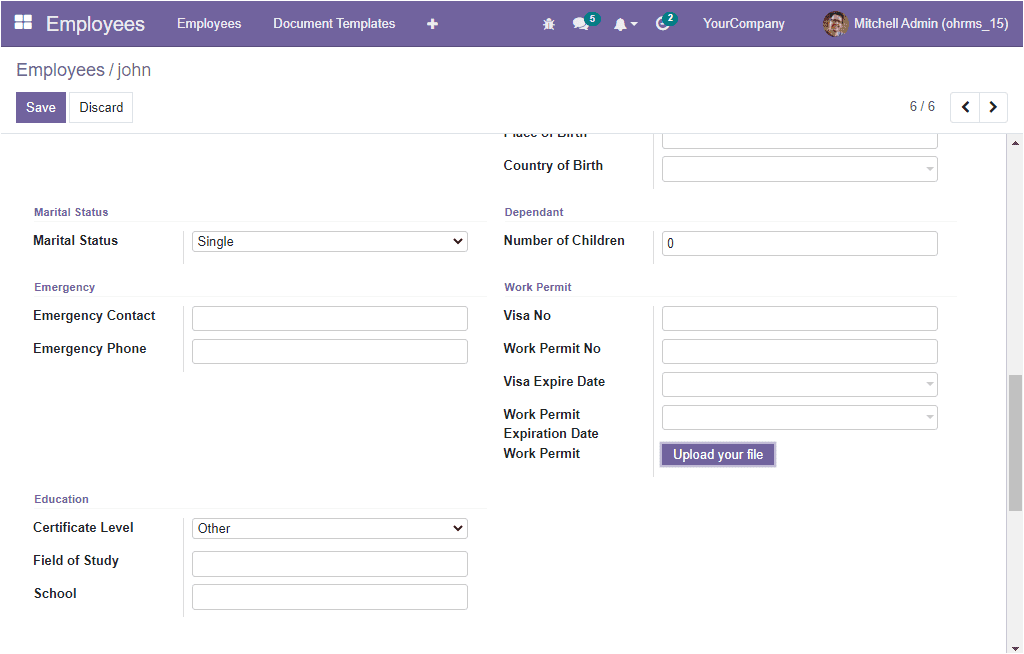
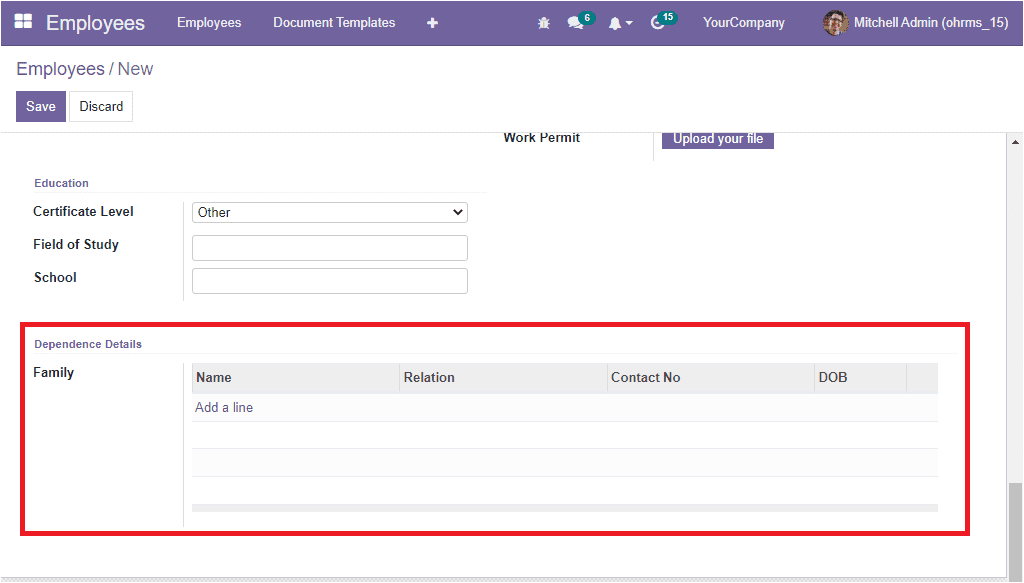
The Education session allows you to define the Certificate Level, Field of Study, School and all the academic achievements of that particular employee. Finally, the Dependence Details can be specified under the Family session of the employee creation window. You can perform it by clicking on the Add a line button available in the session as highlighted in the image below. This option also will be available once you install the OpenHRMS Employee Info module.
The Employee creation window of the OpenHRMS Employees module also provides you with the provision to configure HR-related information under the HR Settingstab. In the Status session of the HR Settings tab, you can specify the Employee Type using the dropdown menu. The primary purpose of this field is to categorize employees. Also, this field has a significant impact on the contract history. The related user name for the employee to manage its access can be defined in the Related user field. The Joining Date (employee joining date computed from the contract start date) can also be included under the Status session. Similarly, in the Payroll field, the Current Contract of the employee and the Job Position can be specified.
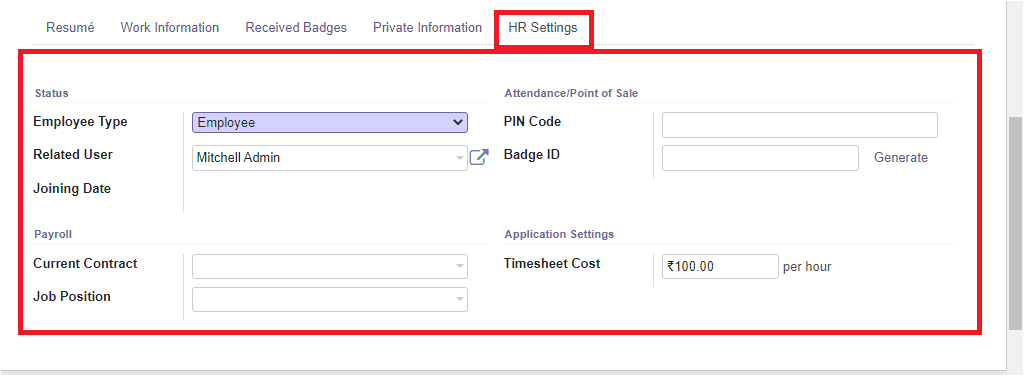
The Attendance/Point of Sale details of this particular employee such as Pin Code and Badge ID can be defined under the respective tab. The pin code is the Pincode required for check-in or check out in the Kiosk Mode of the Attendance application and the Pincode necessary to change the cashier in the Point of Sale application. Also, the system enables you to generate a badge ID that can be used for employee identification. For generating Badge ID, you can click on the Generate menu available in the Badge ID field. The system automatically generates a badge id code as shown in the image below.

If you want to take the printout of the Badge, you can click on the Print Badge option. Then you will get a print of the badge id as shown in the image below.
Moreover, the Timesheet Cost per hour can be defined under the applications Settings session of the HR Settings tab.
After filling all the fields in the new employee creation form, click on the Save button to save the new employee profile in your system as shown in the image below.
If you select any of the employee profiles from the Employees dashboard window, you will depict a detailed view of the employee profile.
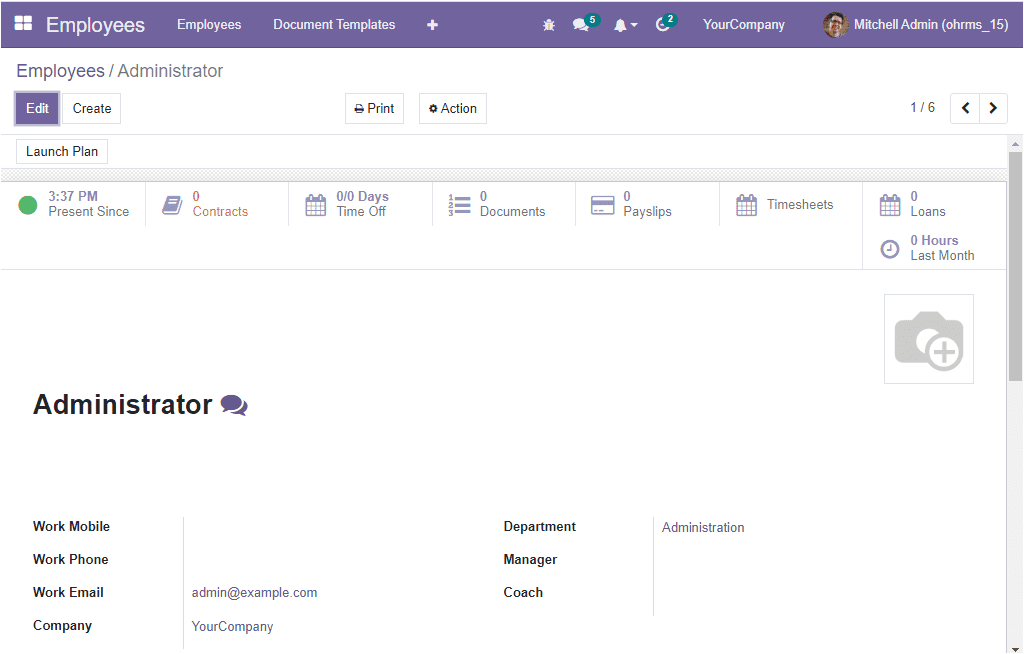
On the top of the employee profile, you will be able to view various smart tabs based on the module you installed, as highlighted in the image below.
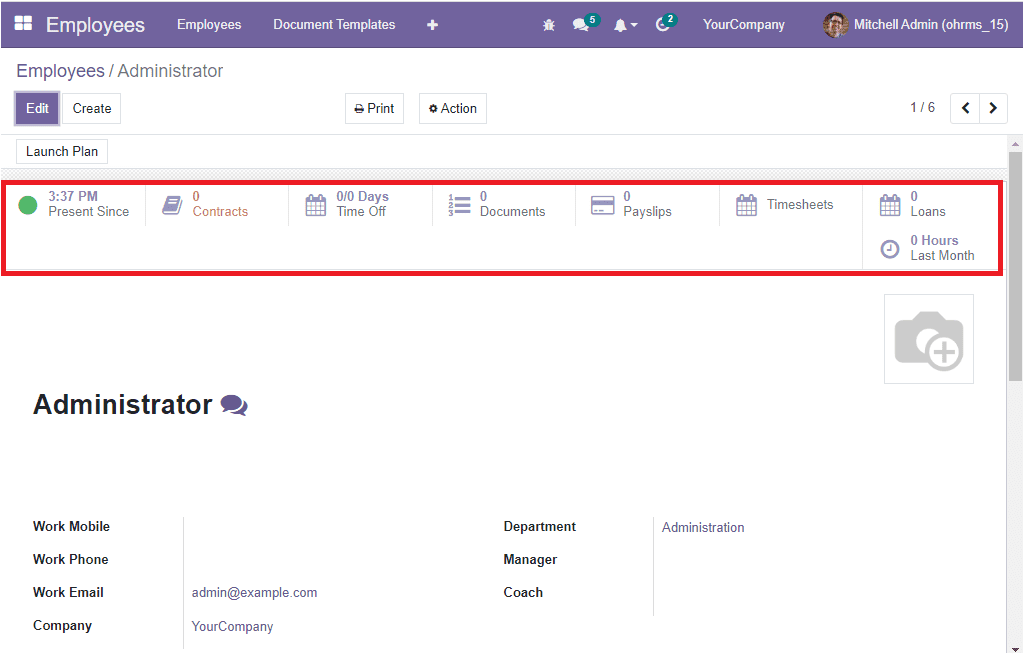
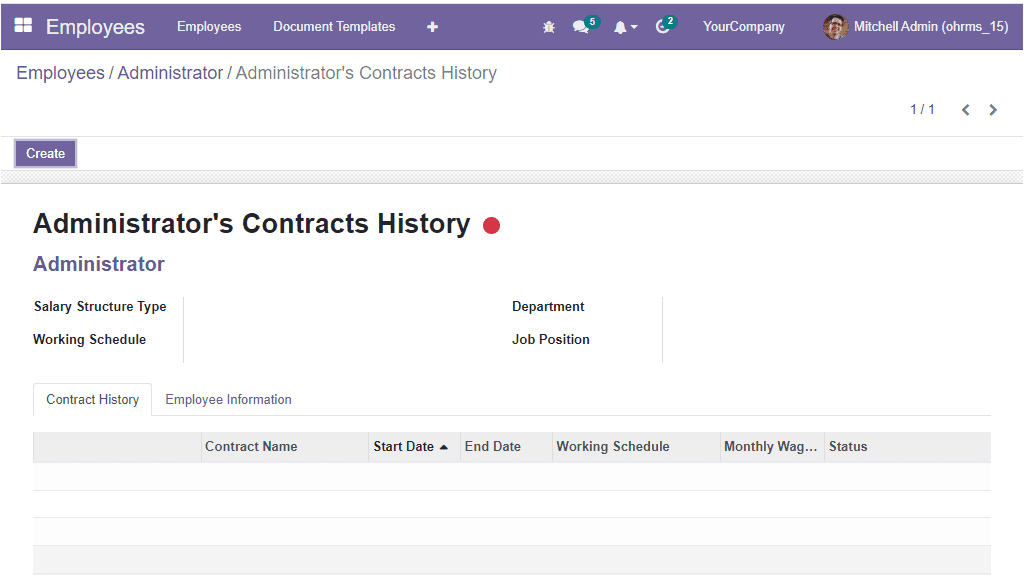
The different smart tabs included in the window are Contracts, Time Off, Documents, Payslips, Timesheets, Loans, etc. The Contract button will display the number of contracts configured with this employee. You can click on the button to access the Administrator’s Contract History window.
In the same way, you can view the time off of the employee by clicking on the respective button. Also can view other windows.