The Time Off Allocation feature will enable the users to obtain special consent in the situations where the employee needful to take additional leaves than the company approved leaves. When we come to an example, if an employee has one monthly approved leave and the employee is required to take three additional leaves in that month, the employee can request leave allocation.
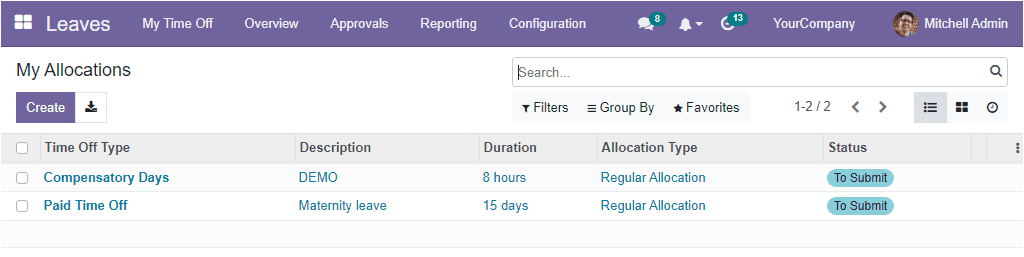
The OpenHRMS Leaves module is furnished with the My Allocation menu, and you can access the menu under the My Time Off tab. With the help of this feature, the employee can request allocations to the time off officers, and the time off officers allocate time off days to their employees.
When you click on the My Allocations menu available under the My Allocations tab, you will be able to create allocation requests and also, you can view all the allocation requests that you have already done. Each of the allocation records displays the Time Off Type, Description, Duration, Allocation Type, and Status.
You can press on the respective record if you want to get the full details of the created allocations. Now the system will open the description in detail. The Create button straightly takes you to the creation window.
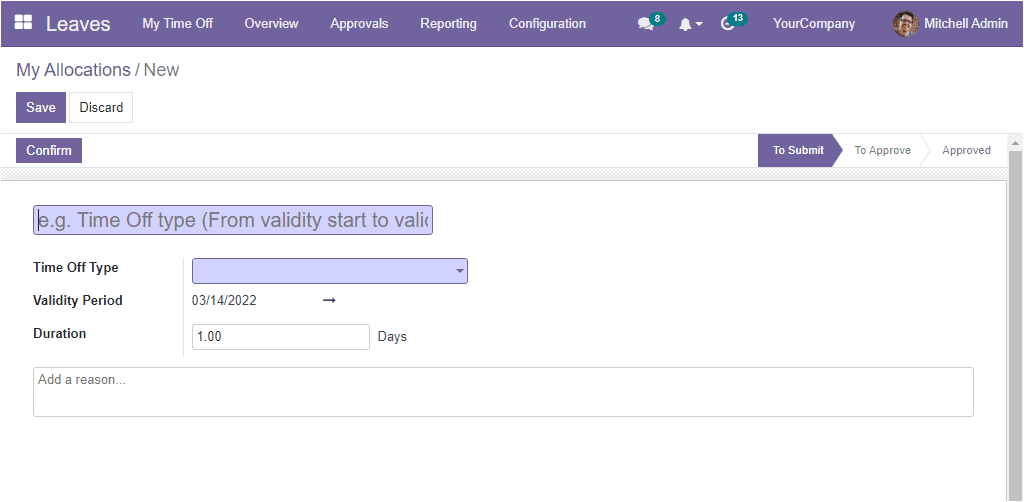
Using this window, you can simply create your request for a new allocation. In the creation form, provide a title for your allocation request. After that, you can mention the Time Off Type. Further, the Validity Period and Duration can be submitted in the provided space. Moreover, the system gives you the freedom for including a reason for the allocation request in the given box. Once you provide all the details, you can save them by clicking on the Save button.
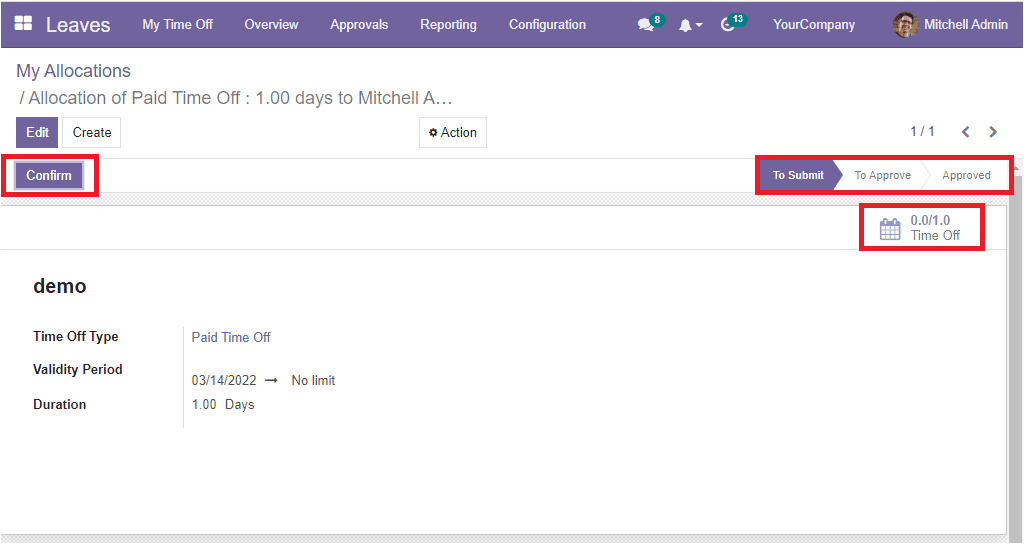
As highlighted in the above window, you can view the different stages named To Submit, To Approve, and Approved on the top right side. In addition, the higher or responsible person for approving this allocation can view the Approve and Refuse buttons. You can click on the Confirm button available on the top left side of the window to confirm the allocation request.
To Submit: if the Allocation request is created and not confirmed, the request is in the To Submit state.
To Approve: the status will show as ‘To Approve’ when the user confirms the allocation request.
Refused: when the manager refuses an allocation request
Approved: when the manager approves an allocation request.